Import a Helm Repository
KubeSphere builds app repositories that allow users to use Kubernetes applications based on Helm charts. App repositories are powered by OpenPitrix, an open source platform for cross-cloud application management sponsored by QingCloud. In an app repository, every application serves as a base package library. To deploy and manage an app from an app repository, you need to create the repository in advance.
To create a repository, you use an HTTP/HTTPS server or object storage solutions to store packages. More specifically, an app repository relies on external storage independent of OpenPitrix, such as MinIO object storage, QingStor object storage, and AWS object storage. These object storage services are used to store configuration packages and index files created by developers. After a repository is registered, the configuration packages are automatically indexed as deployable applications.
This tutorial demonstrates how to add an app repository to KubeSphere.
Prerequisites
- You need to enable the KubeSphere App Store (OpenPitrix).
- You need to have an app repository. Refer to the official documentation of Helm to create repositories or upload your own apps to the public repository of KubeSphere. Alternatively, use the example repository in the steps below, which is only for demonstration purposes.
- You need to create a workspace and a user account (
ws-admin). The account must be granted the role ofworkspace-adminin the workspace. For more information, refer to Create Workspaces, Projects, Accounts and Roles.
Add an App Repository
-
Log in to the web console of KubeSphere as
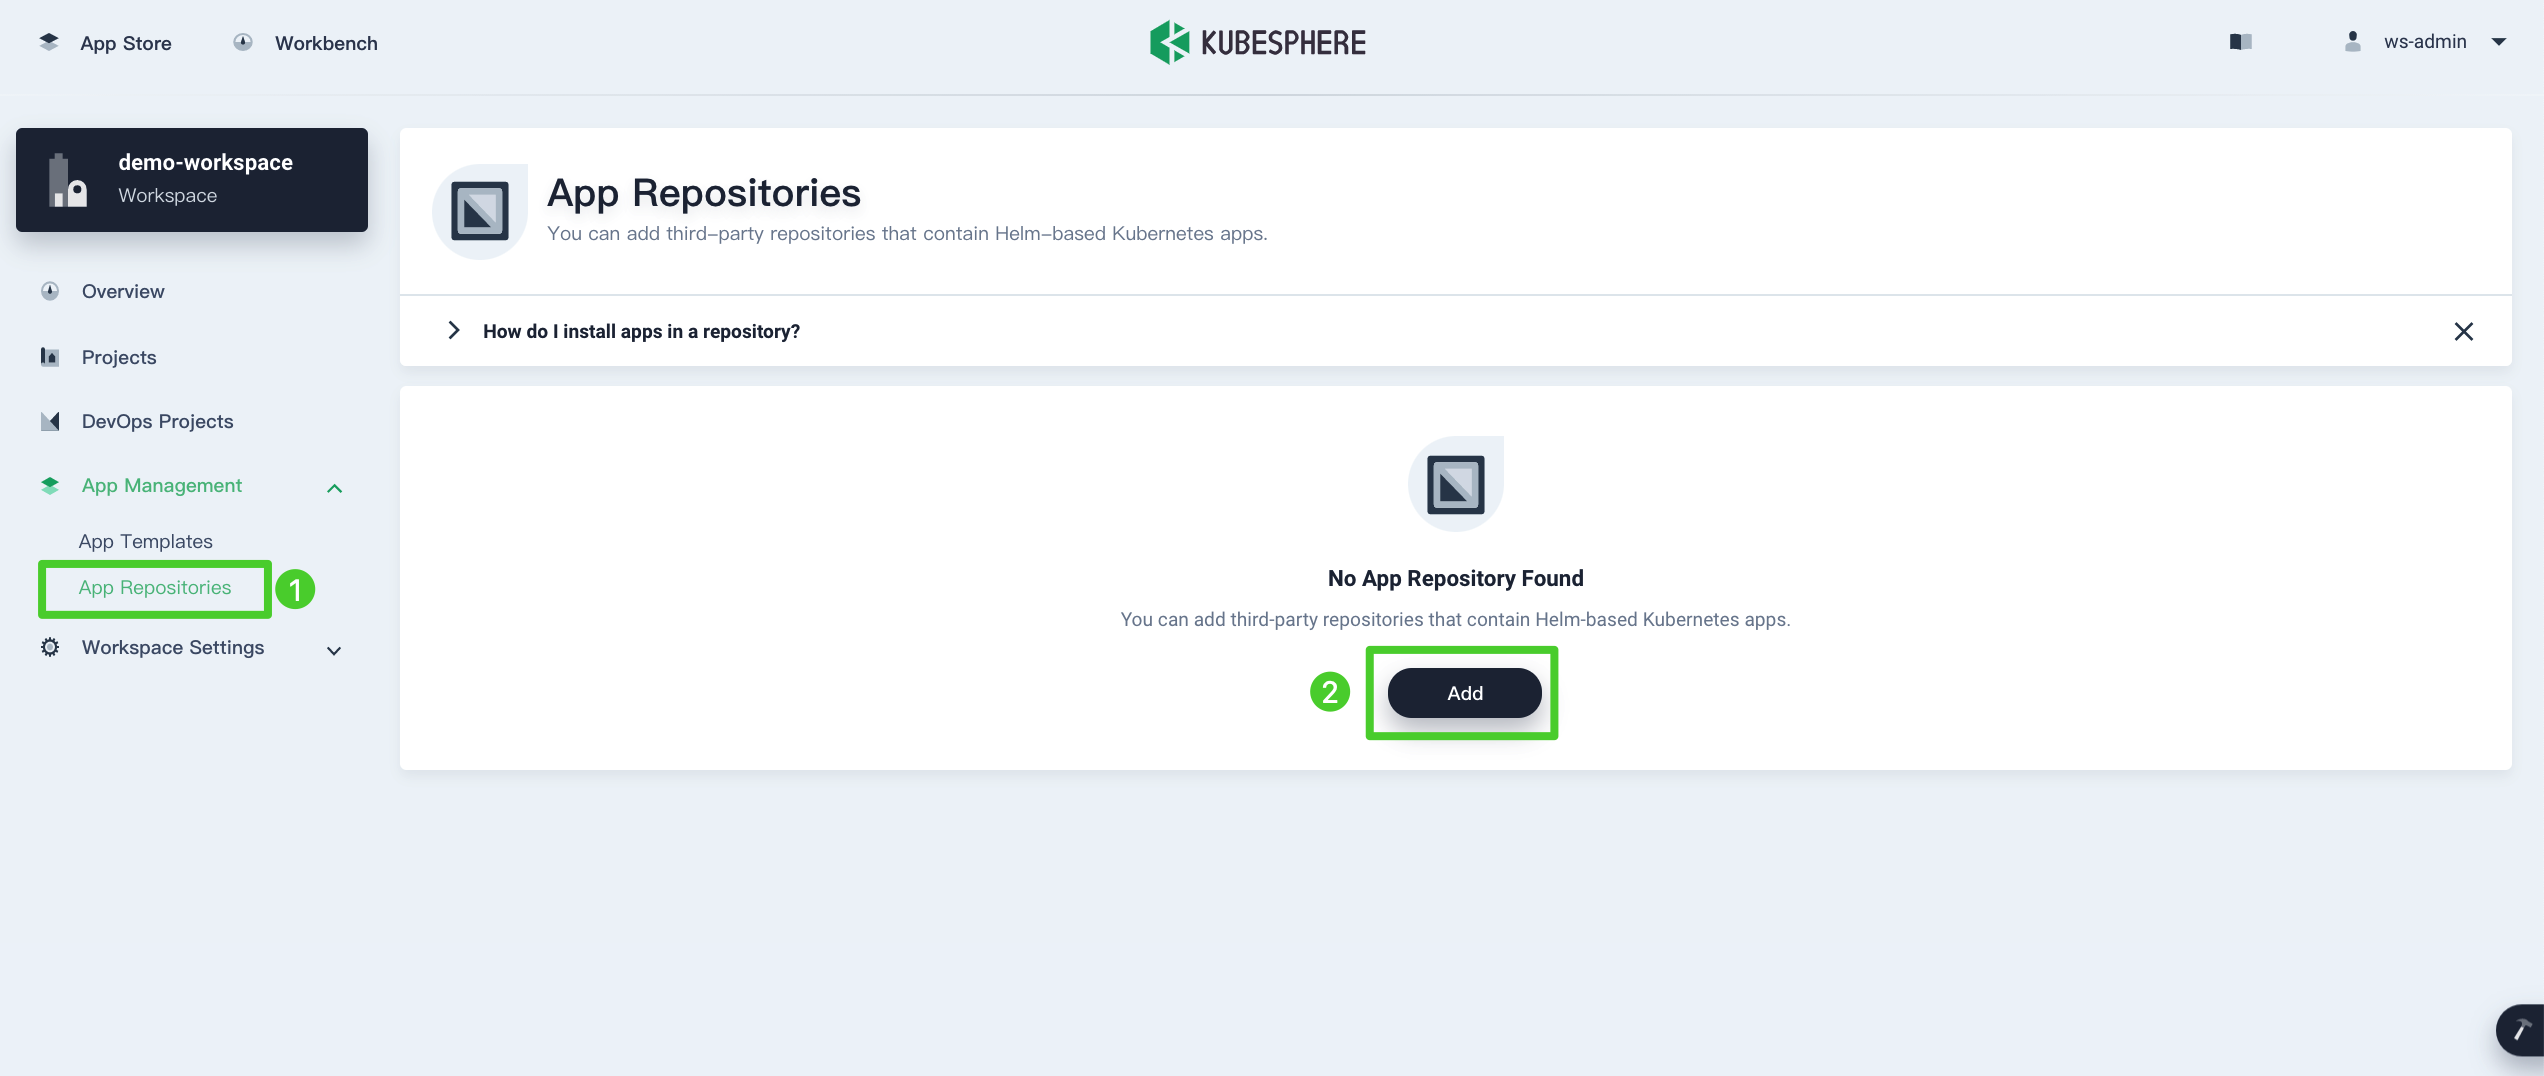
ws-admin. In your workspace, go to App Repositories under App Management, and then click Add.
-
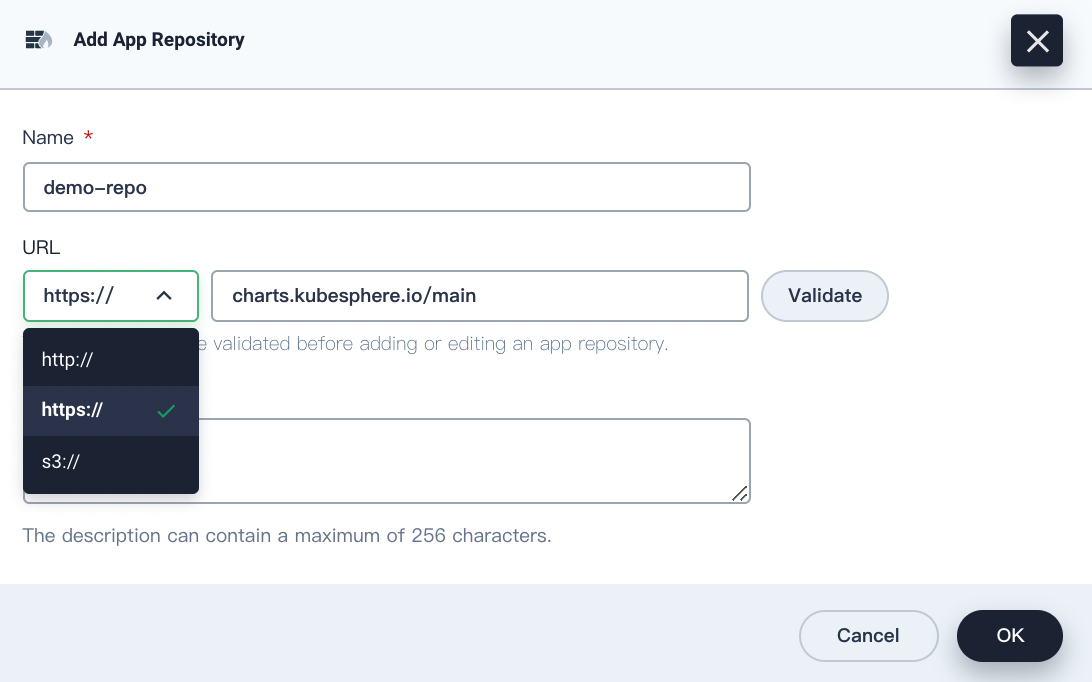
In the dialog that appears, specify an app repository name and add your repository URL. For example, enter
https://charts.kubesphere.io/main.
-
Name: Set a simple and clear name for the repository, which is easy for users to identify.
-
URL: Follow the RFC 3986 specification with the following three protocols supported:
- S3: The URL is S3-styled, such as
s3.<region>.amazonaws.comfor the access to Amazon S3 services using the S3 interface. If you select this type, you need to provide the access key and secret. - HTTP: For example,
http://docs-repo.gd2.qingstor.com. The example contains a sample app NGINX, which will be imported automatically after the repository is created. You can deploy it from app templates. - HTTPS: For example,
https://docs-repo.gd2.qingstor.com.Note
If you want to use basic access authentication in HTTP/HTTPS, you can use a URL with a style like this:http://username:password@docs-repo.gd2.qingstor.com.
- S3: The URL is S3-styled, such as
-
Description: Give a brief introduction of main features of the app repository.
-
-
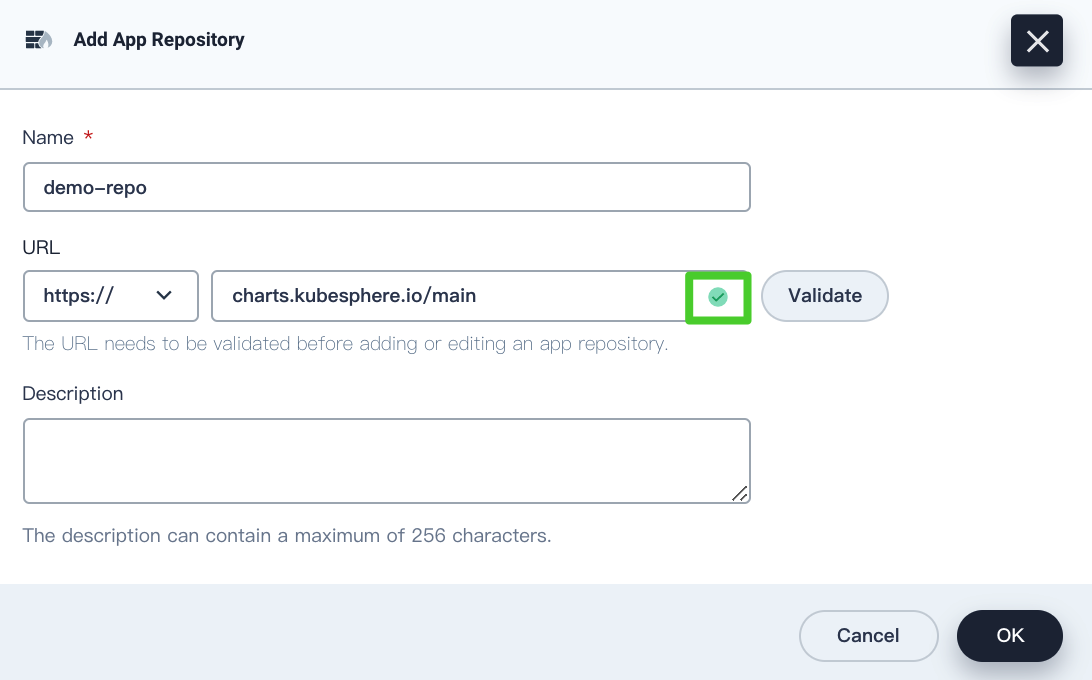
After you specify required fields, click Validate to verify the URL. You will see a green check mark next to the URL if it is available and click OK to finish.

Note
-
In an on-premises private cloud environment, you can build your own repository based on ChartMuseum. Then, you develop and upload applications to the repository and deploy them on KubeSphere for your own needs.
-
If you need to set up HTTP basic access authentication, you can refer to this document.
-
-
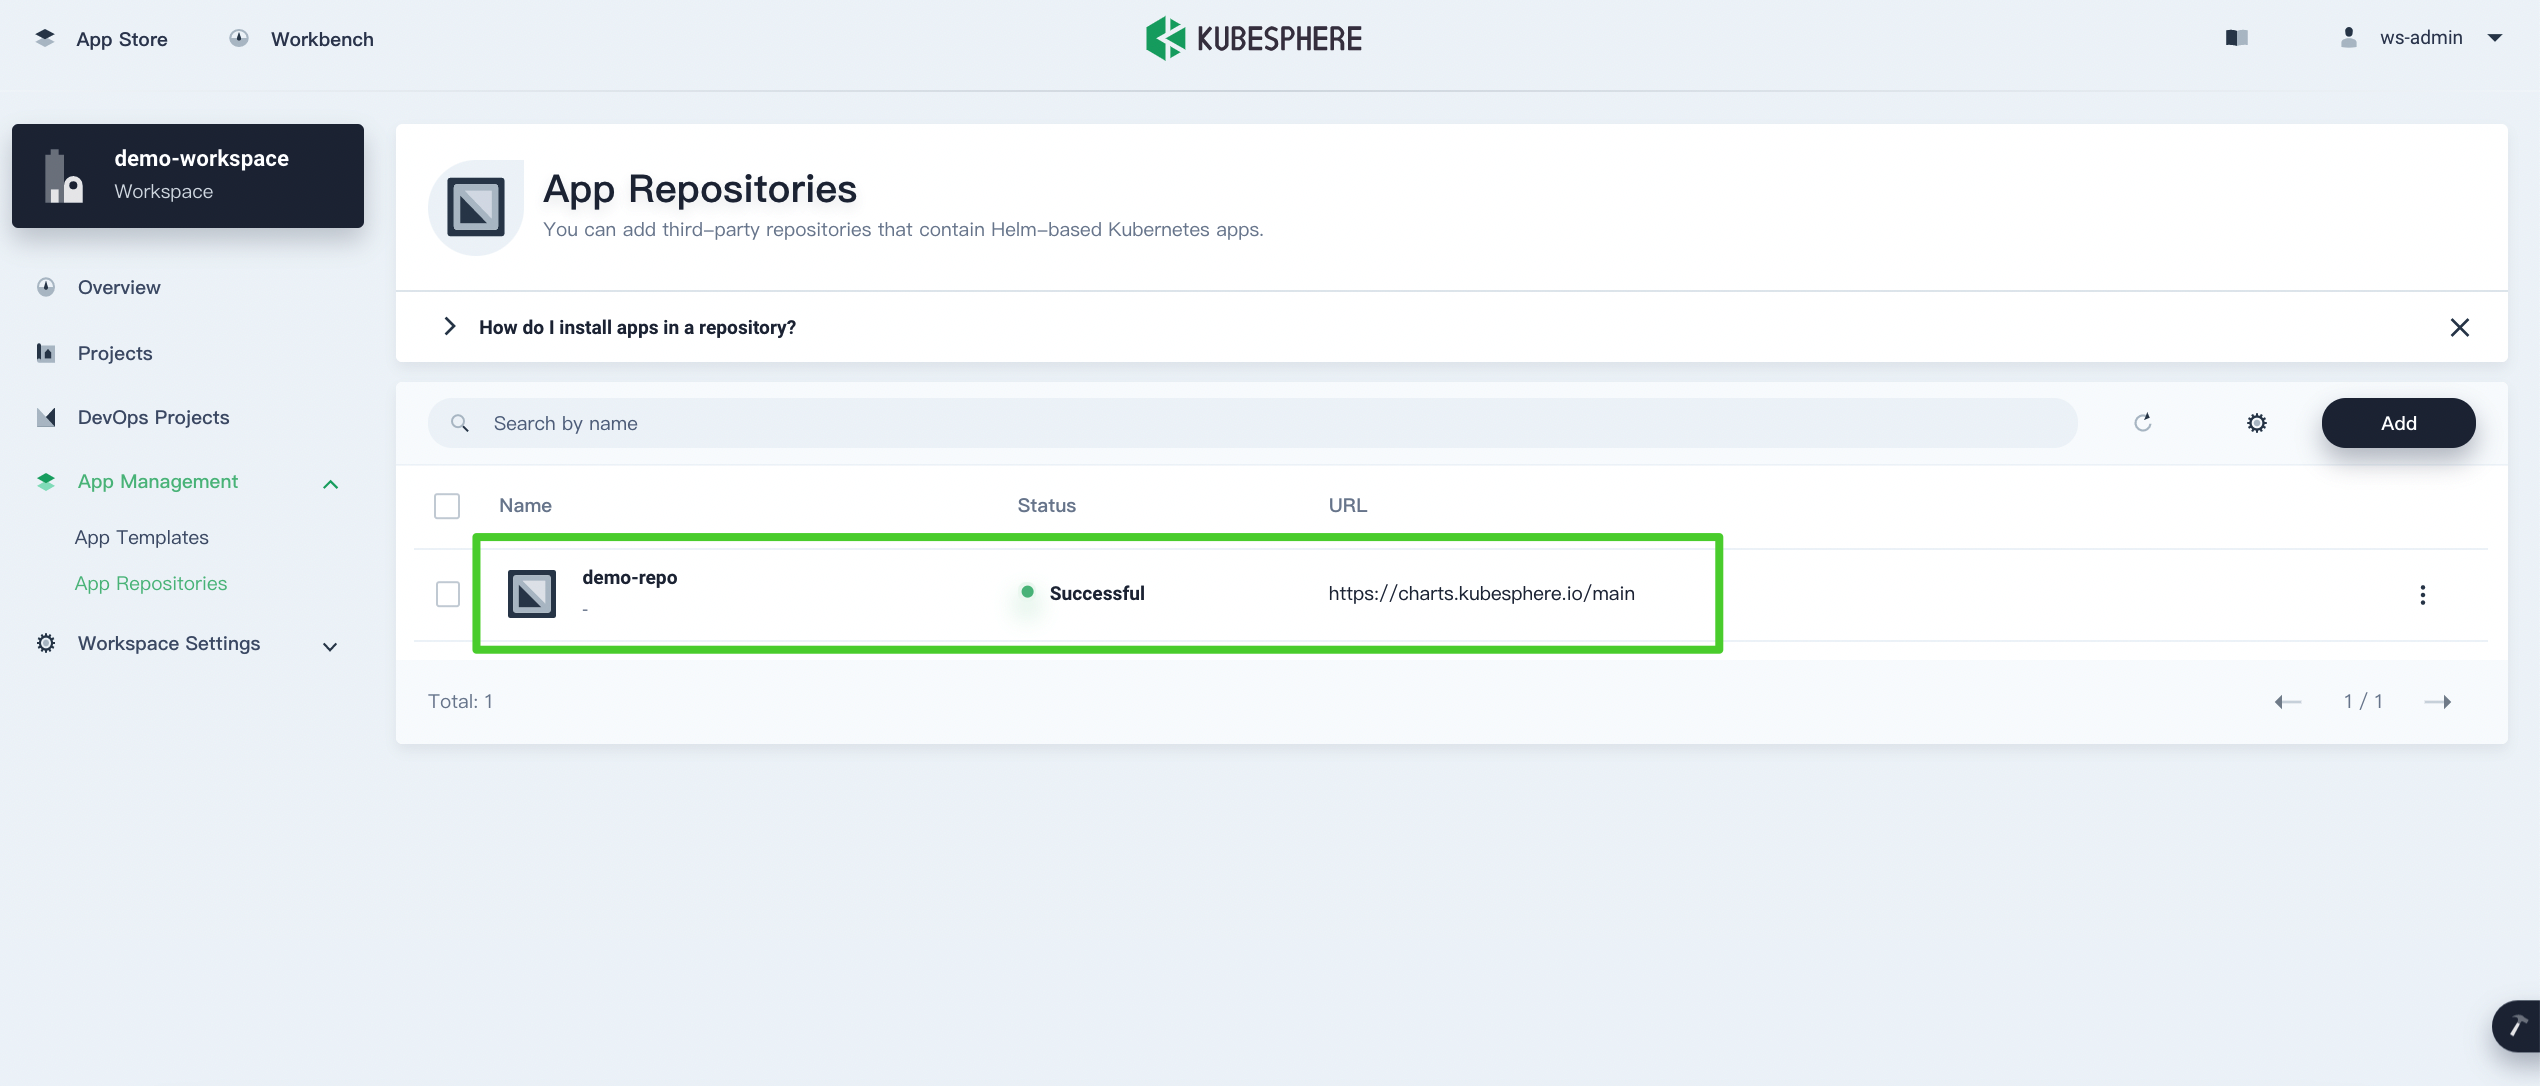
The repository appears in the repository list below after imported and KubeSphere automatically adds all apps in the repository as app templates. When users choose to deploy apps using app templates, they can see apps in this repository. For more information, see Deploy Apps from App Templates.

Feedback
Was this page Helpful?


 Previous
