


Create a Jenkins Pipeline Using a Jenkinsfile
A Jenkinsfile is a text file that contains the definition of a Jenkins pipeline and is checked into source control. As it stores the entire workflow as code, it underpins the code review and iteration process of a pipeline. For more information, see the official documentation of Jenkins.
This tutorial demonstrates how to create a pipeline based on a Jenkinsfile from a GitHub repository. Using the Jenkins pipeline, you deploy an example application to a development environment and a production environment respectively, which is accessible externally.
Note
Two types of pipelines can be created in KubeSphere: Pipelines created based on a Jenkinsfile in SCM, which is introduced in this tutorial, and pipelines created through the graphical editing panel. The Jenkinsfile in SCM requires an internal Jenkinsfile in Source Control Management (SCM). In other words, the Jenkfinsfile serves as part of SCM. The KubeSphere DevOps system automatically builds a CI/CD Jenkins pipeline based on the existing Jenkinsfile of the code repository. You can define workflows such as
stage and step.Prerequisites
- You need to have a Docker Hub account and a GitHub account.
- You need to enable the KubeSphere DevOps system.
- You need to create a workspace, a DevOps project, and an account (
project-regular). This account needs to be invited to the DevOps project with theoperatorrole. See Create Workspaces, Projects, Accounts and Roles if they are not ready. - You need to set a CI dedicated node for running pipelines. Refer to Set a CI Node for Dependency Caching.
- You need to install and configure SonarQube. Refer to Integrate SonarQube into Pipeline. If you skip this part, there is no SonarQube Analysis below.
Jenkins Pipeline Overview
There are eight stages as shown below in this example pipeline.

Note
- Stage 1. Checkout SCM: Check out source code from the GitHub repository.
- Stage 2. Unit test: It will not proceed with the next stage unit the test is passed.
- Stage 3. SonarQube analysis: The SonarQube code quality analysis.
- Stage 4. Build & push snapshot image: Build the image based on selected branches in Behavioral strategy. Push the tag of
SNAPSHOT-$BRANCH_NAME-$BUILD_NUMBERto Docker Hub, the$BUILD_NUMBERof which is the operation serial number in the pipeline’s activity list. - Stage 5. Push the latest image: Tag the sonarqube branch as
latestand push it to Docker Hub. - Stage 6. Deploy to dev: Deploy the sonarqube branch to the development environment. Review is required for this stage.
- Stage 7. Push with tag: Generate the tag and release it to GitHub. The tag is pushed to Docker Hub.
- Stage 8. Deploy to production: Deploy the released tag to the production environment.
Hands-on Lab
Step 1: Create credentials
-
Log in to the KubeSphere console as
project-regular. Go to your DevOps project and create the following credentials in Credentials under Project Management. For more information about how to create credentials, see Credential Management.Note
If there are any special characters such as@and$in your account or password, they can cause errors as a pipeline runs because they may not be recognized. In this case, you need to encode your account or password on some third-party websites first, such as urlencoder. After that, copy and paste the output for your credential information.Credential ID Type Where to use dockerhub-id Account Credentials Docker Hub github-id Account Credentials GitHub demo-kubeconfig kubeconfig Kubernetes -
You need to create an additional credential ID (
sonar-token) for SonarQube, which is used in stage 3 (SonarQube analysis) mentioned above. Refer to Create SonarQube Token for New Project to use the token for the secret field below. Click OK to finish.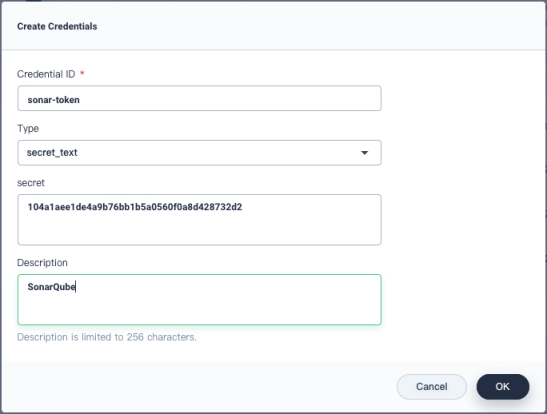
-
You also need to create a GitHub personal access token with the permission as shown in the below image, and then use the generated token to create Account Credentials (for example,
github-token) for GitHub authentication in your DevOps project.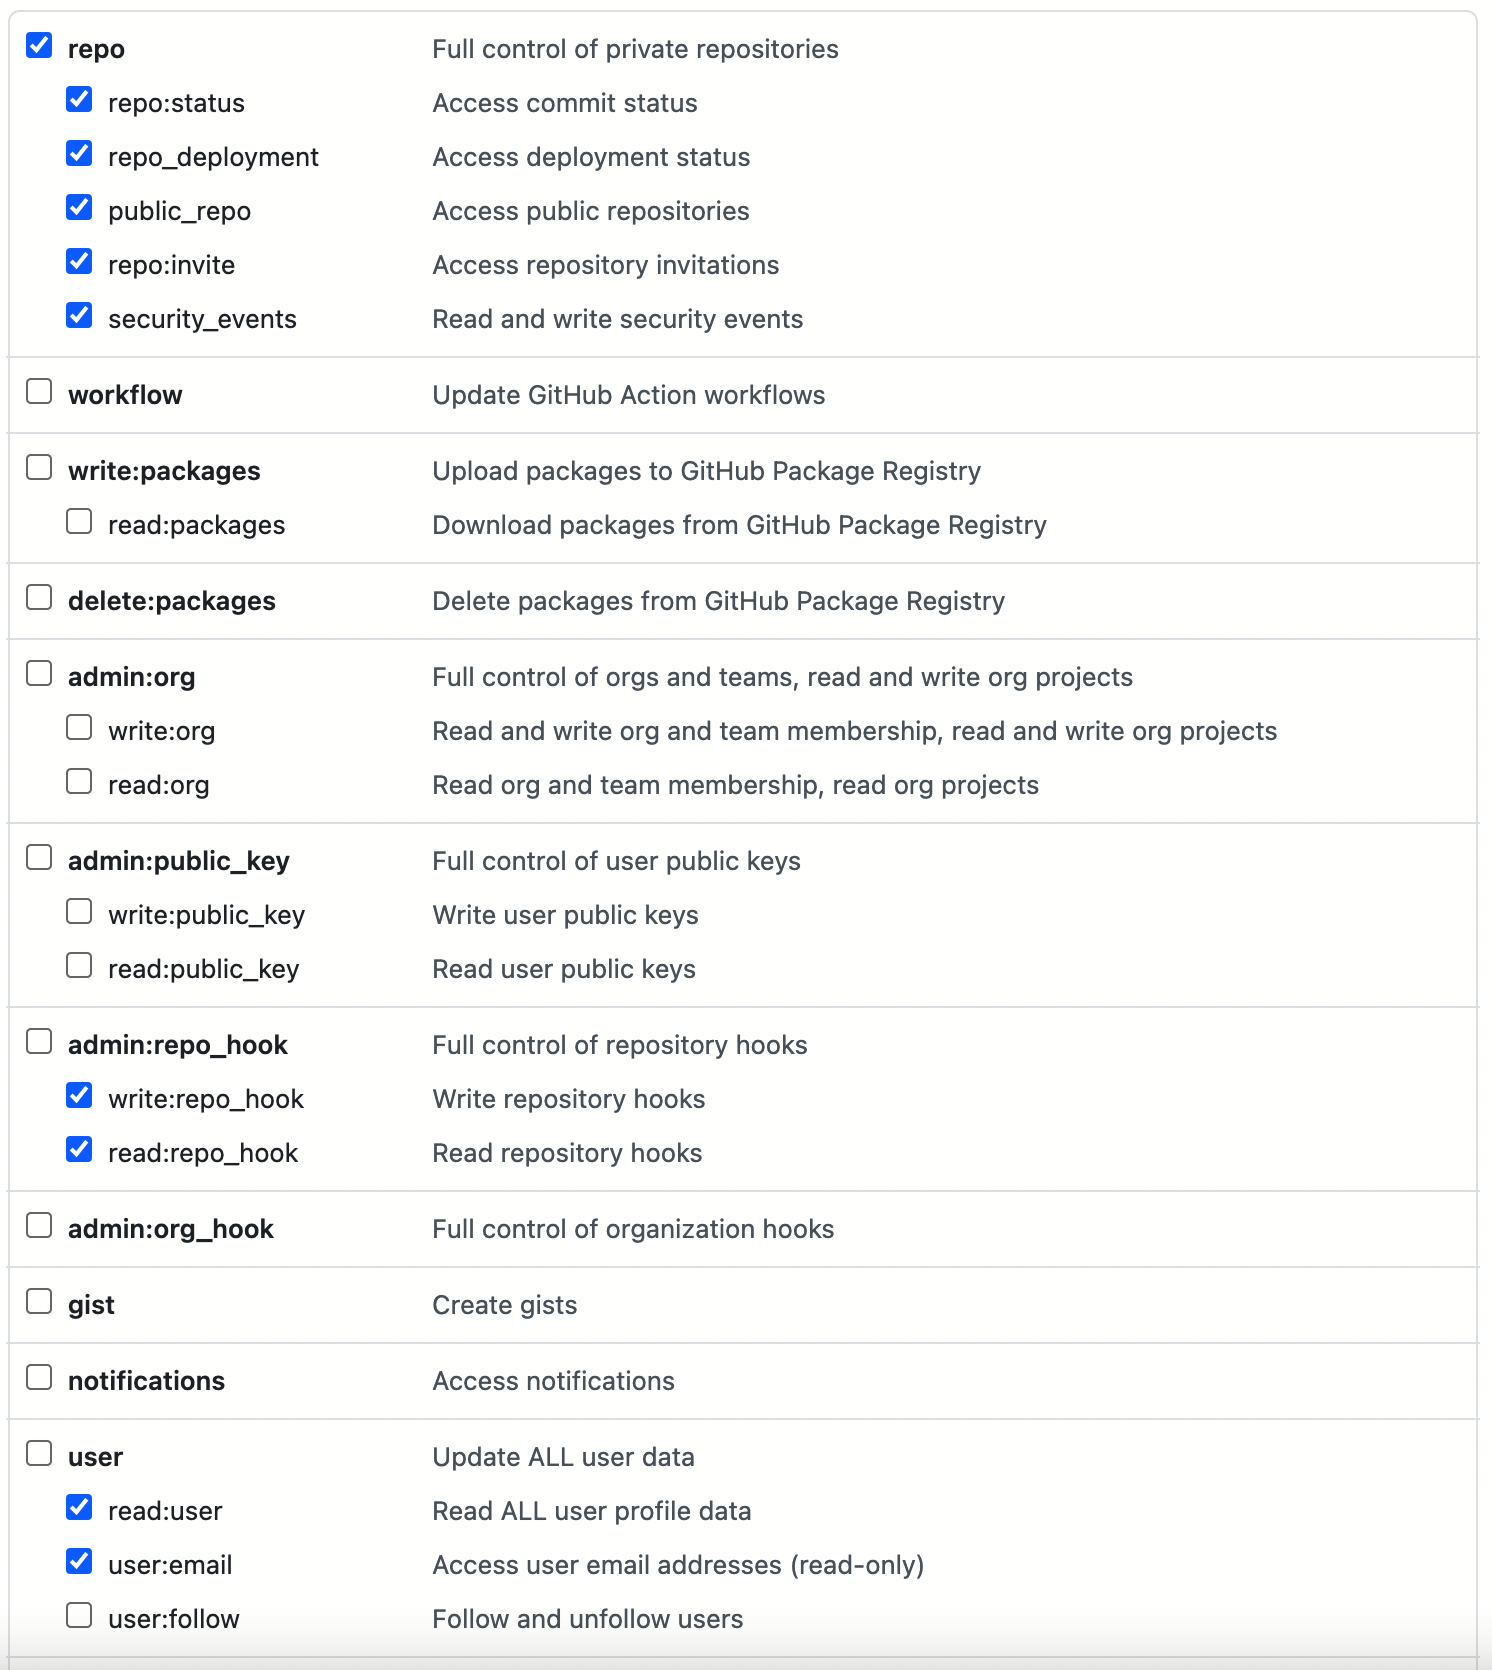
Note
To create a GitHub personal access token, go to Settings of your GitHub account, click Developer settings, select Personal access tokens, and click Generate new token. -
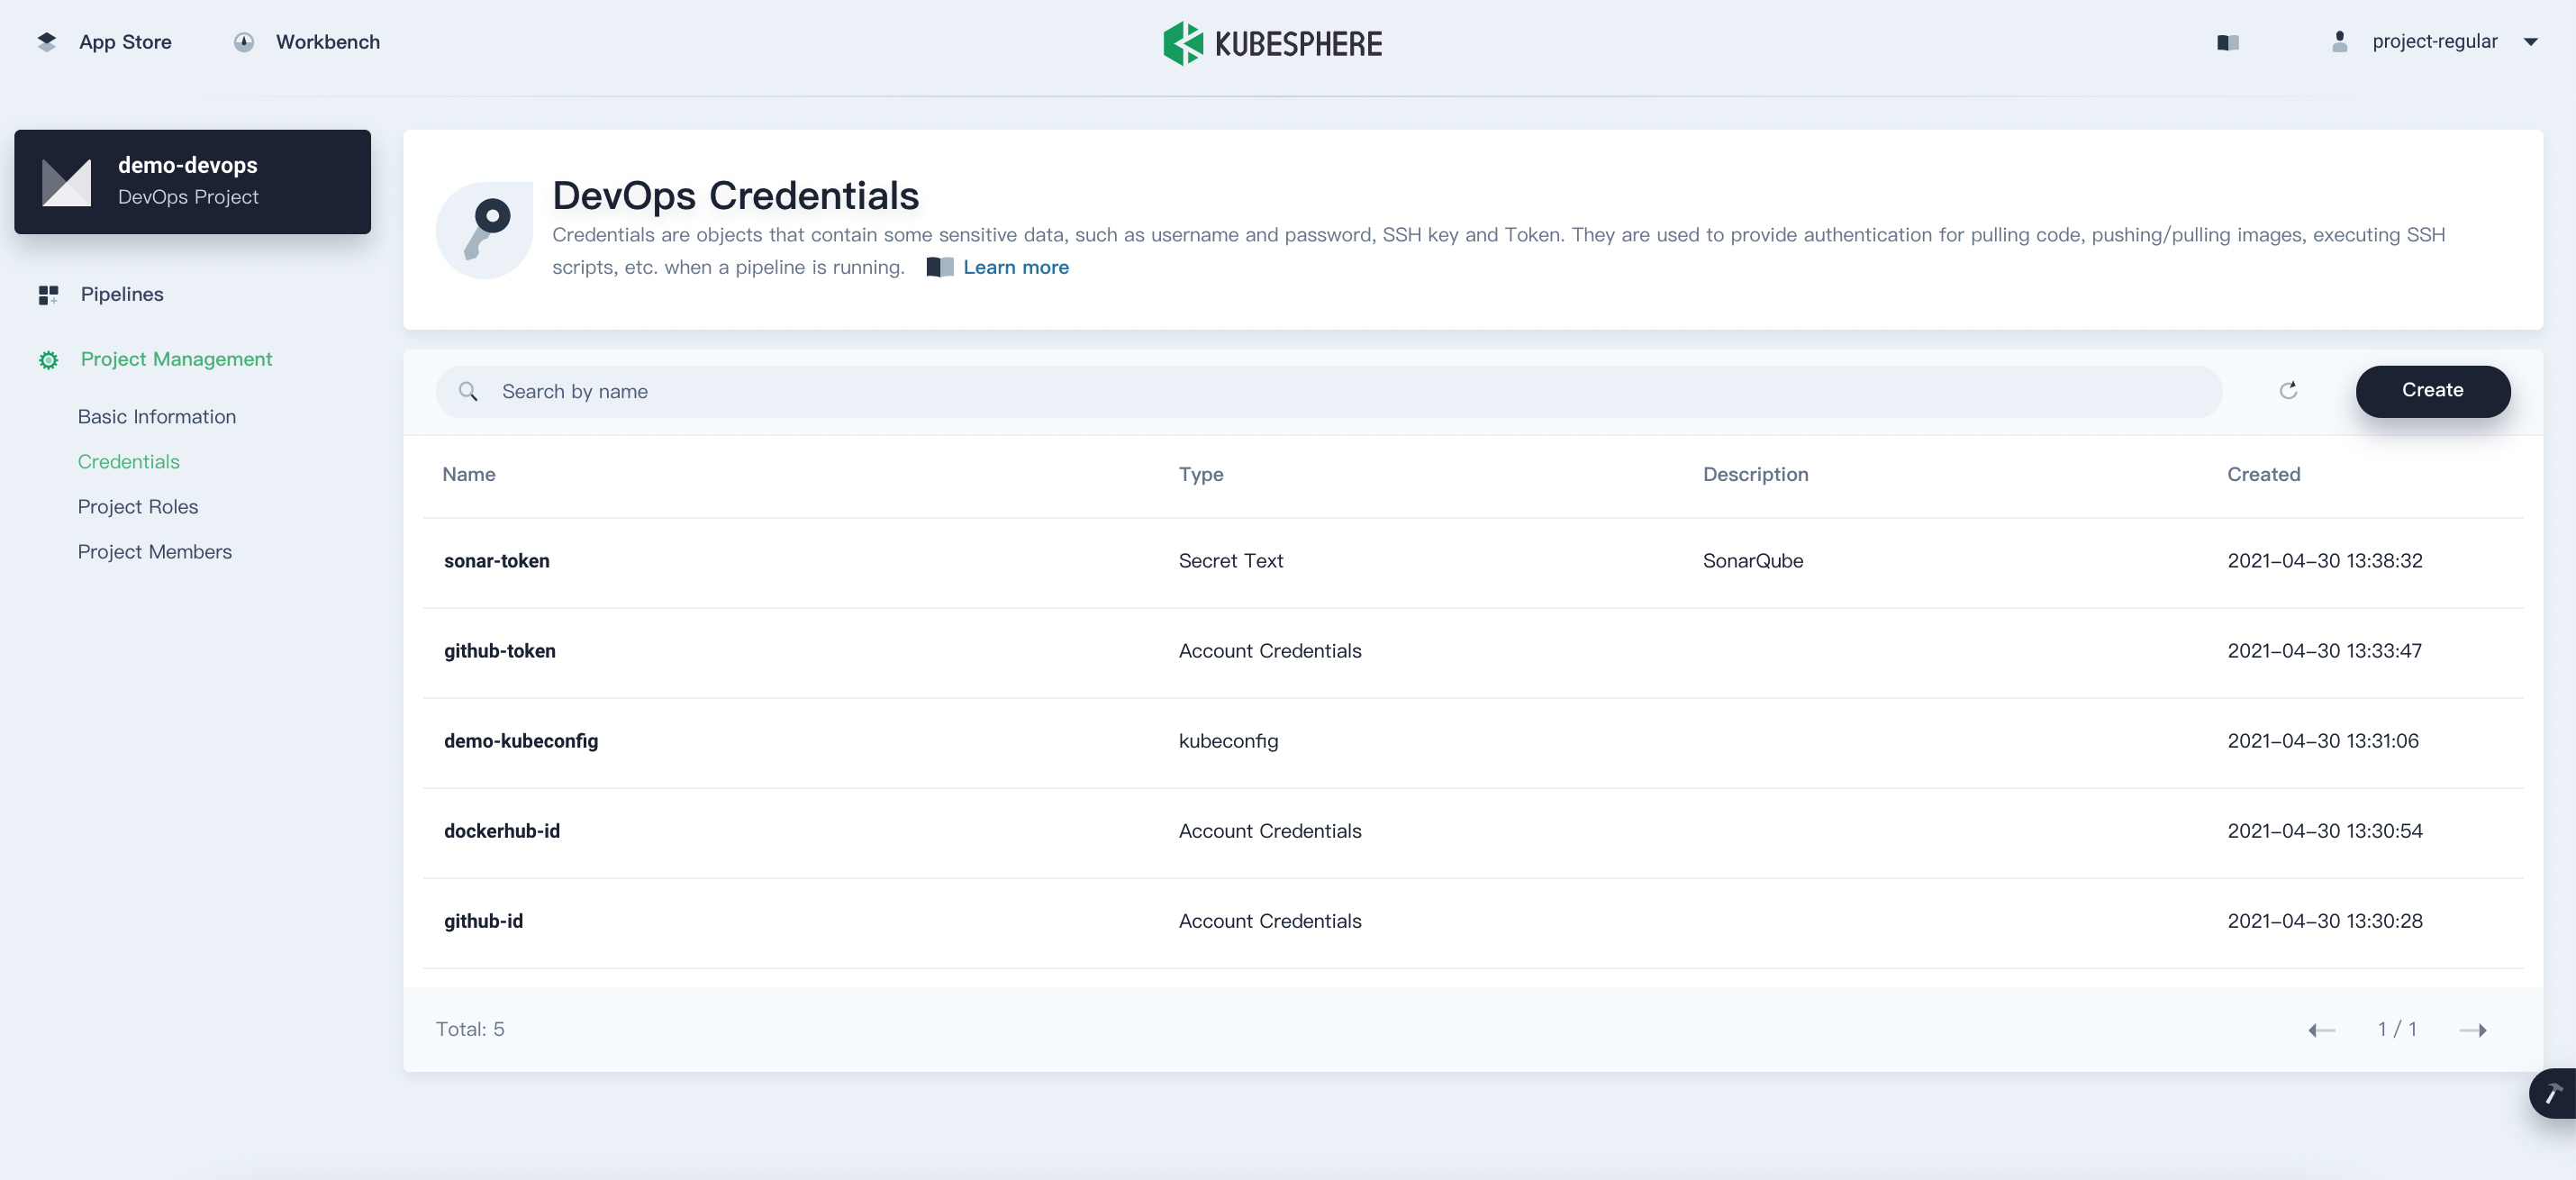
In total, you have five credentials in the list.
Step 2: Modify the Jenkinsfile in your GitHub repository
-
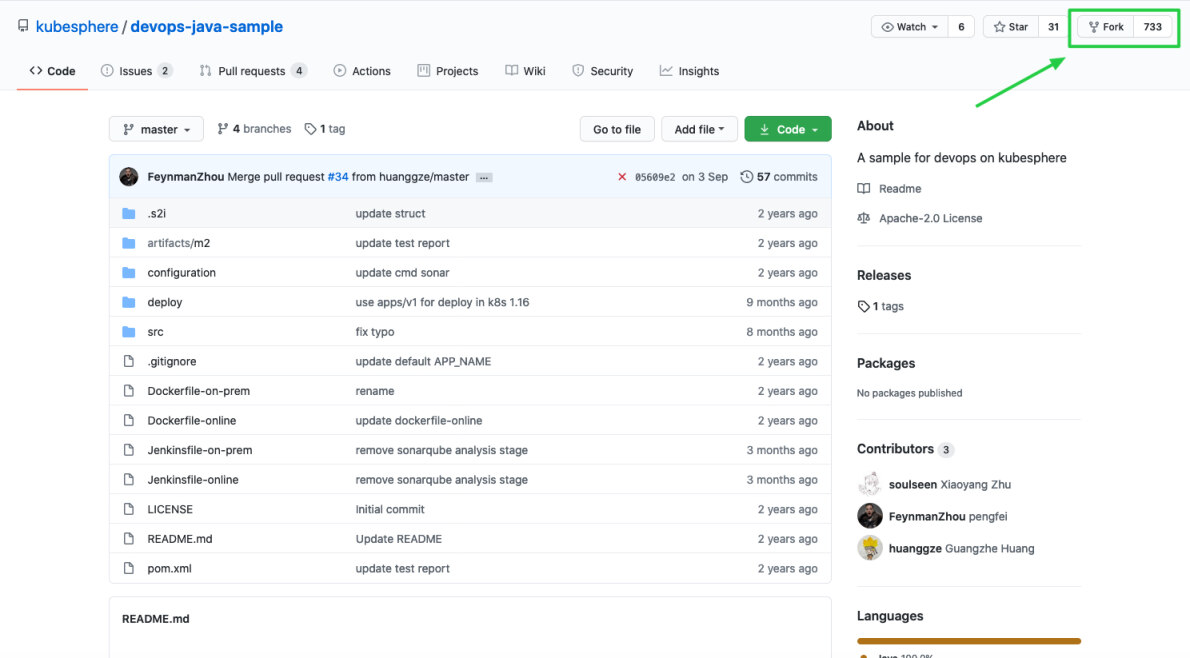
Log in to GitHub. Fork devops-java-sample from the GitHub repository to your own GitHub account.
-
In your own GitHub repository of devops-java-sample, click the file
Jenkinsfile-onlinein the root directory.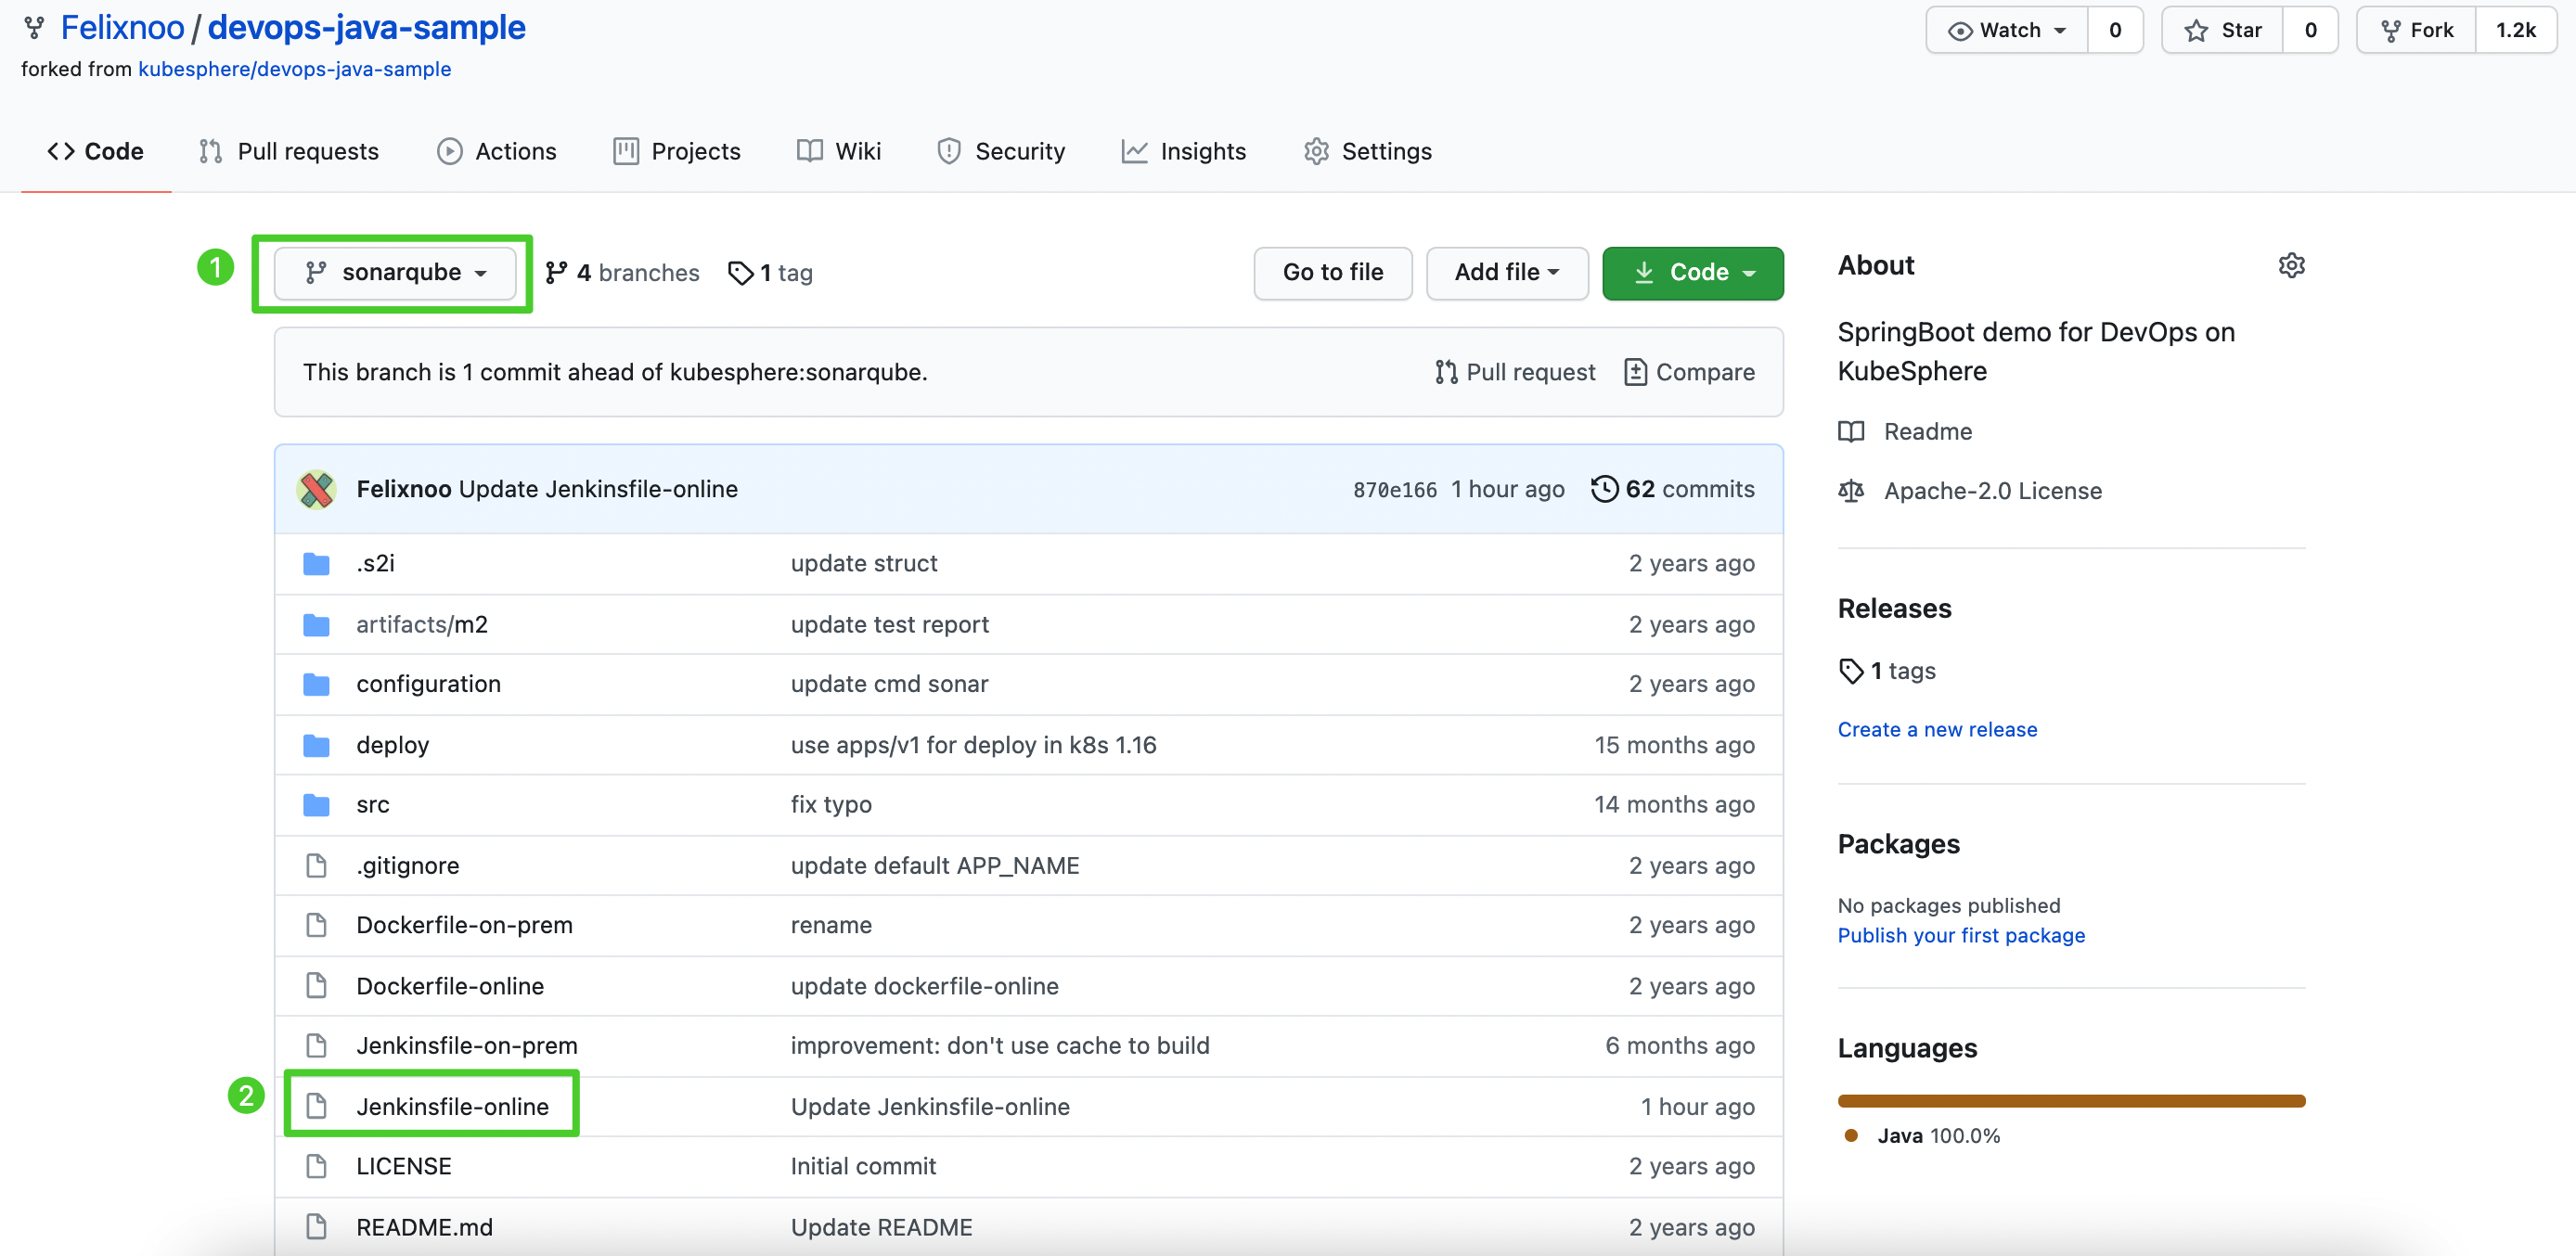
-
Click the edit icon on the right to edit environment variables.
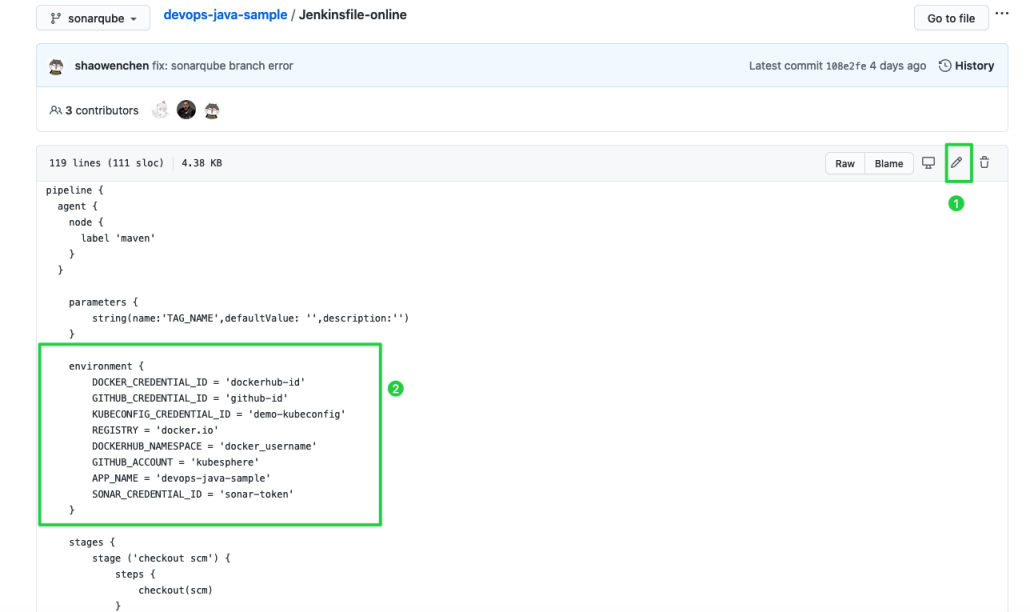
Items Value Description DOCKER_CREDENTIAL_ID dockerhub-id The Credential ID you set in KubeSphere for your Docker Hub account. GITHUB_CREDENTIAL_ID github-id The Credential ID you set in KubeSphere for your GitHub account. It is used to push tags to your GitHub repository. KUBECONFIG_CREDENTIAL_ID demo-kubeconfig The Credential ID you set in KubeSphere for your kubeconfig. It is used to access a running Kubernetes cluster. REGISTRY docker.io It defaults to docker.io, serving as the address of pushing images.DOCKERHUB_NAMESPACE your-dockerhub-account Replace it with your Docker Hub’s account name. It can be the Organization name under the account. GITHUB_ACCOUNT your-github-account Replace it with your GitHub account name. For example, your GitHub account name is kubesphereif your GitHub address ishttps://github.com/kubesphere/. It can also be the account’s Organization name.APP_NAME devops-java-sample The application name. SONAR_CREDENTIAL_ID sonar-token The Credential ID you set in KubeSphere for the SonarQube token. It is used for code quality test. Note
The command parameter-oof Jenkinsfile’smvnindicates that the offline mode is enabled. Relevant dependencies have already been downloaded in this tutorial to save time and to adapt to network interference in certain environments. The offline mode is on by default. -
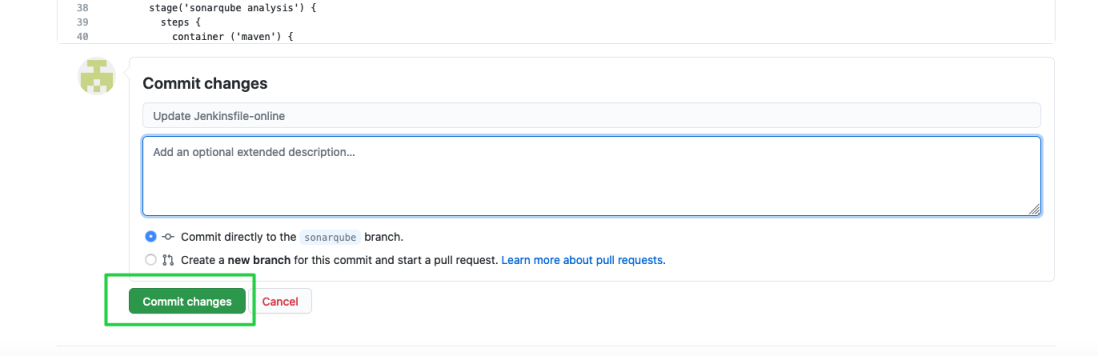
After you edit the environmental variables, click Commit changes at the bottom of the page, which updates the file in the SonarQube branch.
Step 3: Create projects
You need to create two projects, such as kubesphere-sample-dev and kubesphere-sample-prod, which represent the development environment and the production environment respectively. Related Deployments and Services of the app will be created automatically in these two projects once the pipeline runs successfully.
Note
The account
project-admin needs to be created in advance since it is the reviewer of the CI/CD Pipeline. See Create Workspaces, Projects, Accounts and Roles for more information.-
Use the account
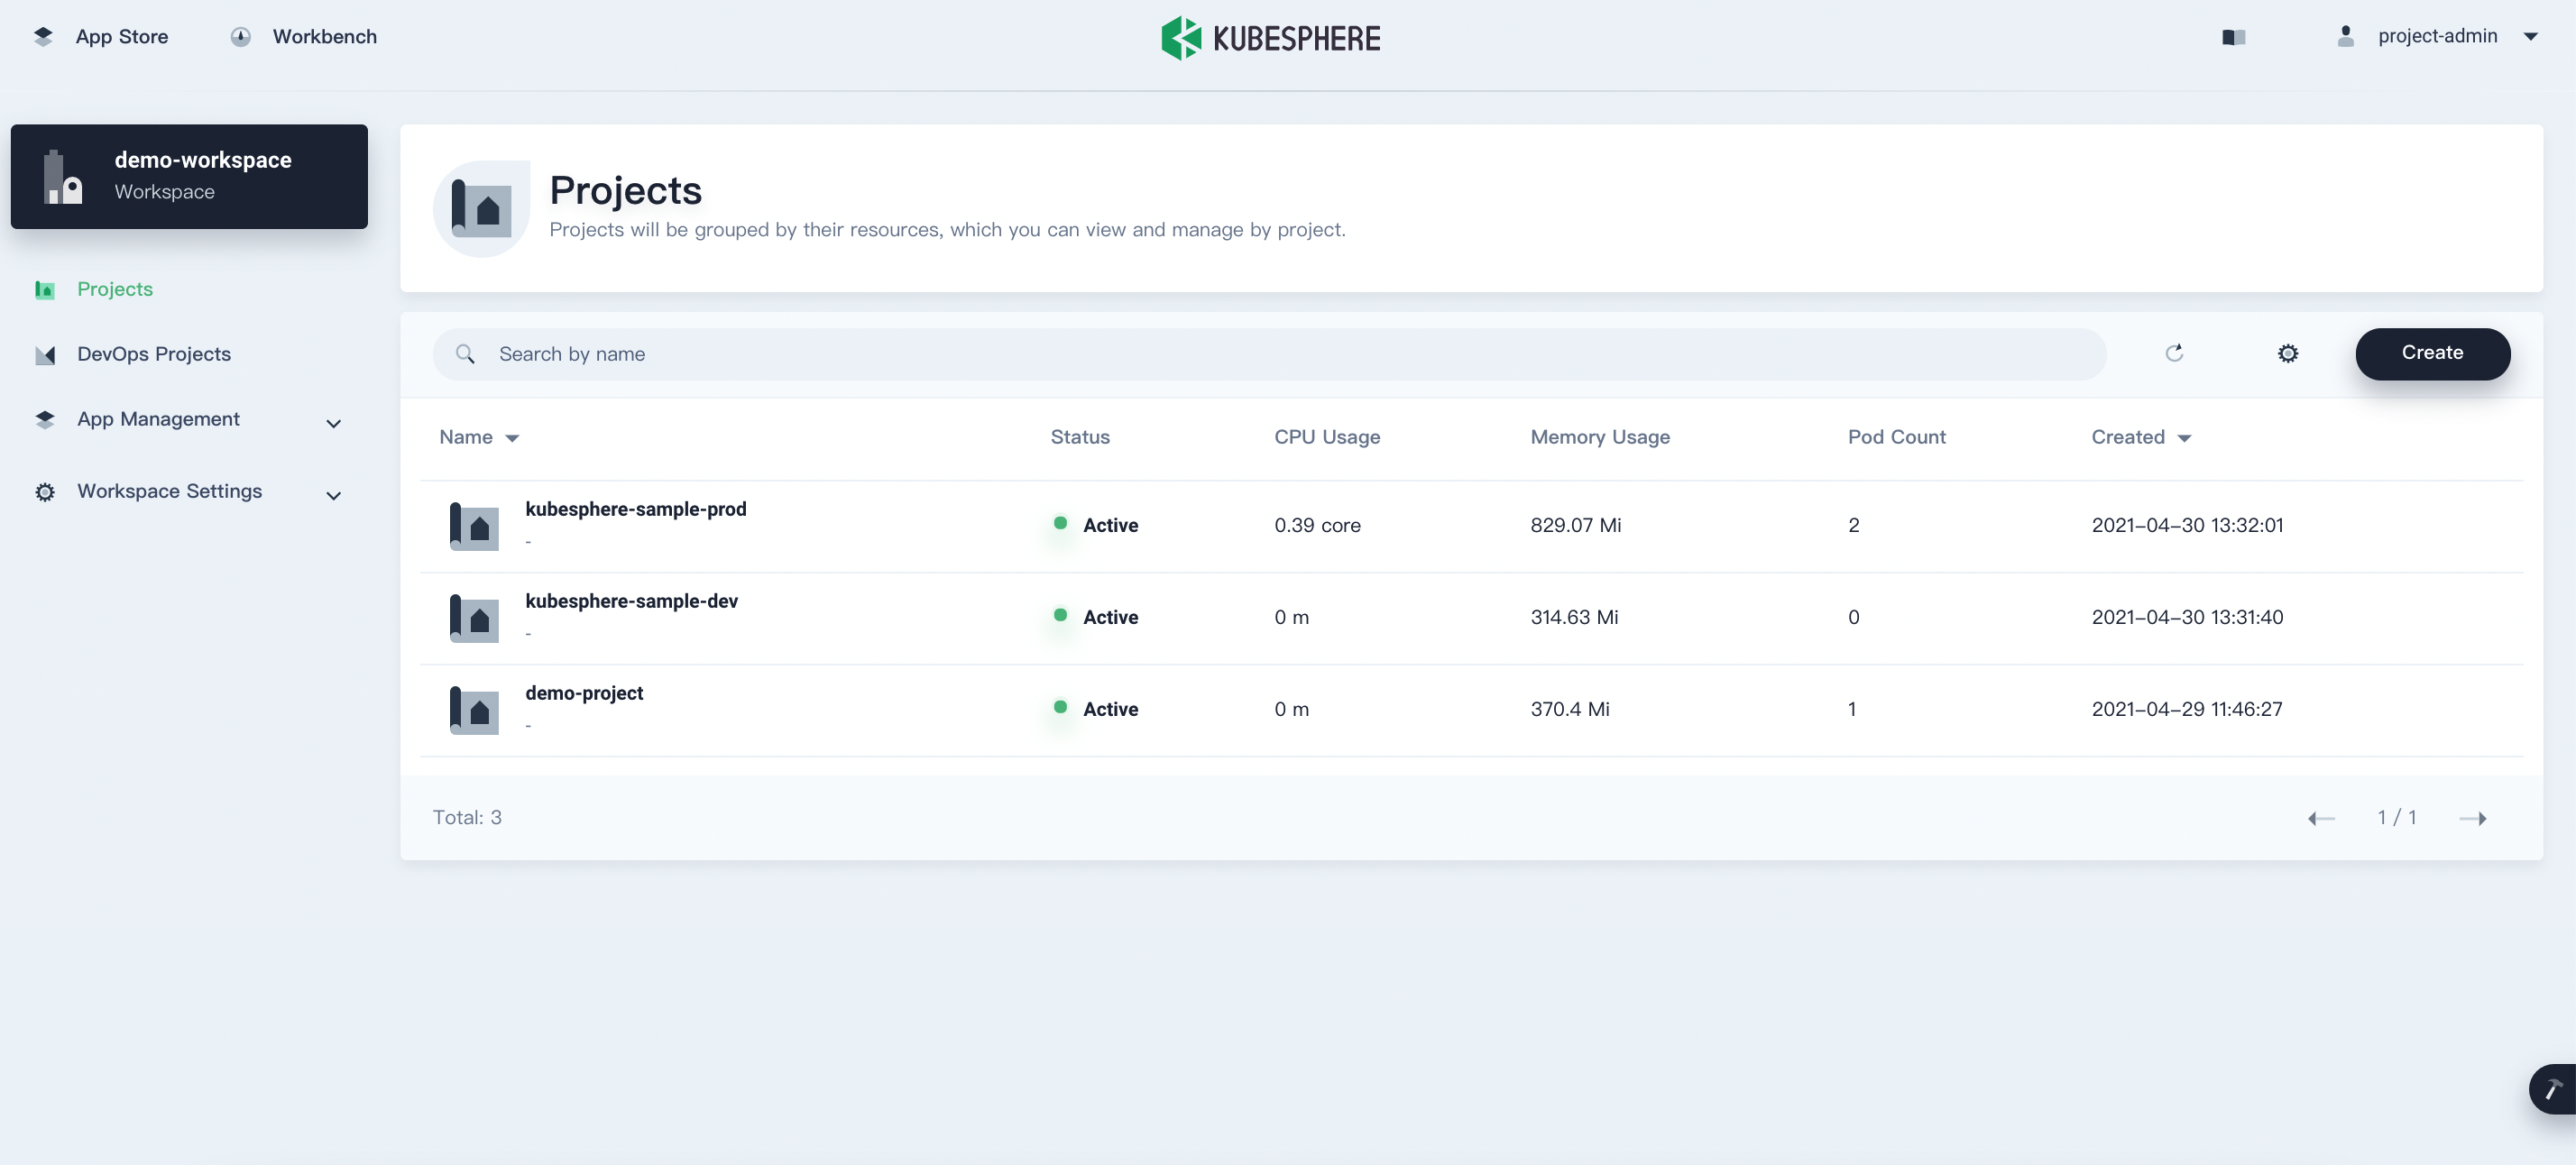
project-adminto log in to KubeSphere. In the same workspace where you create the DevOps project, create two projects as below. Make sure you inviteproject-regularto these two projects with the role ofoperator.Project Name Alias kubesphere-sample-dev development environment kubesphere-sample-prod production environment -
After those projects are created, they will be listed in the project list as below:
Step 4: Create a pipeline
-
Log out of KubeSphere and log back in as
project-regular. Go to the DevOps projectdemo-devopsand click Create to build a new pipeline.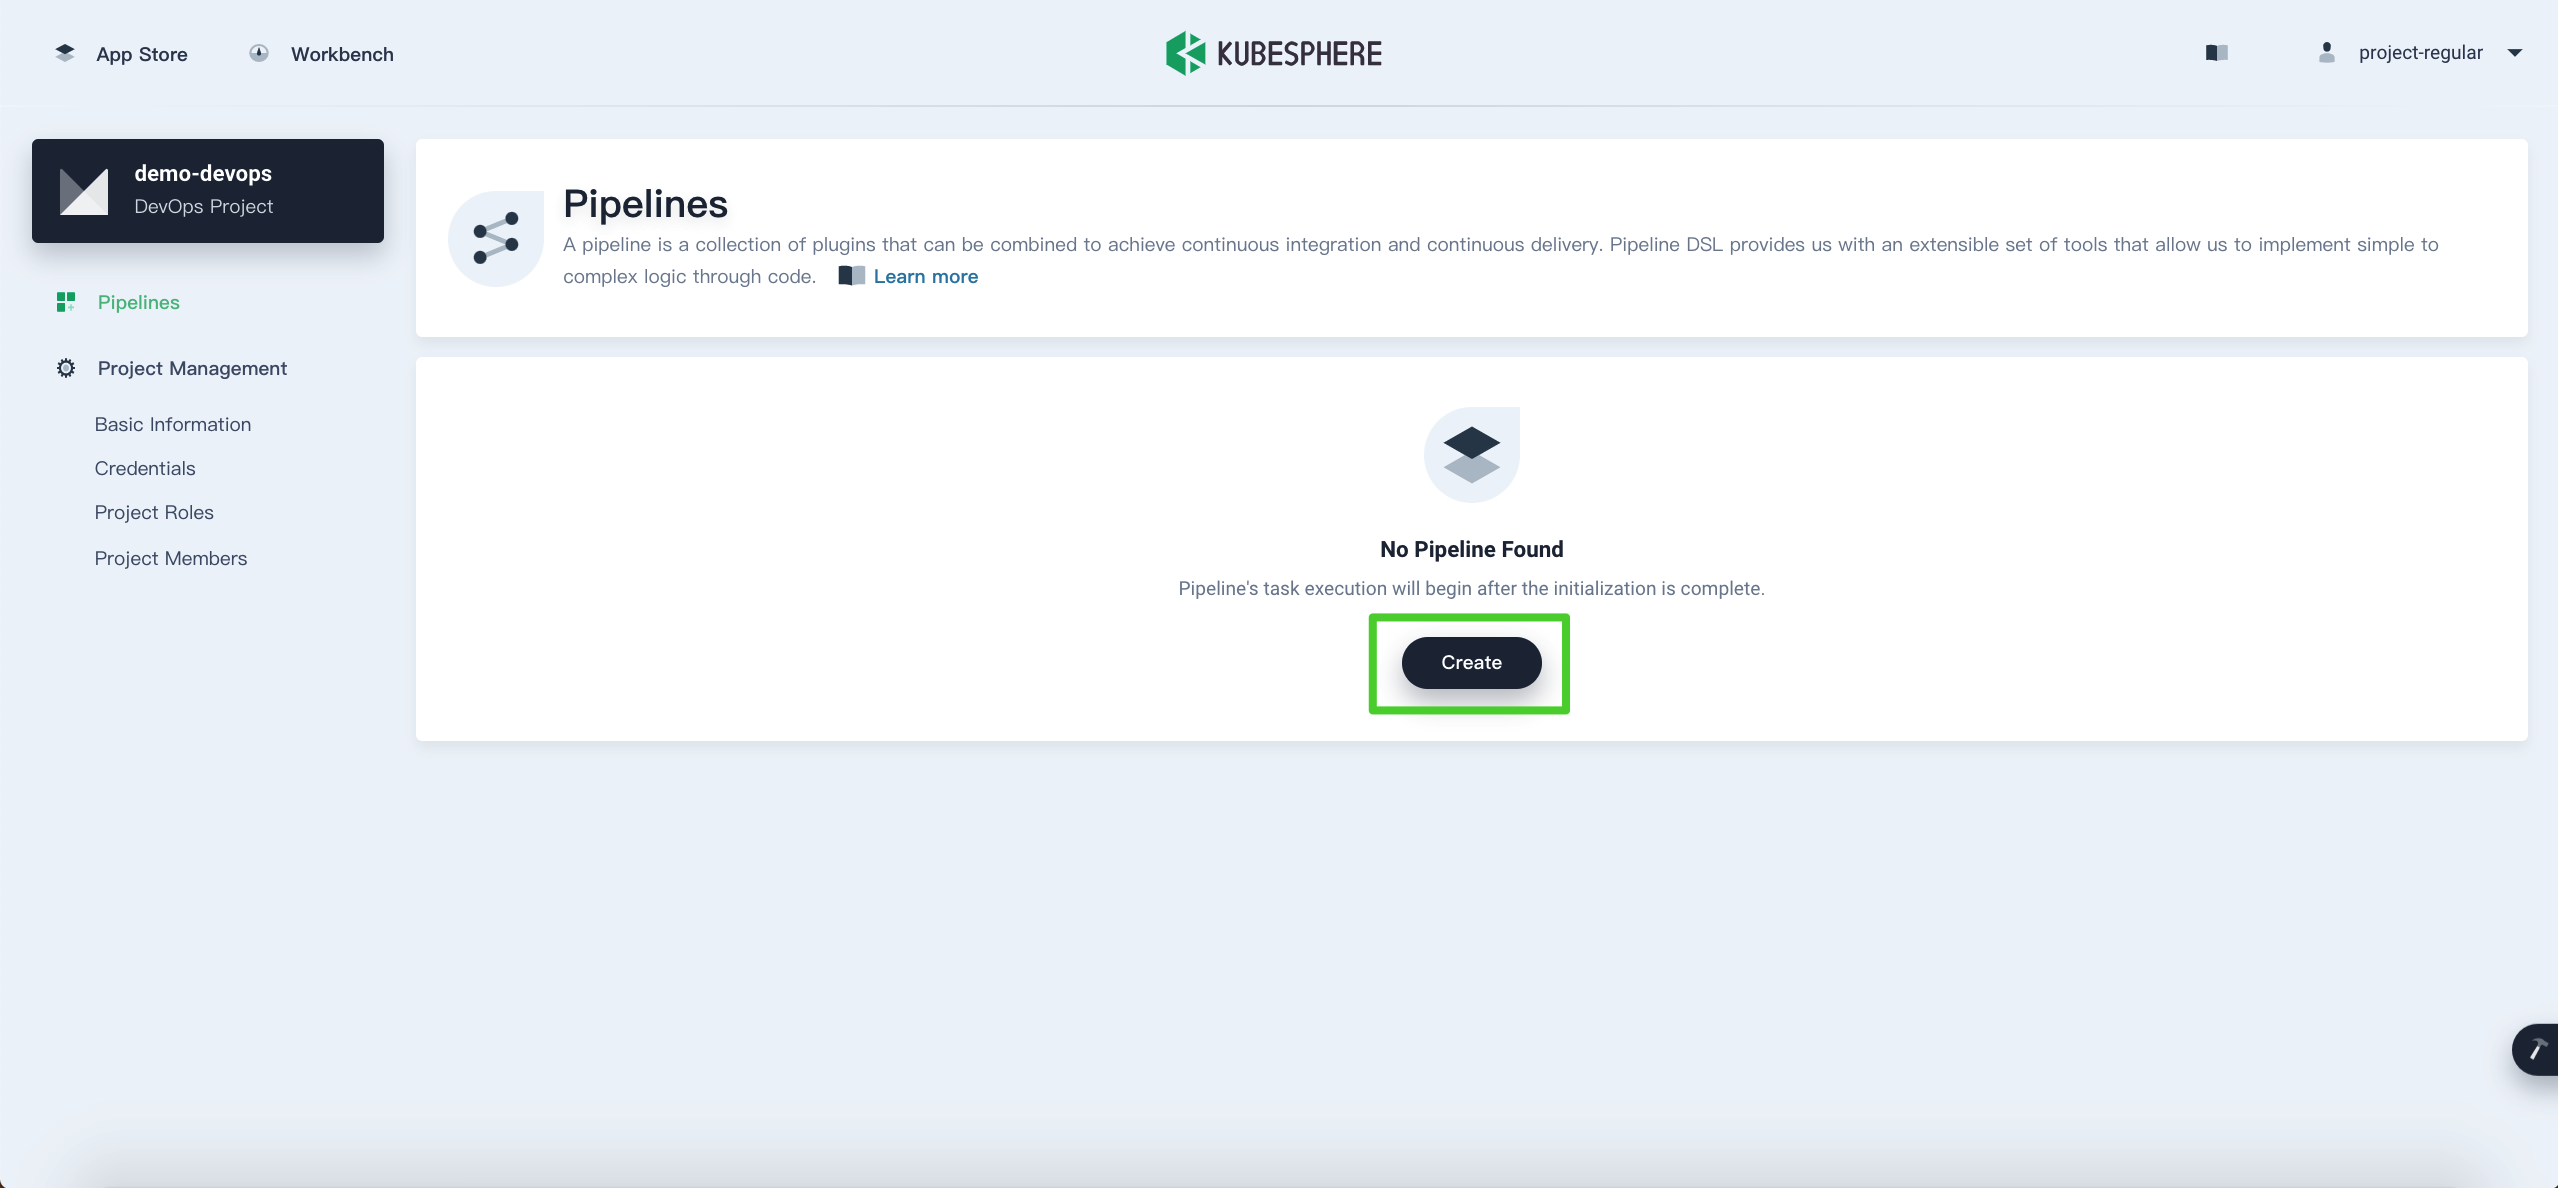
-
Provide the basic information in the dialog that appears. Name it
jenkinsfile-in-scmand select a code repository.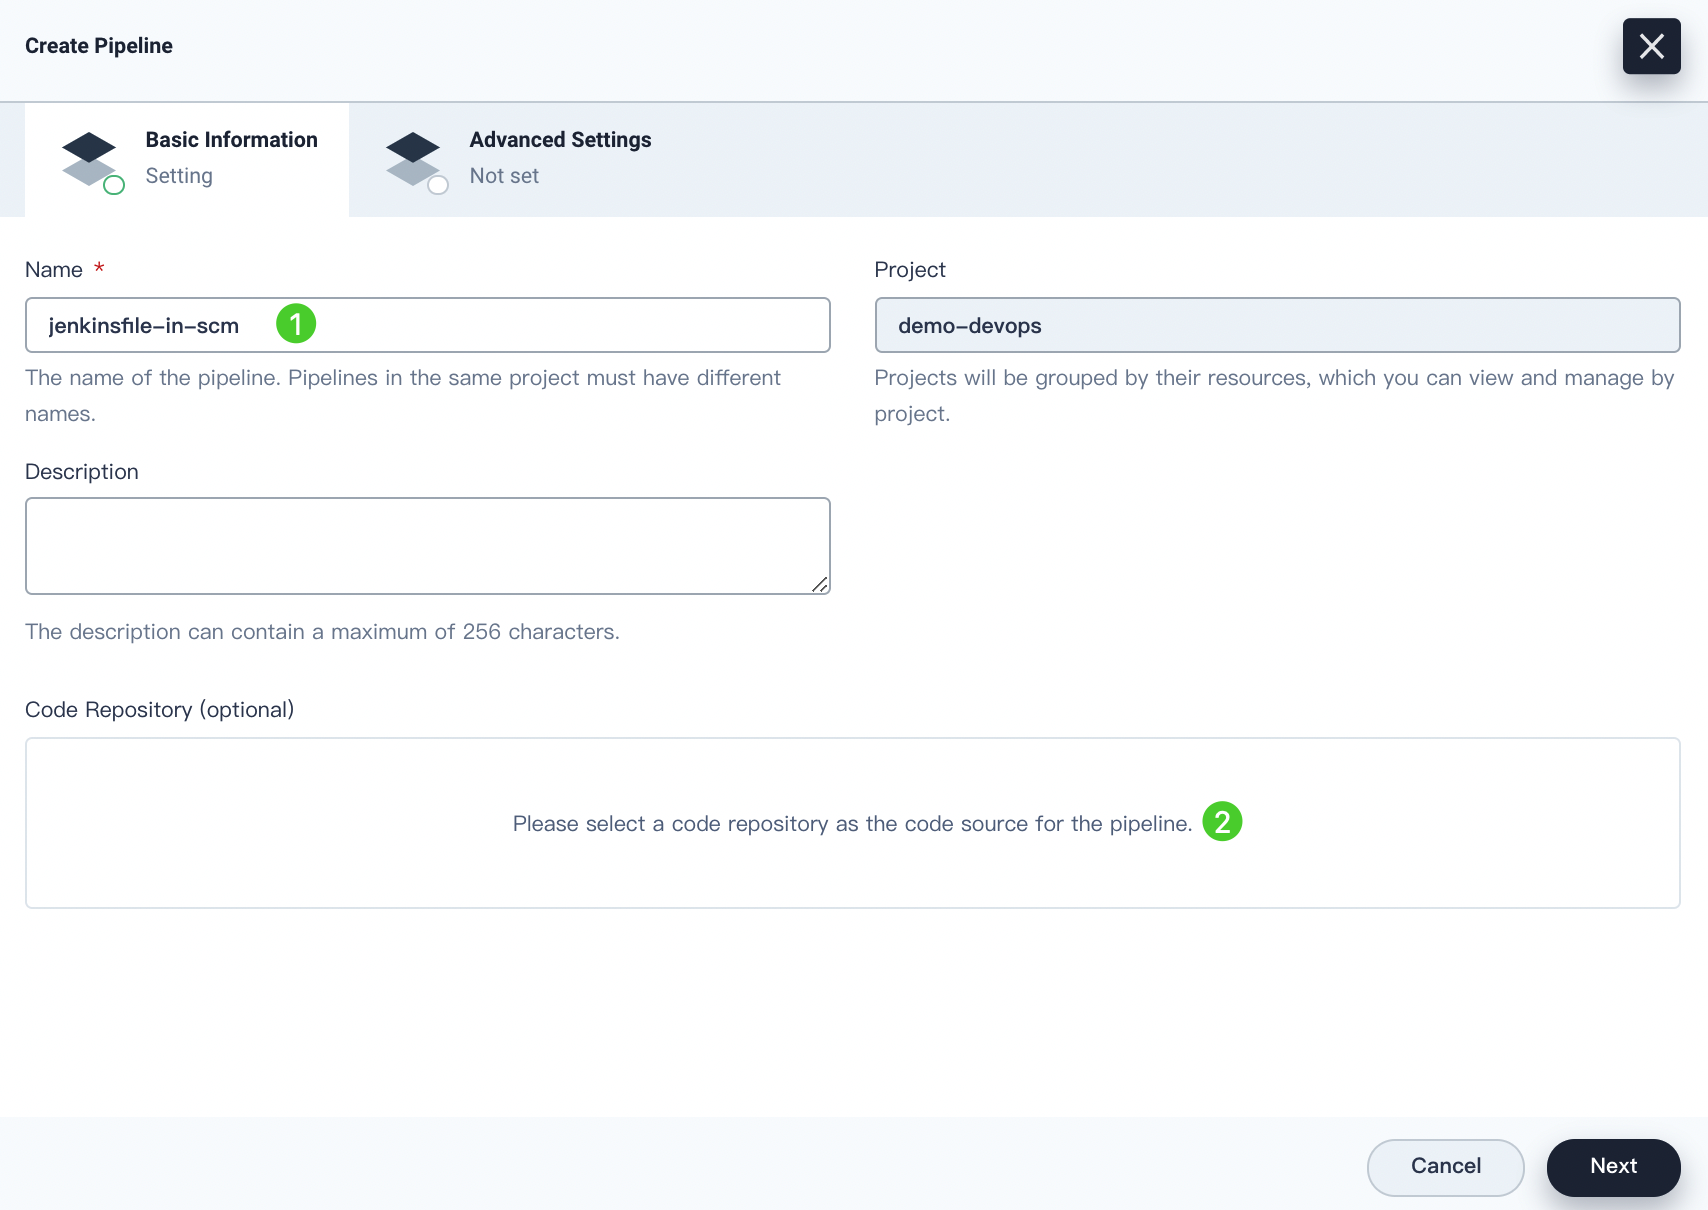
-
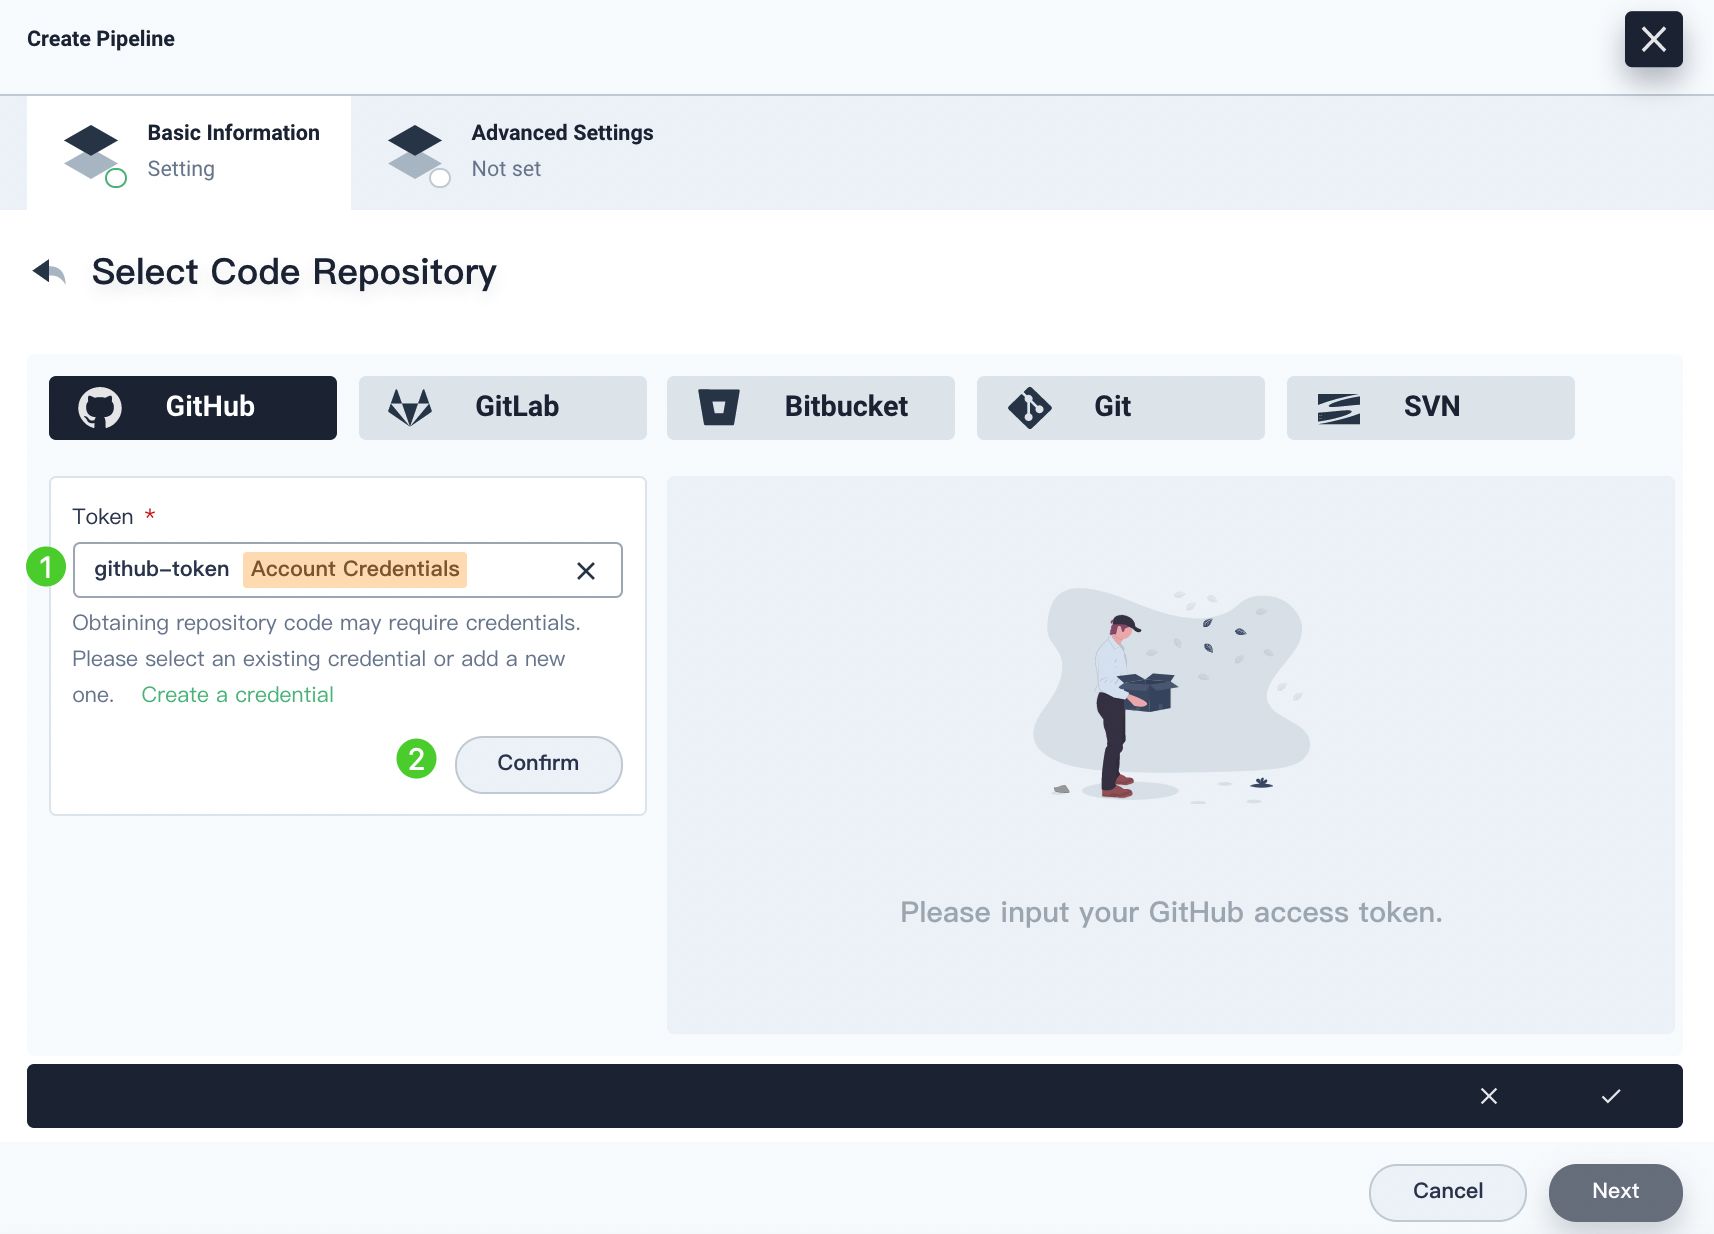
In the GitHub tab, select github-token from the drop-down list, and then click Confirm to select your repository.
-
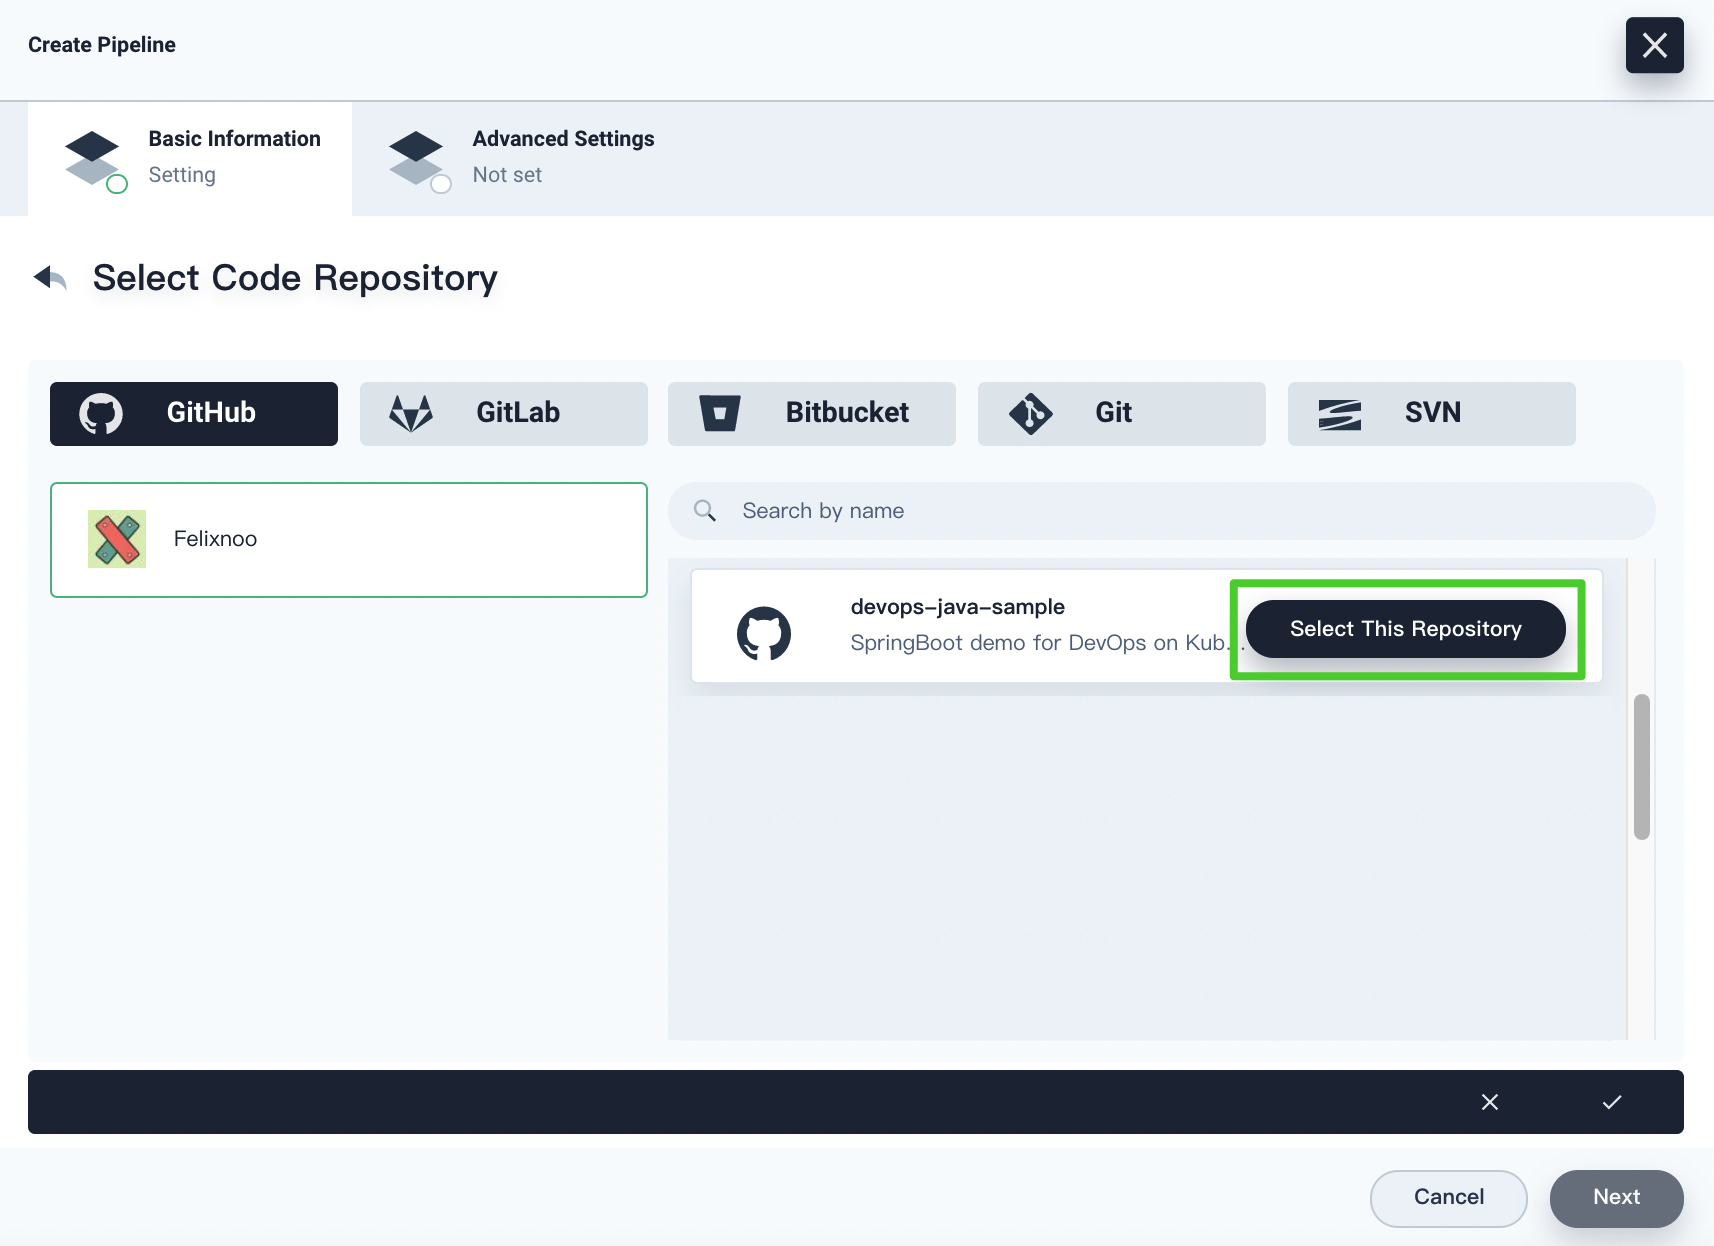
Choose your GitHub account. All the repositories related to this token will be listed on the right. Select devops-java-sample and click Select This Repository. Click Next to continue.
-
In Advanced Settings, check the box next to Discard old branch. In this tutorial, you can use the default value of Days to keep old branches and Maximum number branches to keep.
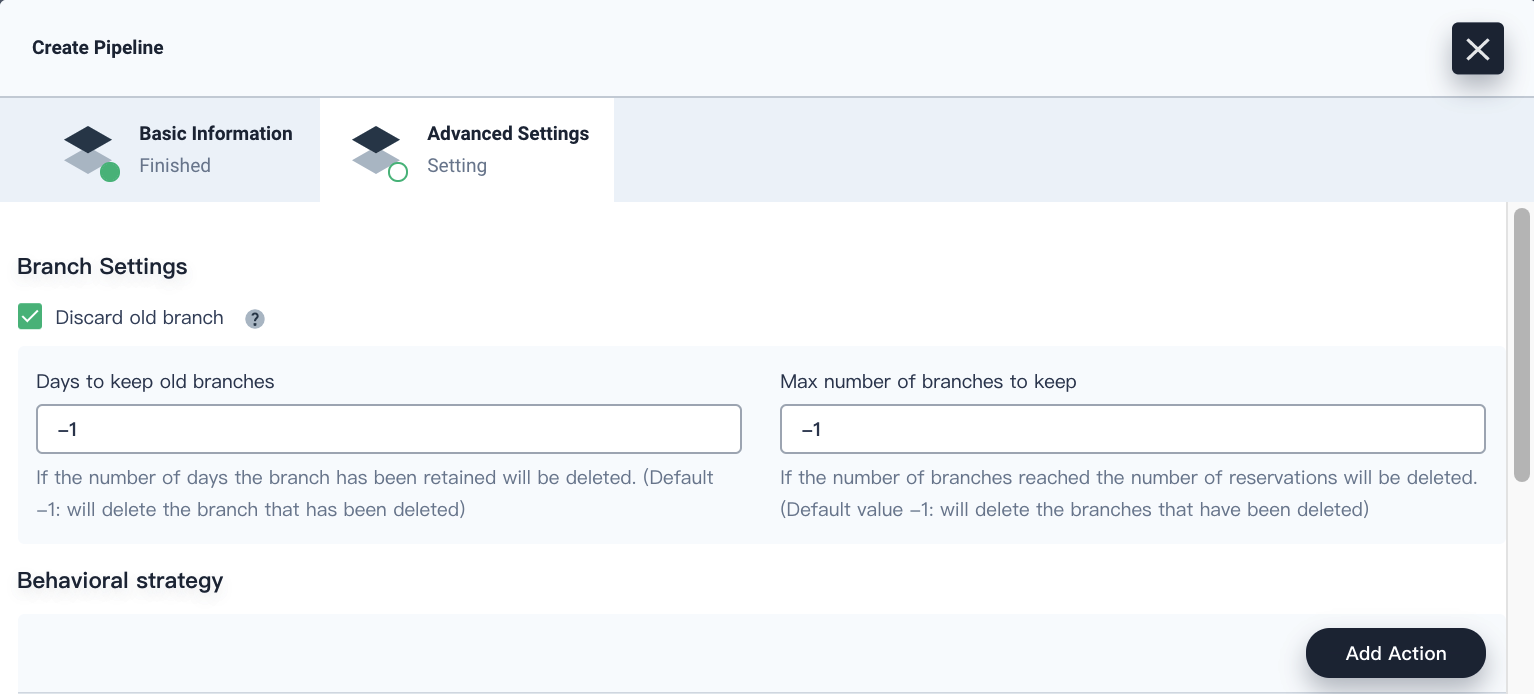
Discarding old branches means that you will discard the branch record all together. The branch record includes console output, archived artifacts and other relevant metadata of specific branches. Fewer branches mean that you can save the disk space that Jenkins is using. KubeSphere provides two options to determine when old branches are discarded:
-
Days to keep old branches. Branches will be discarded after a certain number of days.
-
Maximum number of branches to keep. The oldest branches will be discarded after branches reach a certain amount.
Note
Days to keep old branches and Maximum number of branches to keep apply to branches at the same time. As long as a branch meets the condition of either field, it will be discarded. For example, if you specify 2 as the number of retention days and 3 as the maximum number of branches, any branches that exceed either number will be discarded. KubeSphere repopulates these two fields with -1 by default, which means deleted branches will be discarded. -
-
In Behavioral strategy, KubeSphere offers four strategies by default. You can delete Discover PR from Forks as this strategy will not be used in this example. You do not need to change the setting and can use the default value directly.
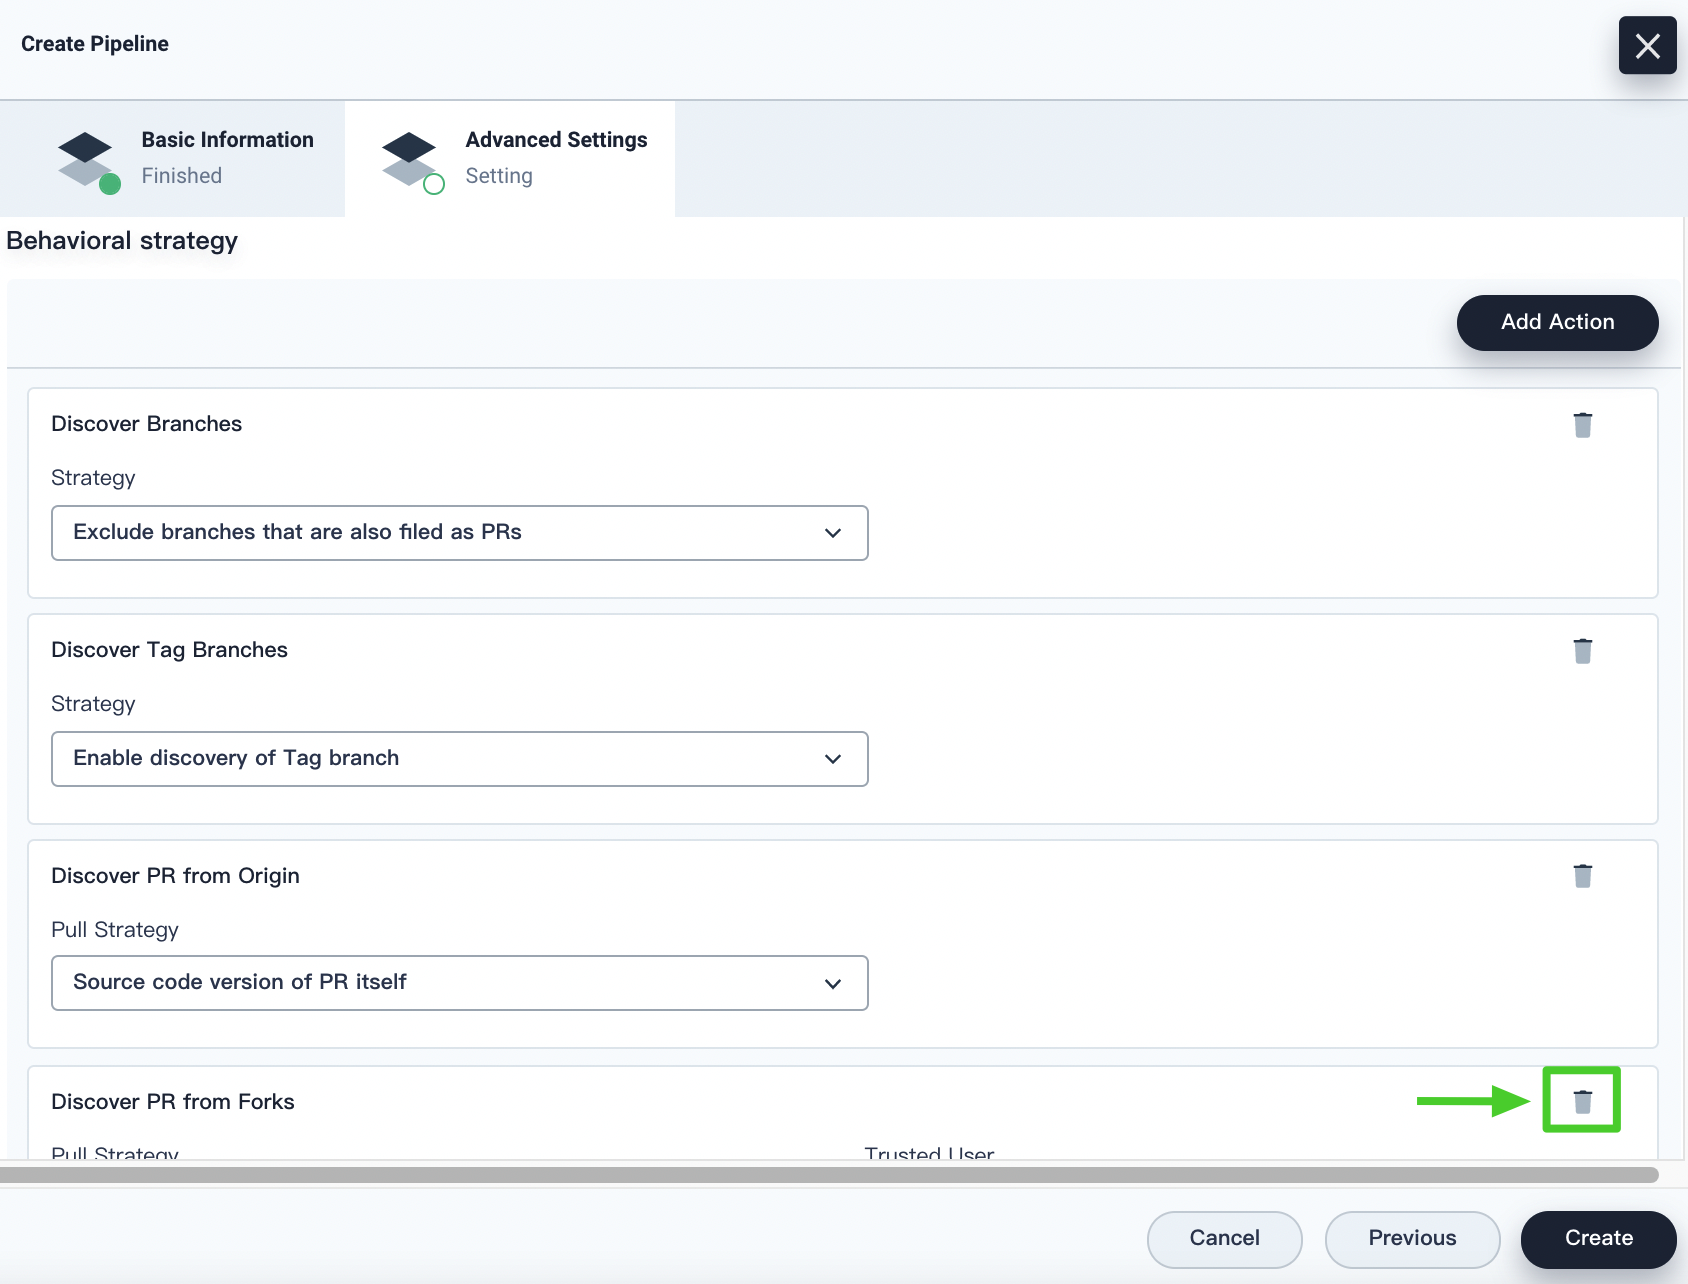
As a Jenkins pipeline runs, the Pull Request (PR) submitted by developers will also be regarded as a separate branch.
Discover Branches
- Exclude branches that are also filed as PRs. The source branch is not scanned such as the origin’s master branch. These branches need to be merged.
- Only branches that are also filed as PRs. Only scan the PR branch.
- All branches. Pull all the branches from the repository origin.
Discover PR from Origin
- Source code version of PR merged with target branch. A pipeline is created and runs based on the source code after the PR is merged into the target branch.
- Source code version of PR itself. A pipeline is created and runs based on the source code of the PR itself.
- Two pipelines are created when a PR is discovered. KubeSphere creates two pipelines, one based on the source code after the PR is merged into the target branch, and the other based on the source code of the PR itself.
Note
You have to choose GitHub as your code repository to enable the settings of Behavioral strategy here. -
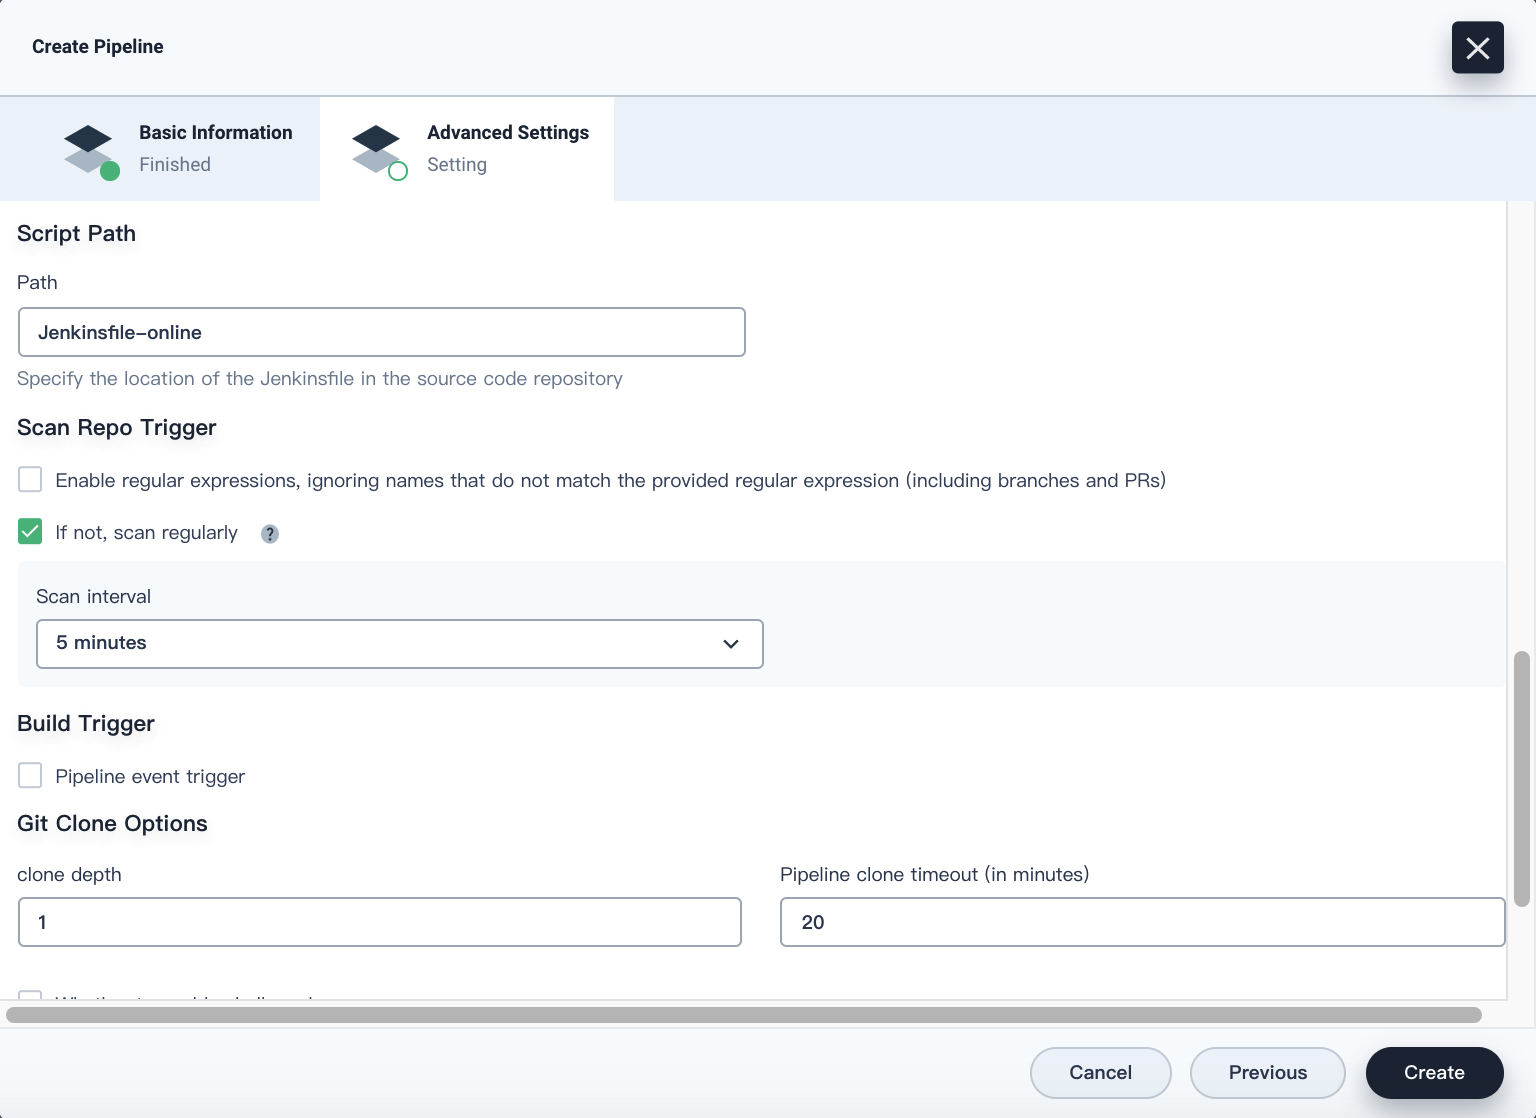
Scroll down to Script Path. The field specifies the Jenkinsfile path in the code repository. It indicates the repository’s root directory. If the file location changes, the script path also needs to be changed. Please change it to
Jenkinsfile-online, which is the file name of Jenkinsfile in the example repository located in the root directory.
-
In Scan Repo Trigger, check If not, scan regularly and set the interval to 5 minutes. Click Create to finish.
Note
You can set a specific interval to allow pipelines to scan remote repositories, so that any code updates or new PRs can be detected based on the strategy you set in Behavioral strategy.
Step 5: Run a pipeline
-
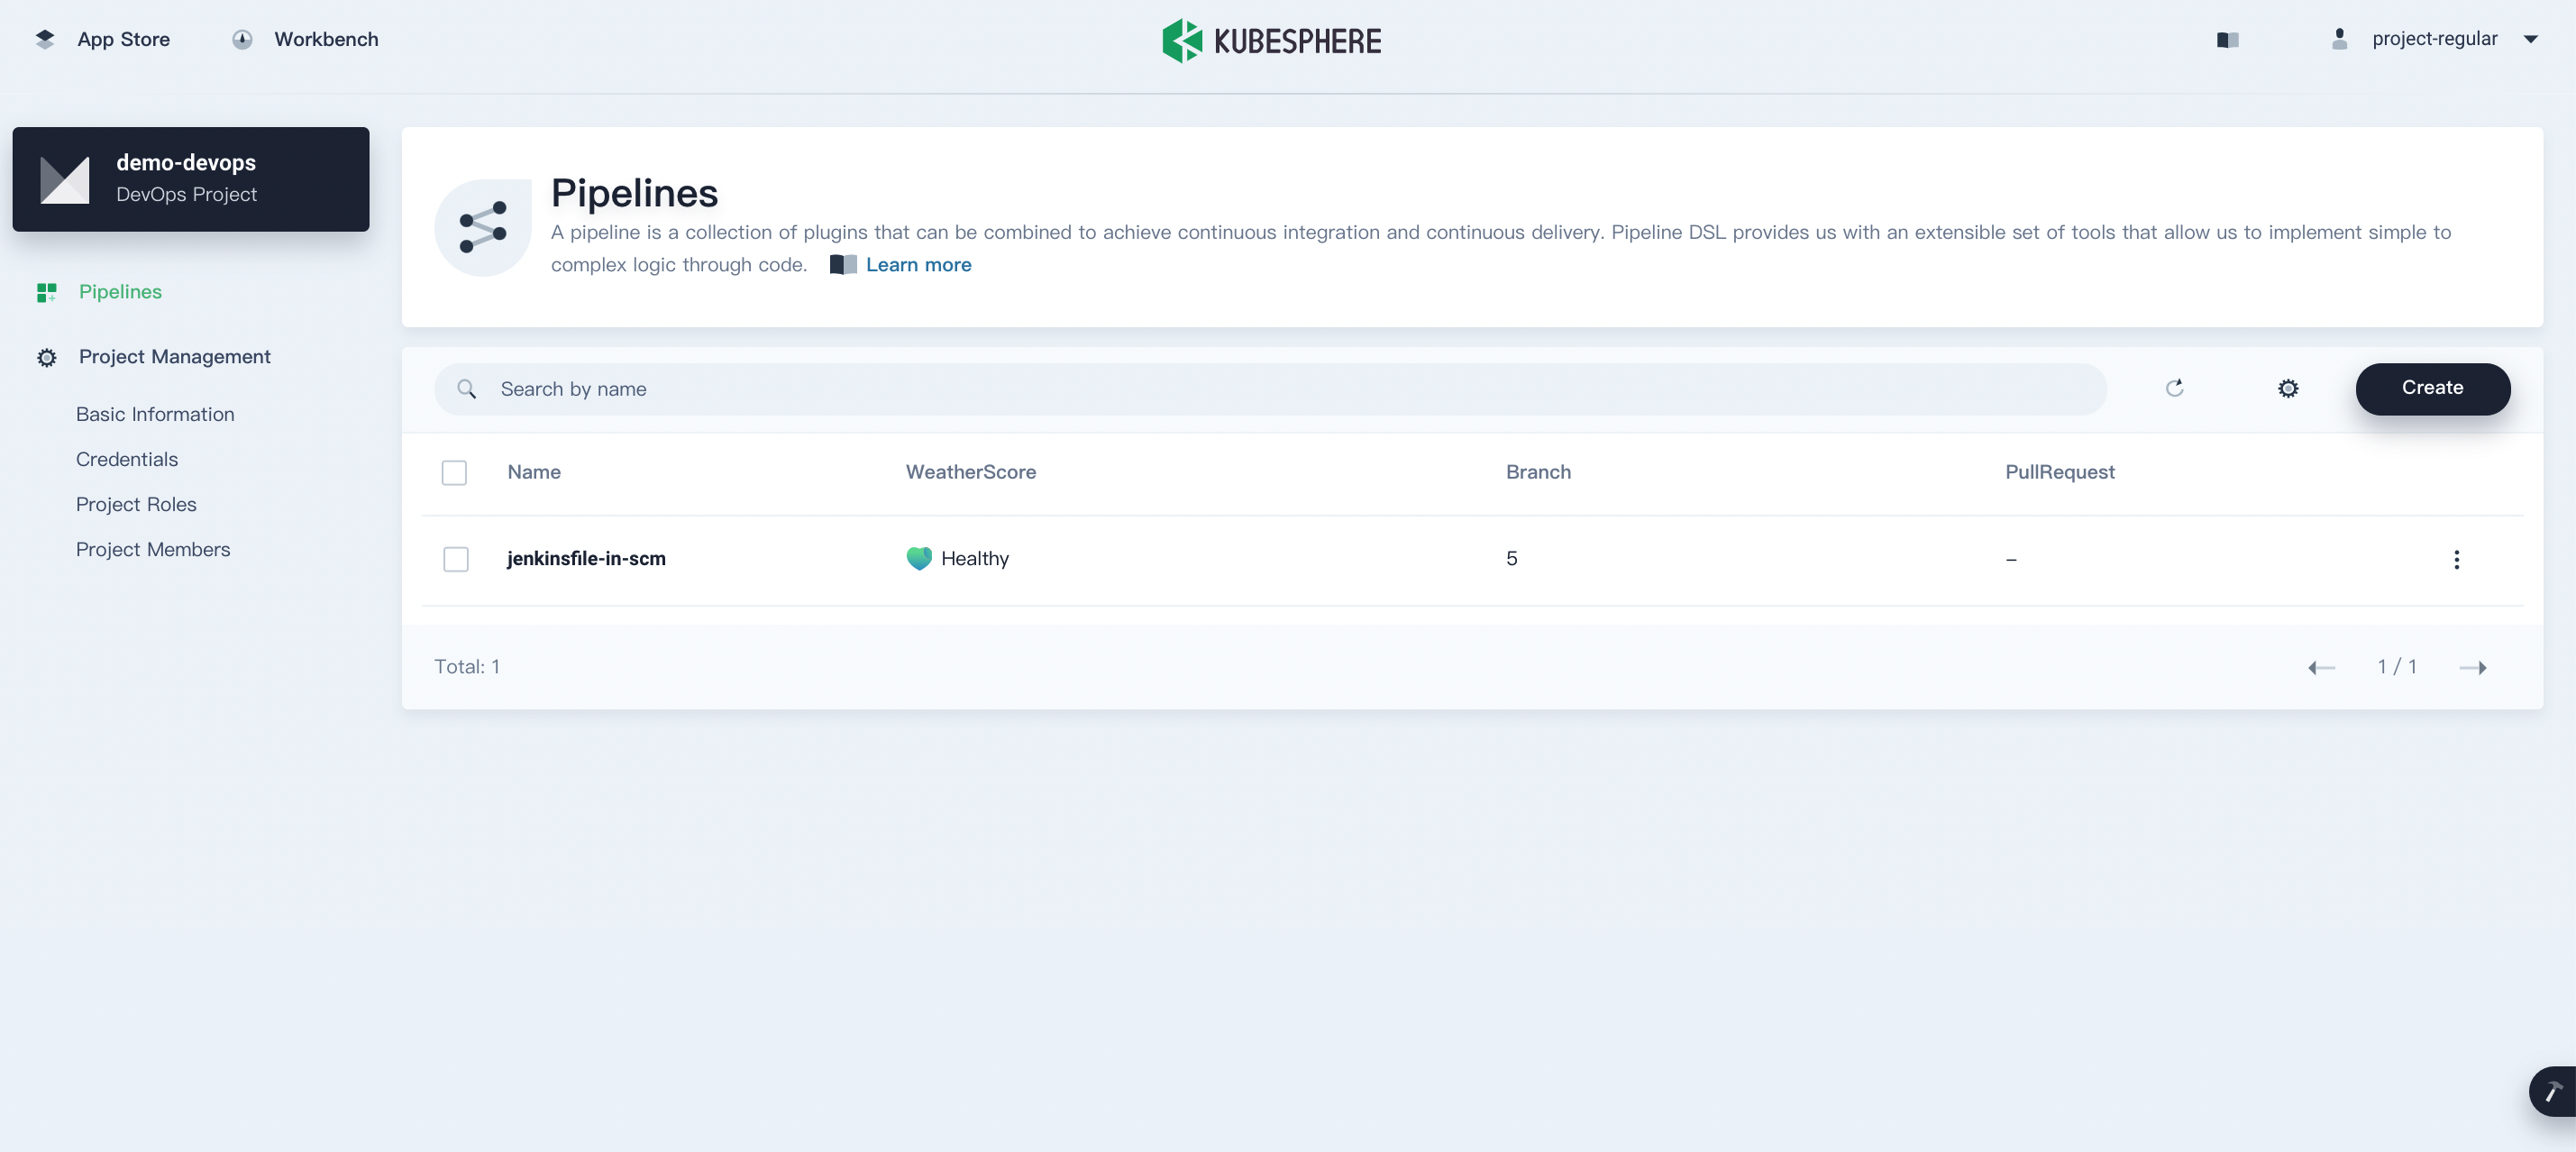
After a pipeline is created, it displays in the list below. Click it to go to its detail page.
Note
- You can click the three dots on the right side of the pipeline and then select Copy Pipeline to create a copy of it. If you need to concurrently run multiple pipelines that don’t contain multiple branches, you can select all of these pipelines and then click Run to run them in a batch.
- The pipeline detail page shows Sync Status. It reflects the synchronization result between KubeSphere and Jenkins, and you can see the Success icon if the synchronization is successful.
-
Under Activity, three branches are being scanned. Click Run on the right and the pipeline runs based on the behavioral strategy you set. Select sonarqube from the drop-down list and add a tag number such as
v0.0.2. Click OK to trigger a new activity.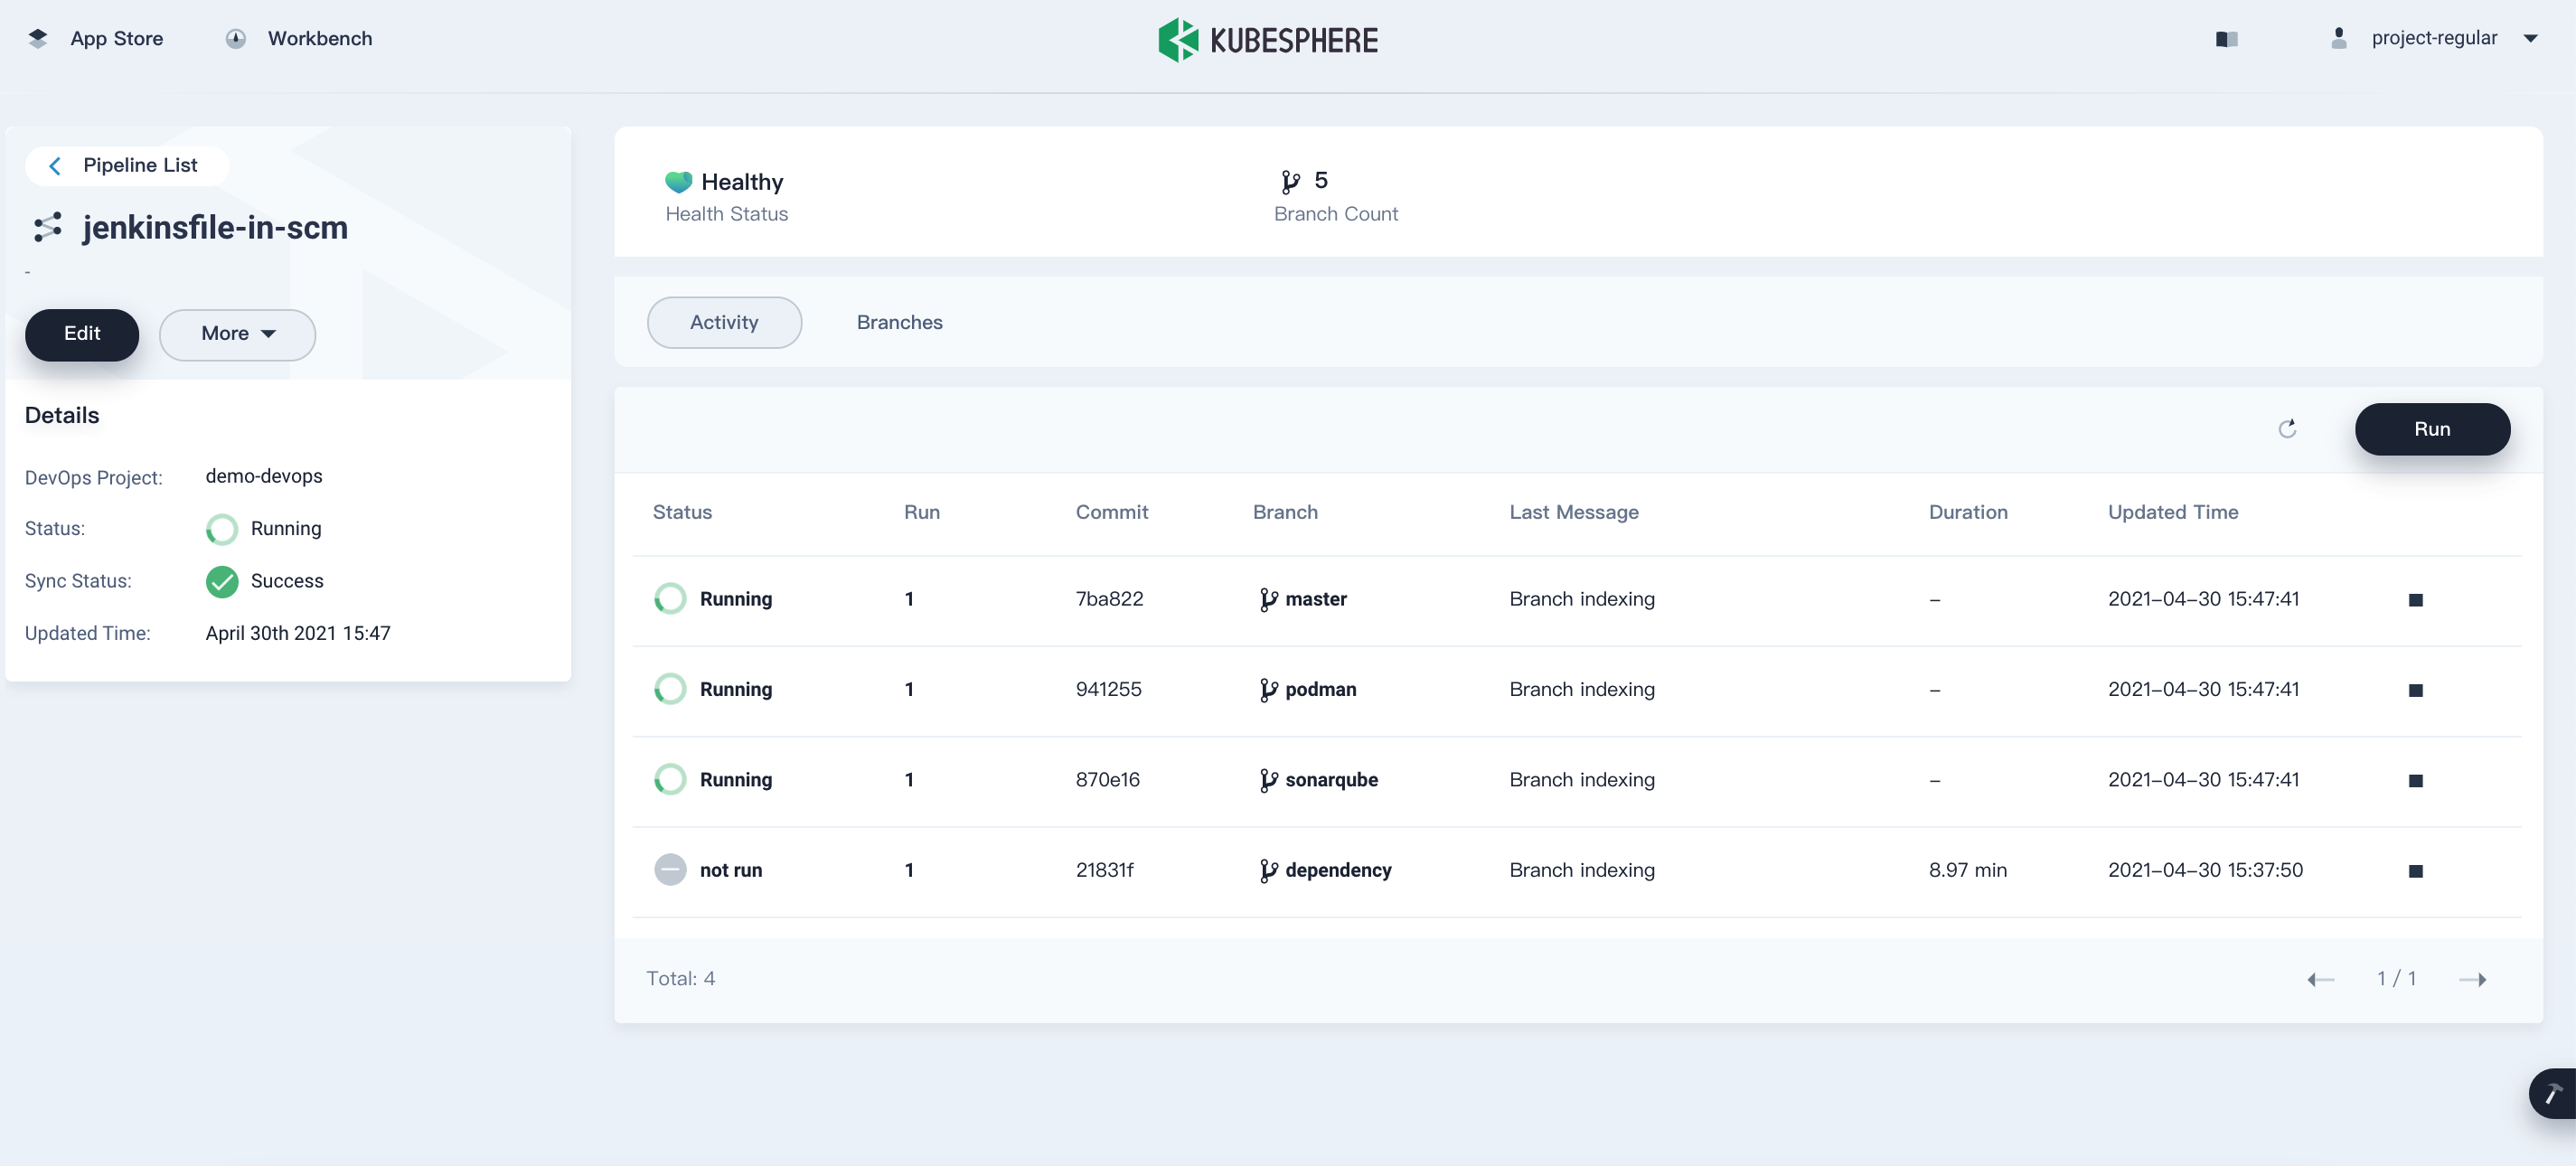
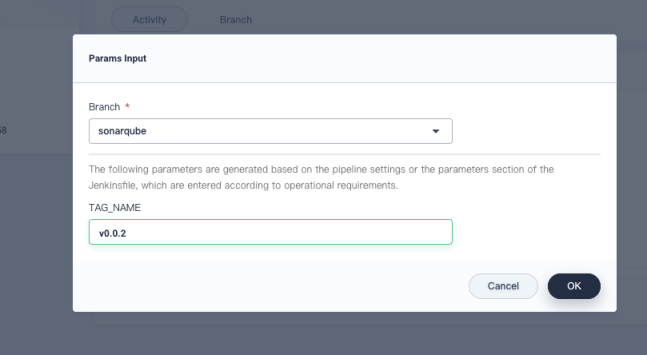
Note
- If you do not see any activity on this page, you need to refresh your browser manually or click Scan Repository from the drop-down menu (the More button).
- The tag name is used to generate releases and images with the tag in GitHub and Docker Hub. An existing tag name cannot be used again for the field
TAG_NAME. Otherwise, the pipeline will not be running successfully.
-
Wait for a while and you can see some activities stop and some fail. Click the first one to view details.
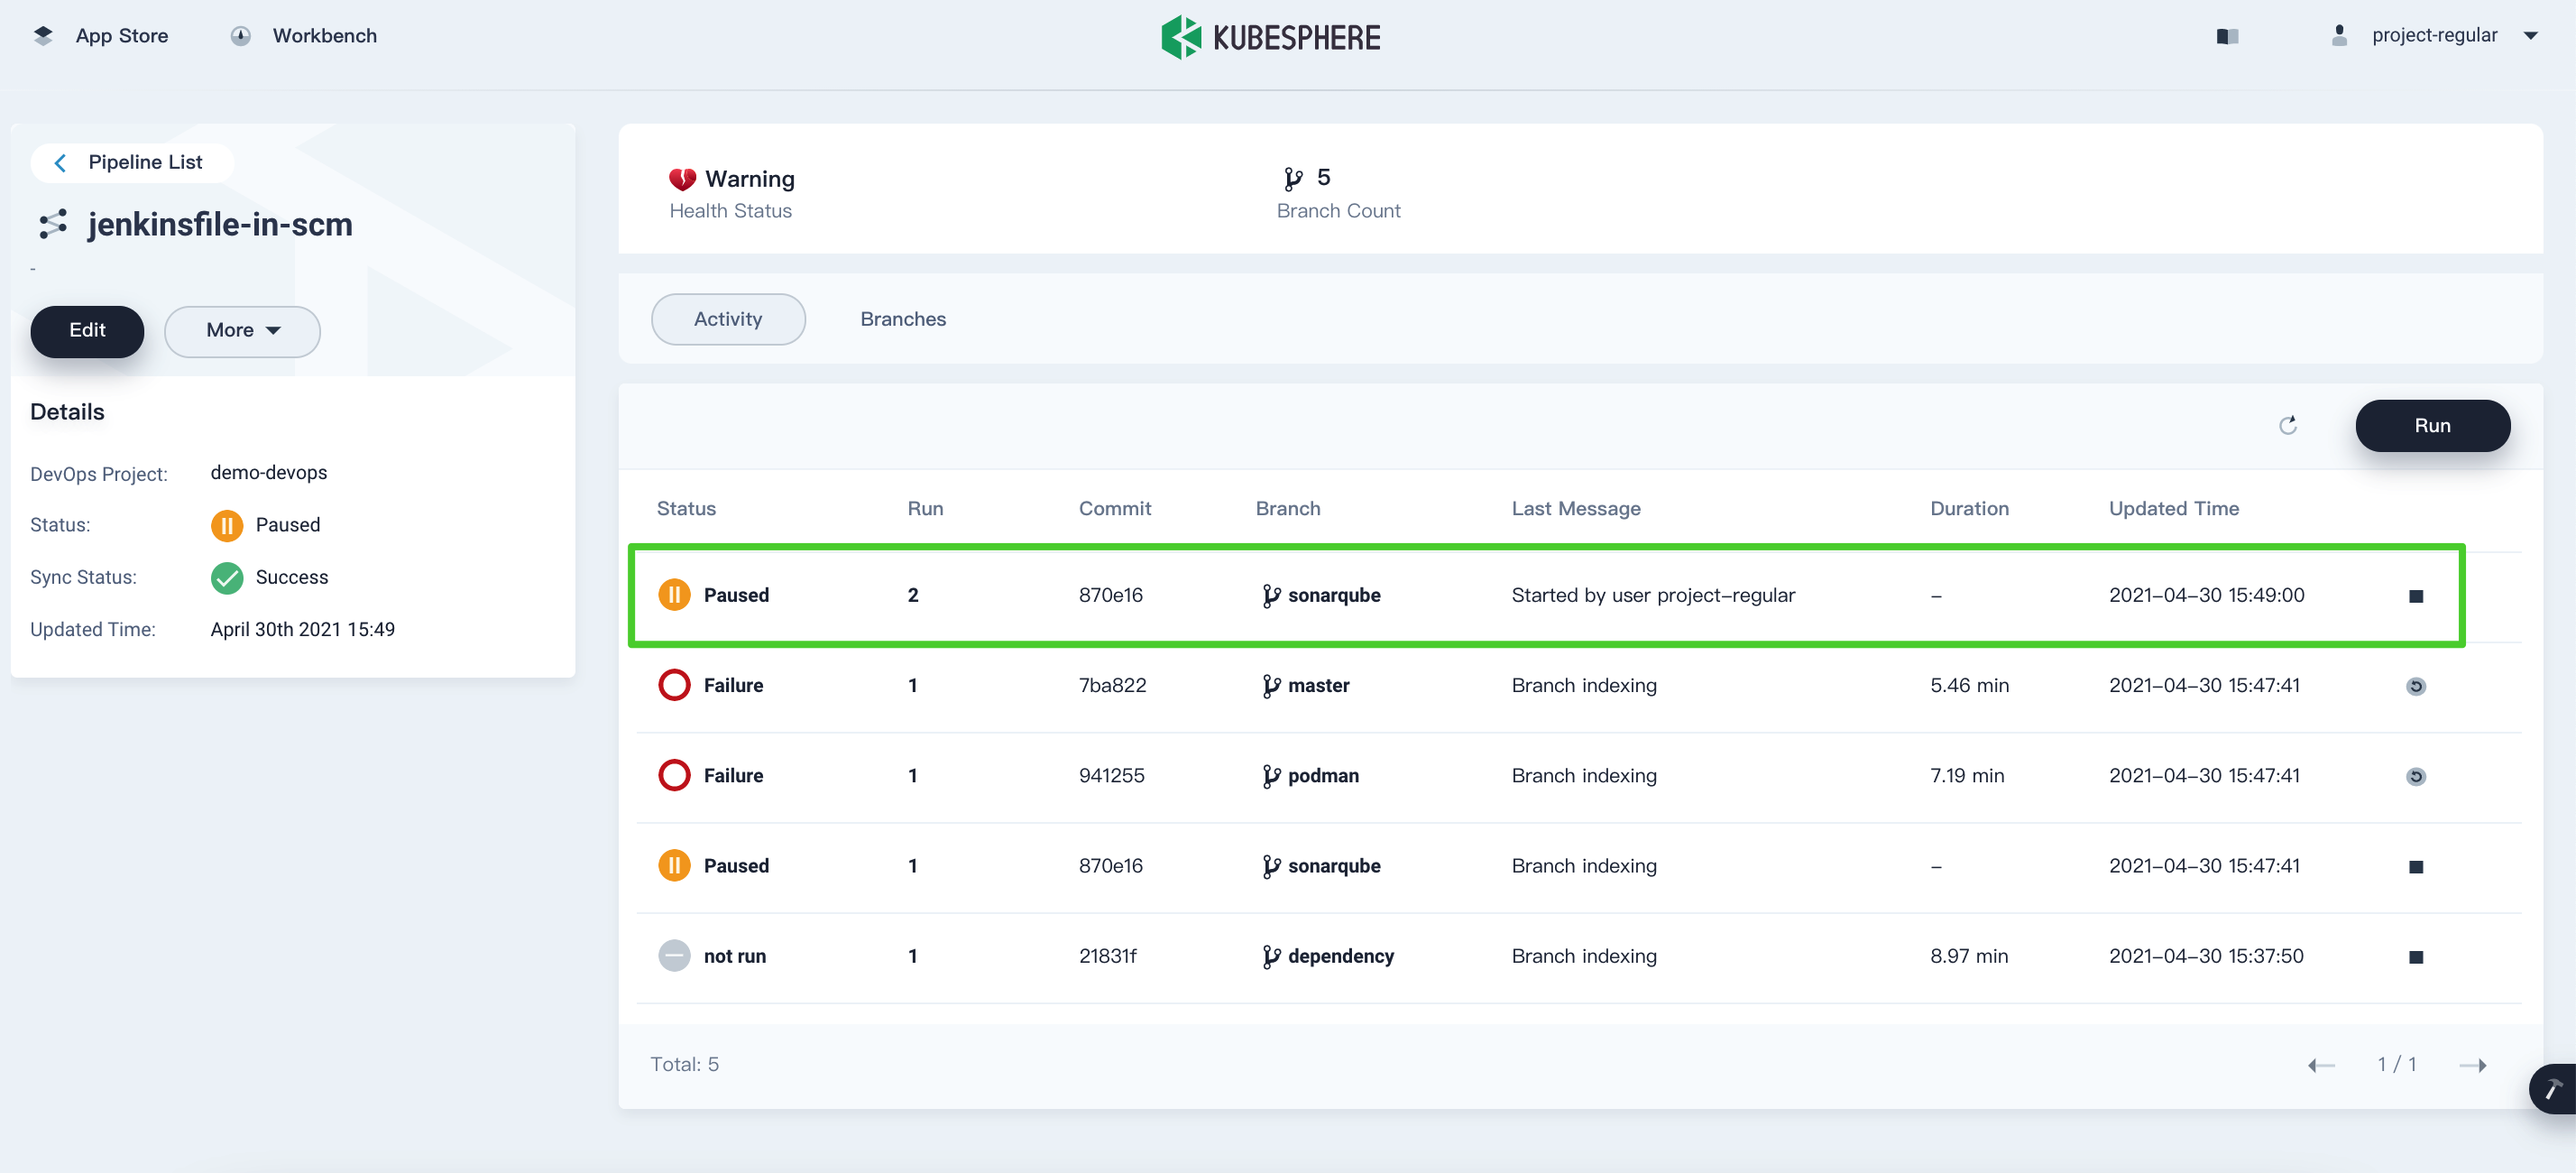
Note
Activity failures may be caused by different factors. In this example, only the Jenkinsfile of the branch sonarqube is changed as you edit the environment variables in it in the steps above. On the contrary, these variables in the dependency and master branch remain changed (namely, wrong GitHub and Docker Hub account), resulting in the failure. You can click it and inspect its logs to see details. Other reasons for failures may be network issues, incorrect coding in the Jenkinsfile and so on. -
The pipeline pauses at the stage
deploy to dev. You need to click Proceed manually. Note that the pipeline will be reviewed three times asdeploy to dev,push with tag, anddeploy to productionare defined in the Jenkinsfile respectively.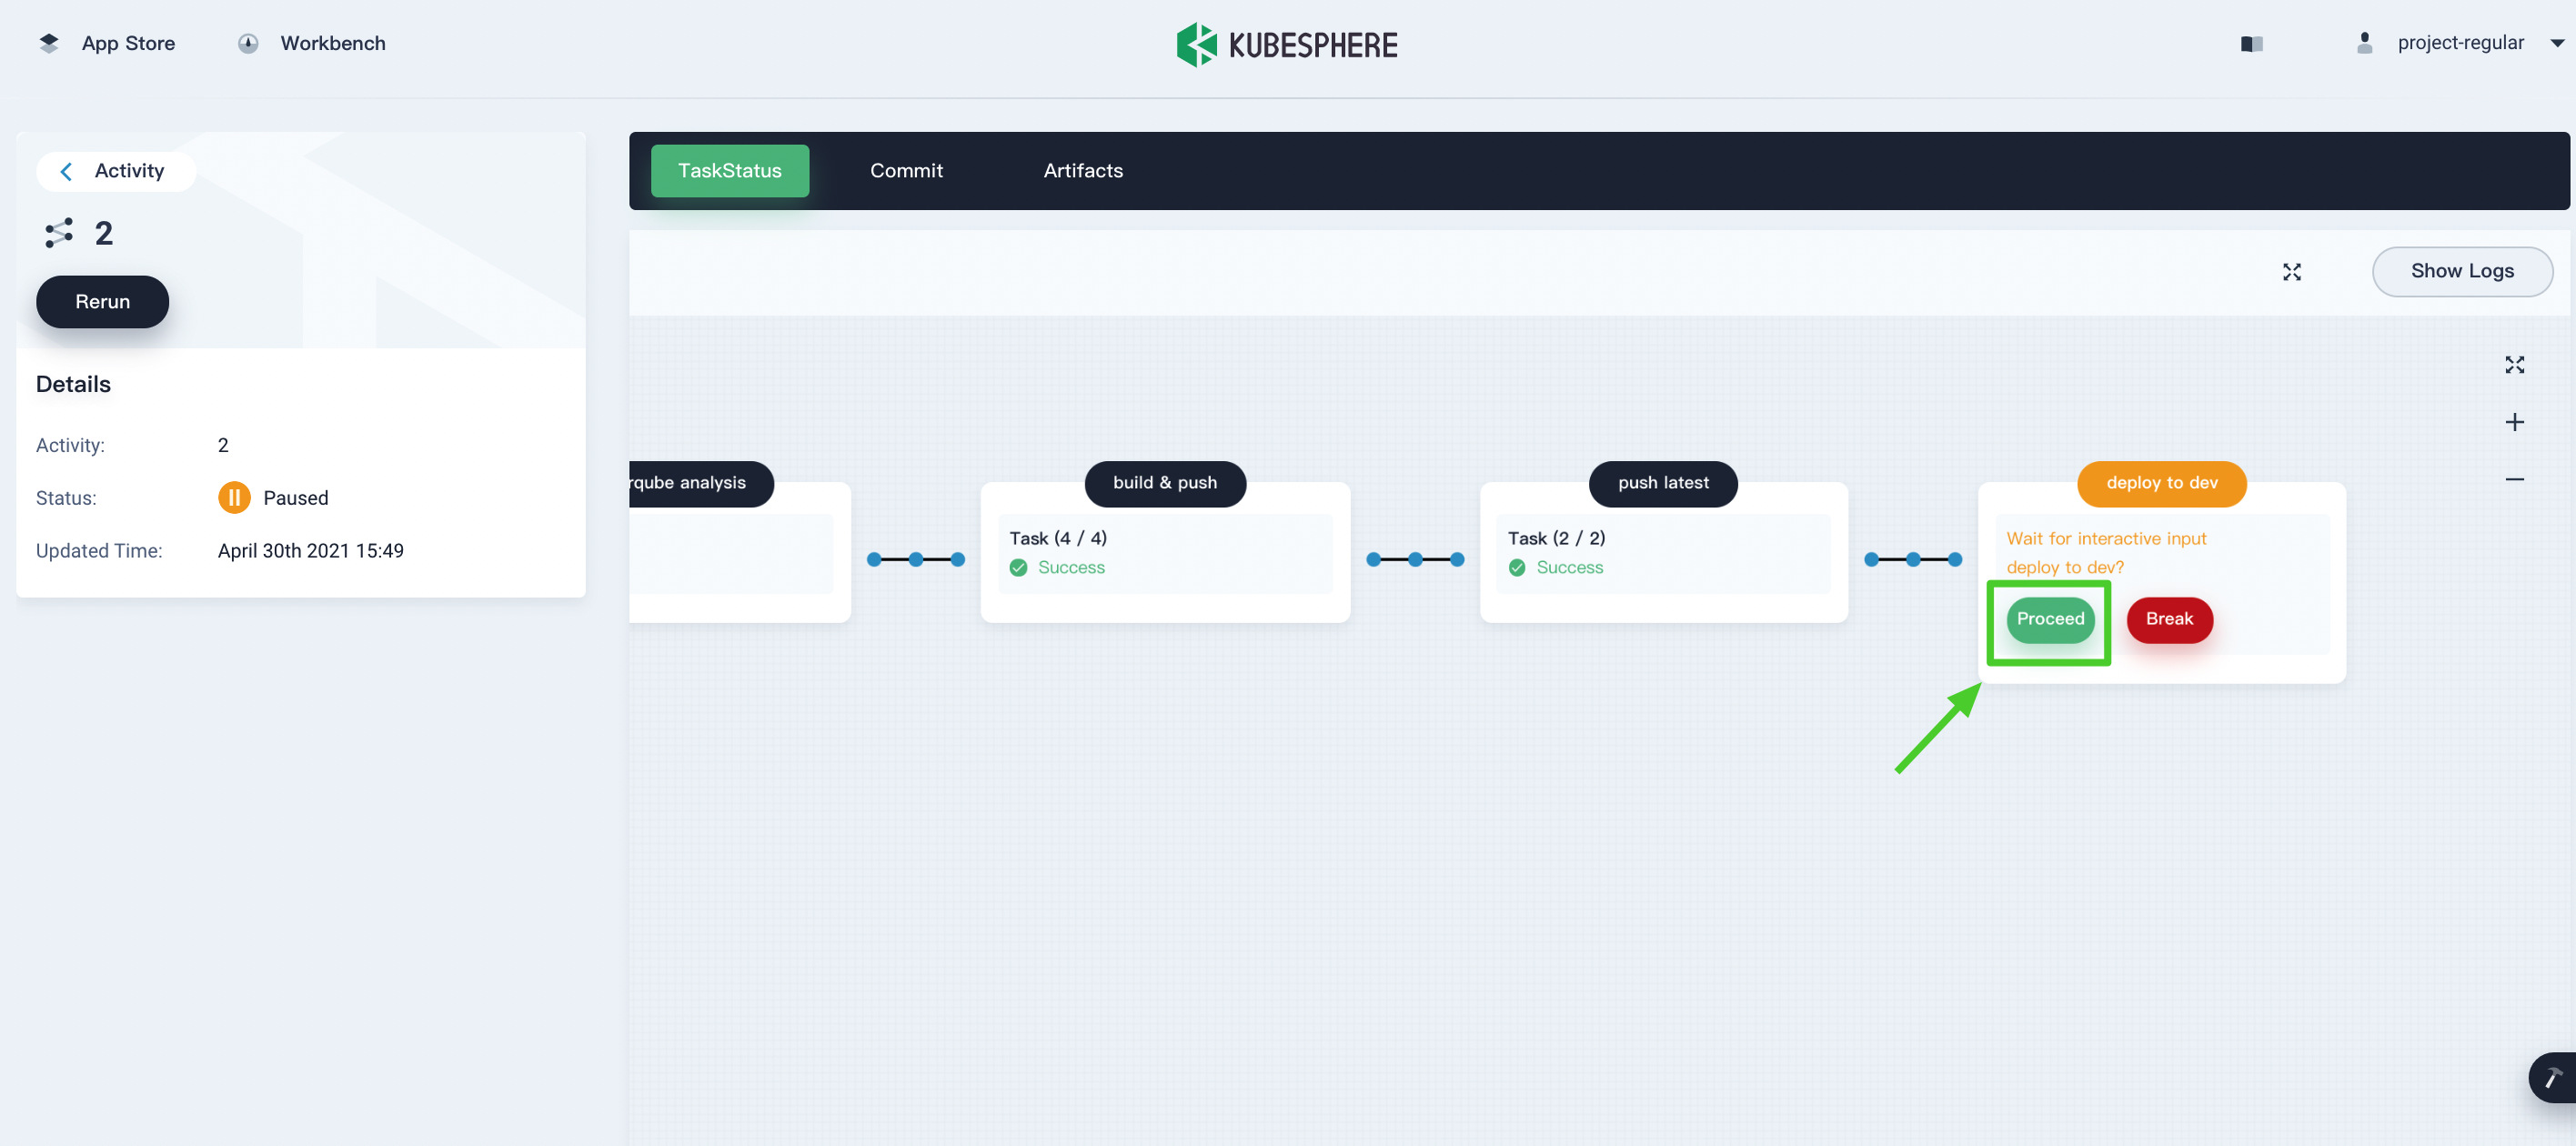
In a development or production environment, it requires someone who has higher authority (for example, release manager) to review the pipeline, images, as well as the code analysis result. They have the authority to determine whether the pipeline can go to the next stage. In the Jenkinsfile, you use the section
inputto specify who reviews the pipeline. If you want to specify a user (for example,project-admin) to review it, you can add a field in the Jenkinsfile. If there are multiple users, you need to use commas to separate them as follows:··· input(id: 'release-image-with-tag', message: 'release image with tag?', submitter: 'project-admin,project-admin1') ···Note
In KubeSphere v3.1, the account that can run a pipeline will be able to continue or terminate the pipeline if there is no reviewer specified. Pipeline creators, accounts with the role ofadminin the project, or the account you specify will be able to continue or terminate the pipeline.
Step 6: Check pipeline status
-
In Task Status, you can see how a pipeline is running. Please note that the pipeline will keep initializing for several minutes after it is just created. There are eight stages in the sample pipeline and they have been defined separately in Jenkinsfile-online.
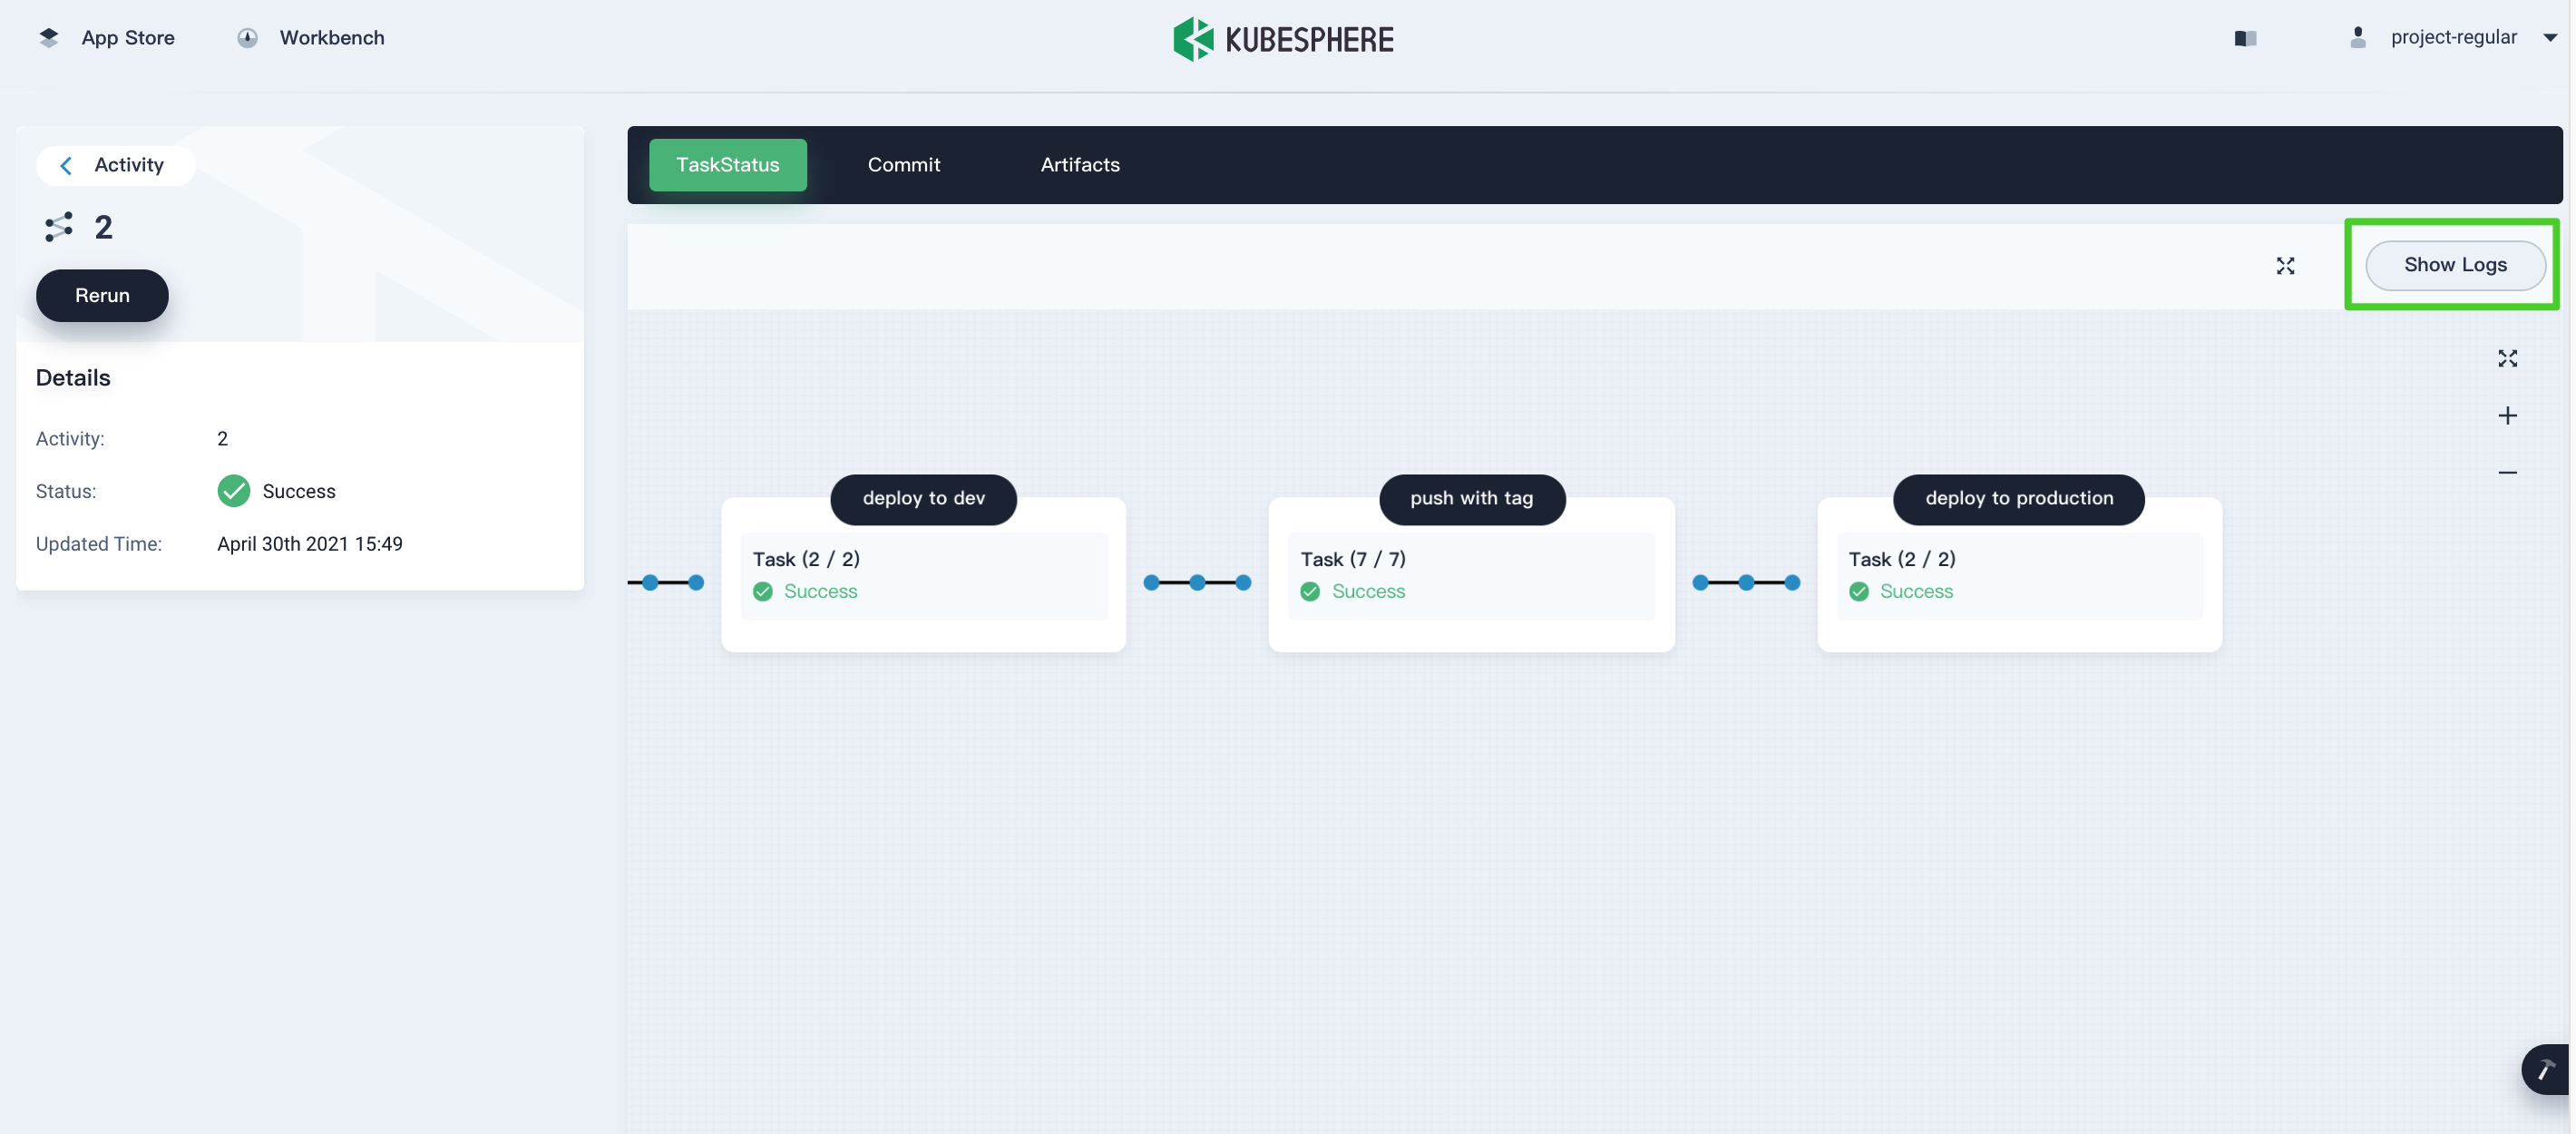
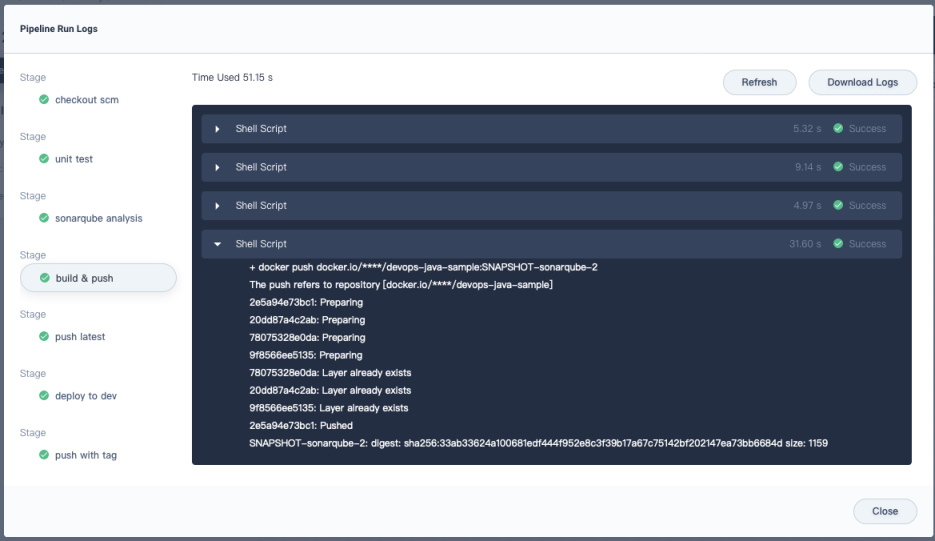
-
Check the pipeline running logs by clicking Show Logs in the top-right corner. You can see the dynamic log output of the pipeline, including any errors that may stop the pipeline from running. For each stage, you click it to inspect logs, which can be downloaded to your local machine for further analysis.
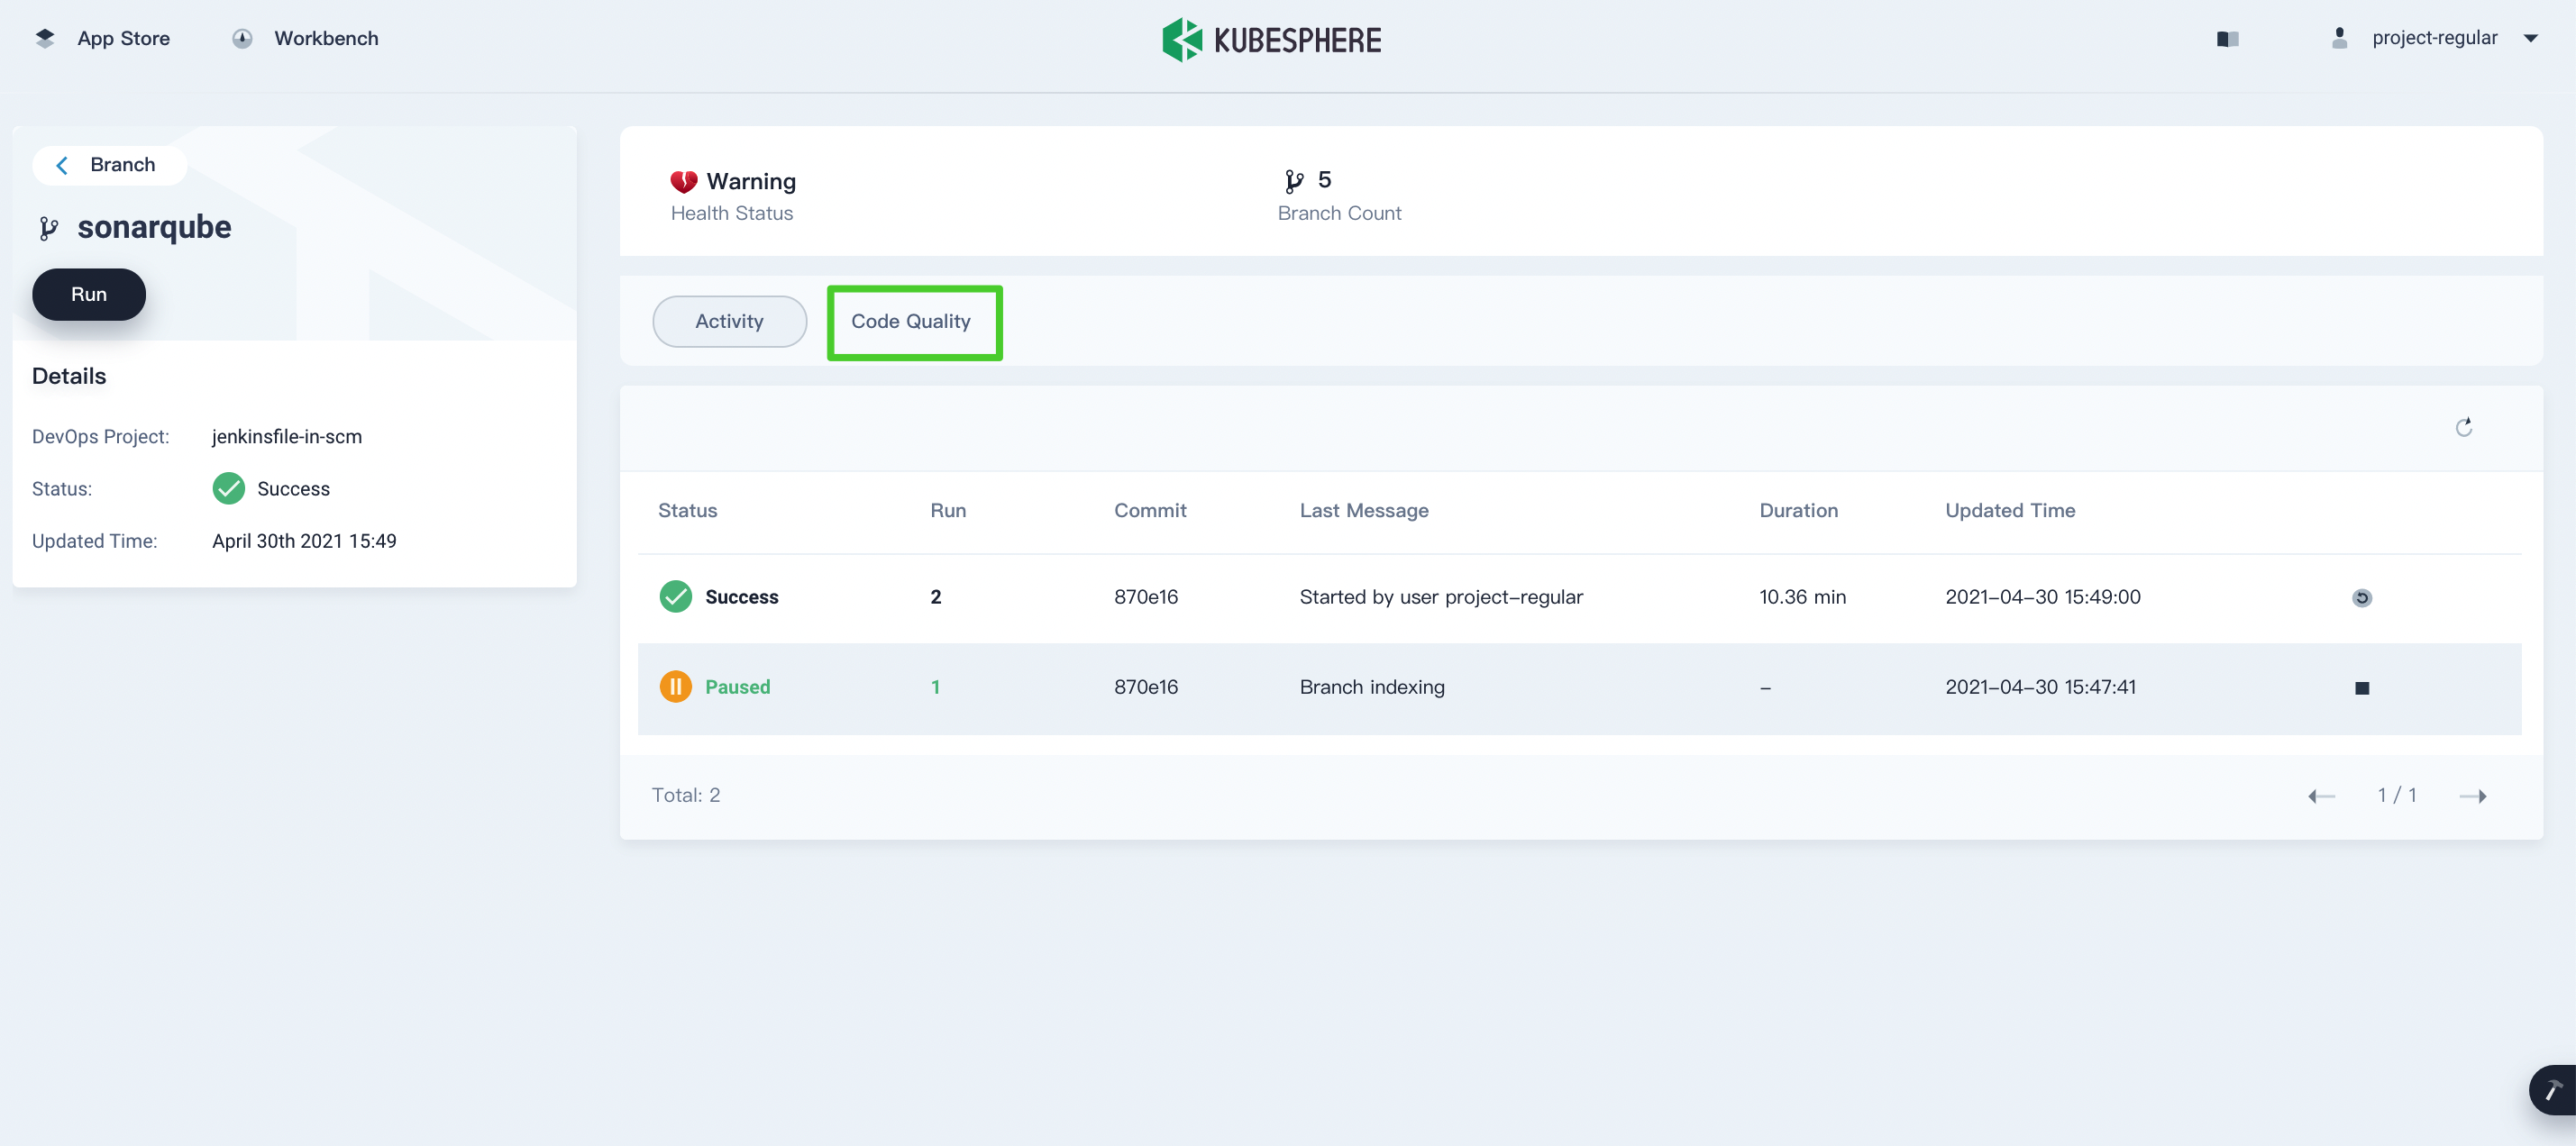
Step 7: Verify results
-
Once you successfully executed the pipeline, click Code Quality to check the results through SonarQube as follows.

-
The Docker image built through the pipeline has also been successfully pushed to Docker Hub, as it is defined in the Jenkinsfile. In Docker Hub, you will find the image with the tag
v0.0.2that is specified before the pipeline runs.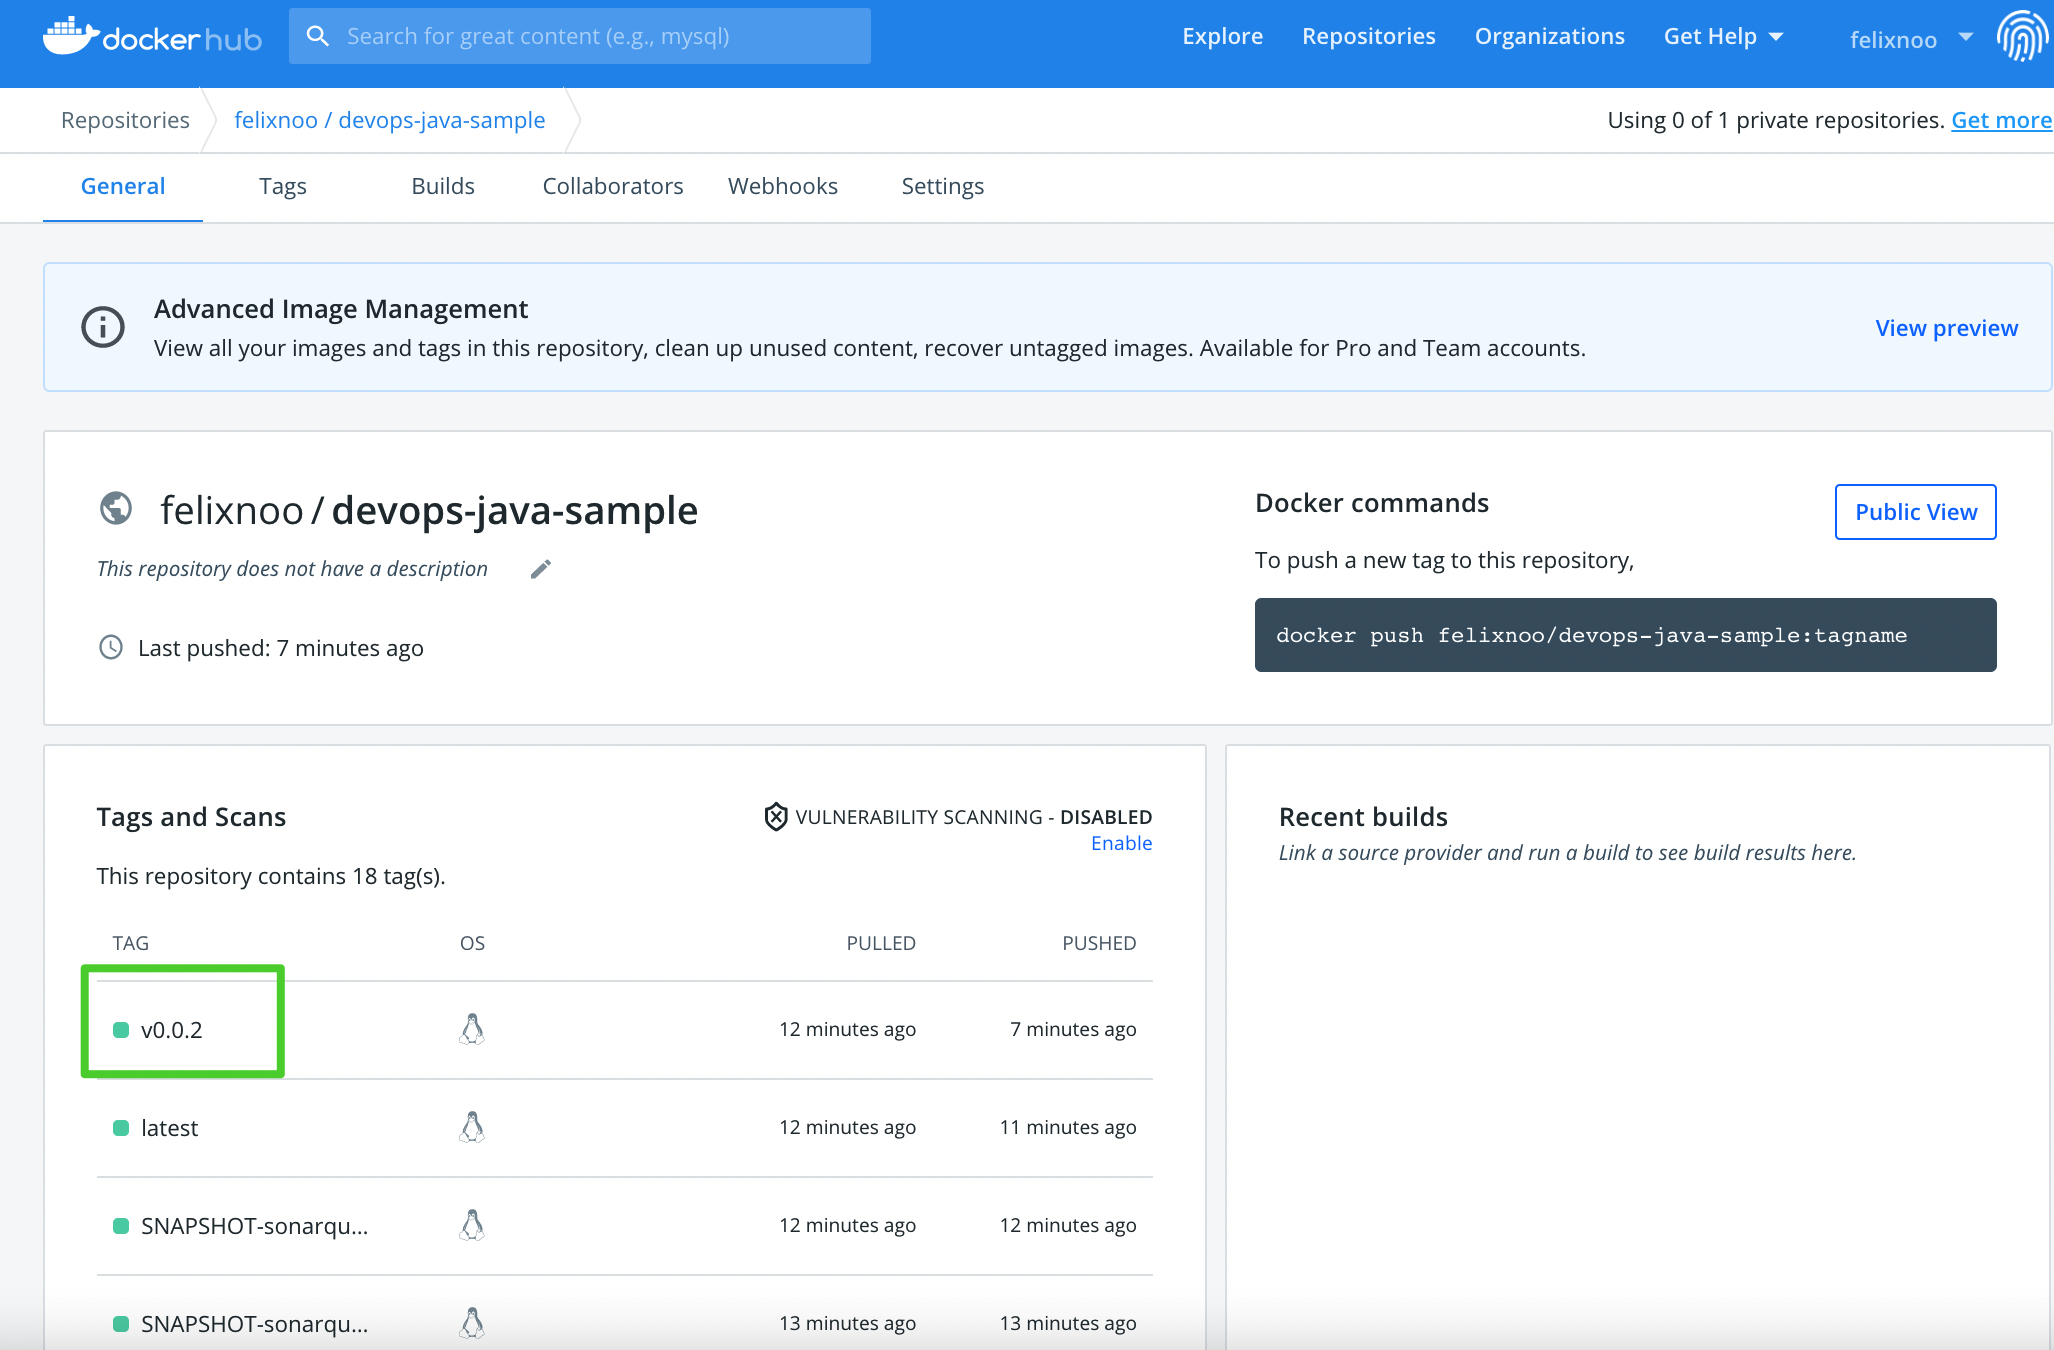
-
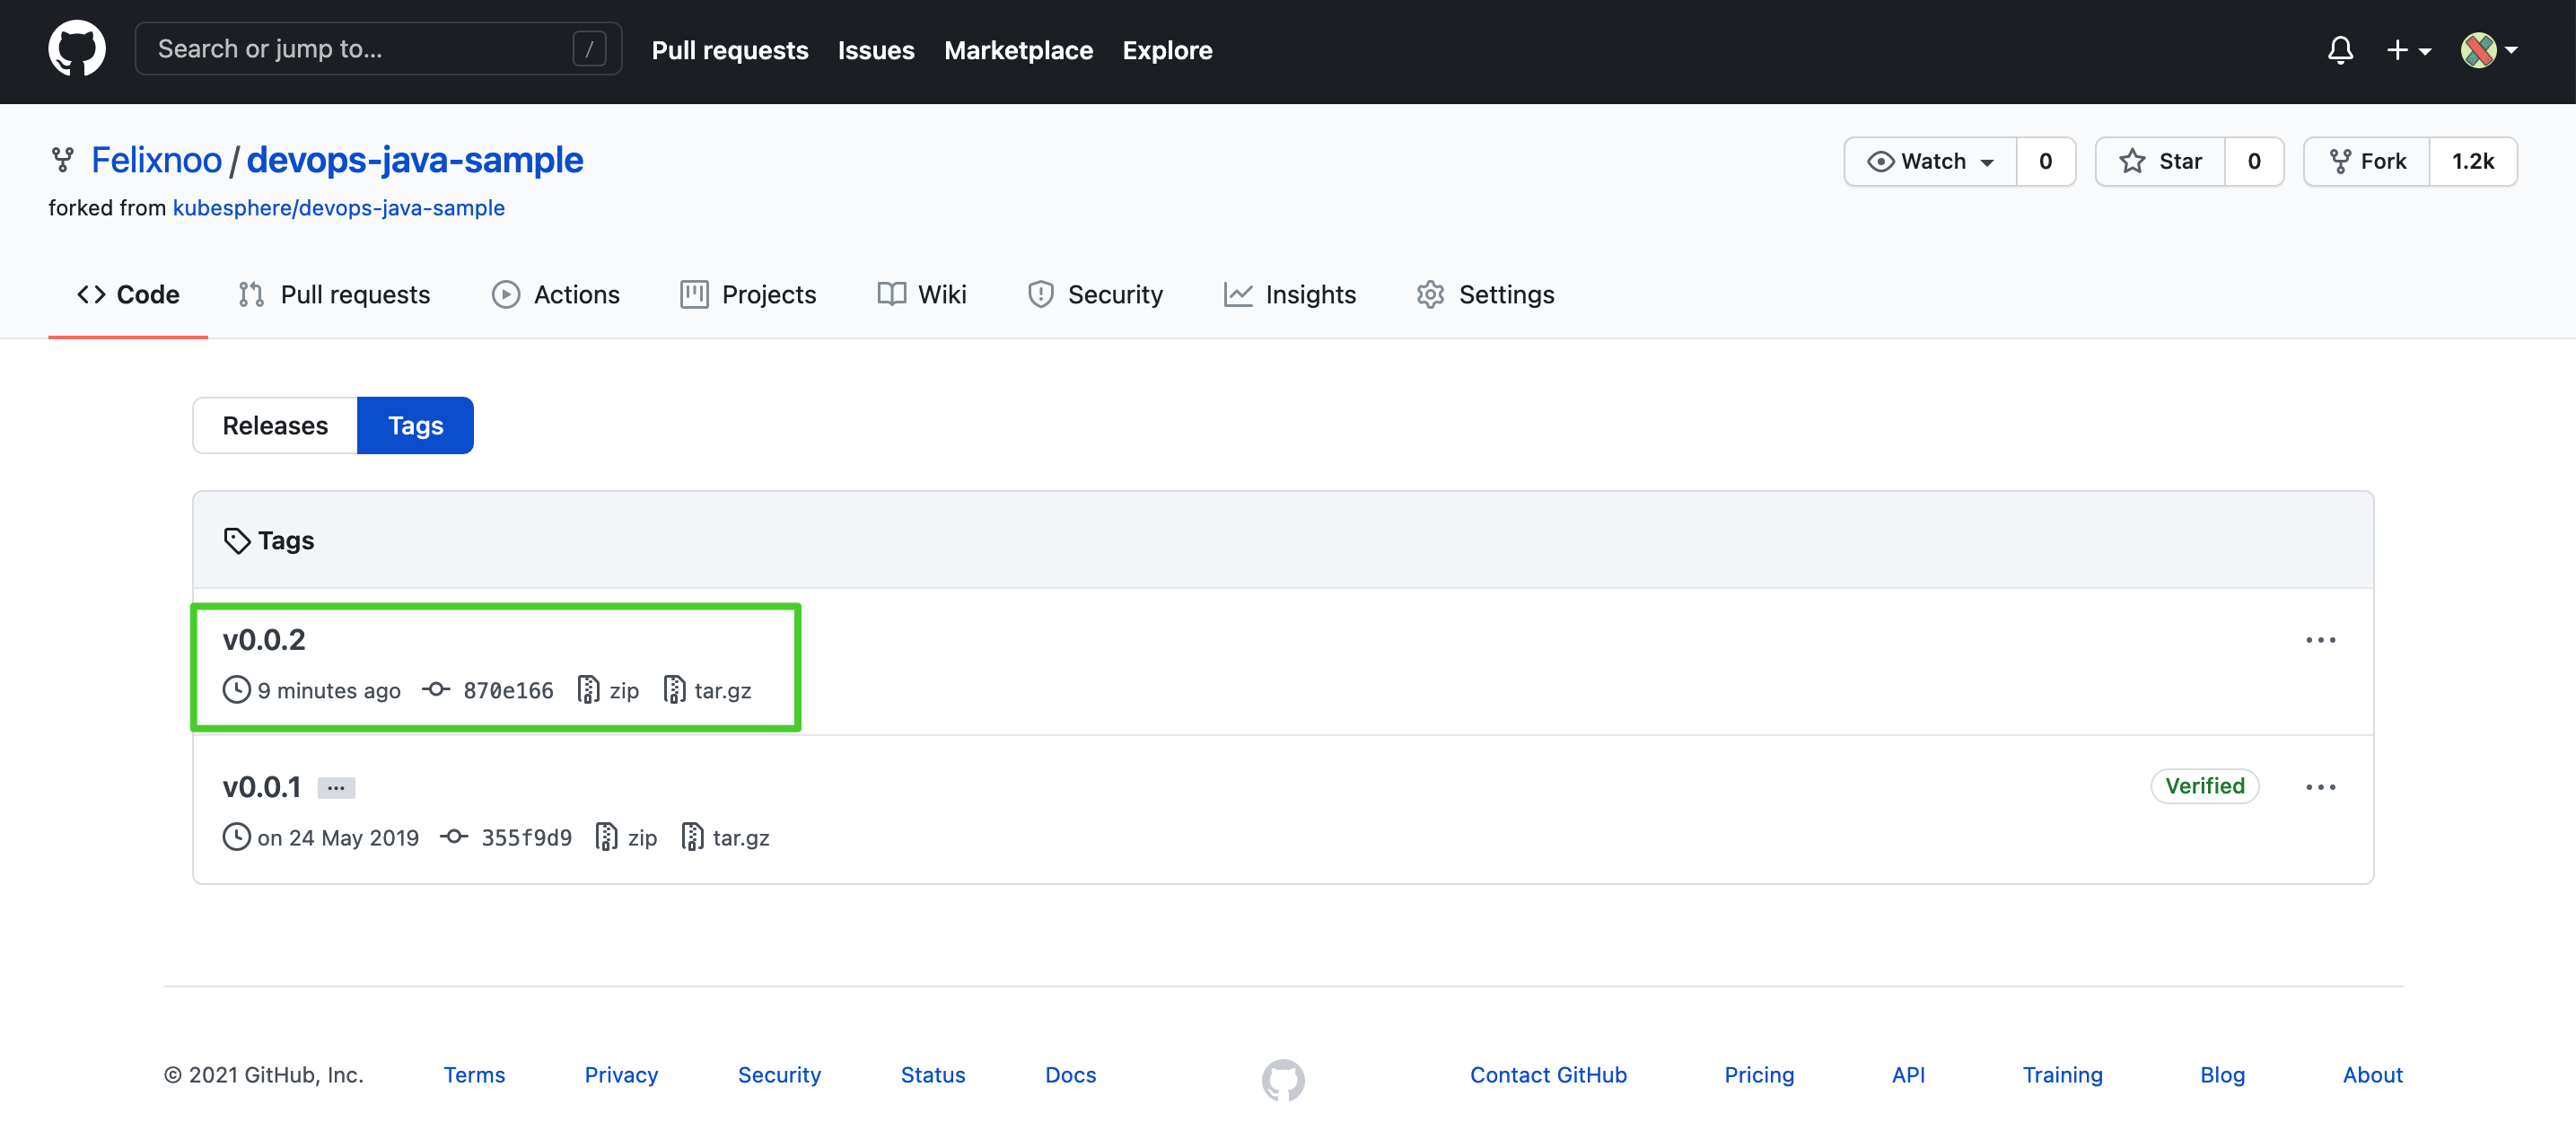
At the same time, a new tag and a new release have been generated in GitHub.
-
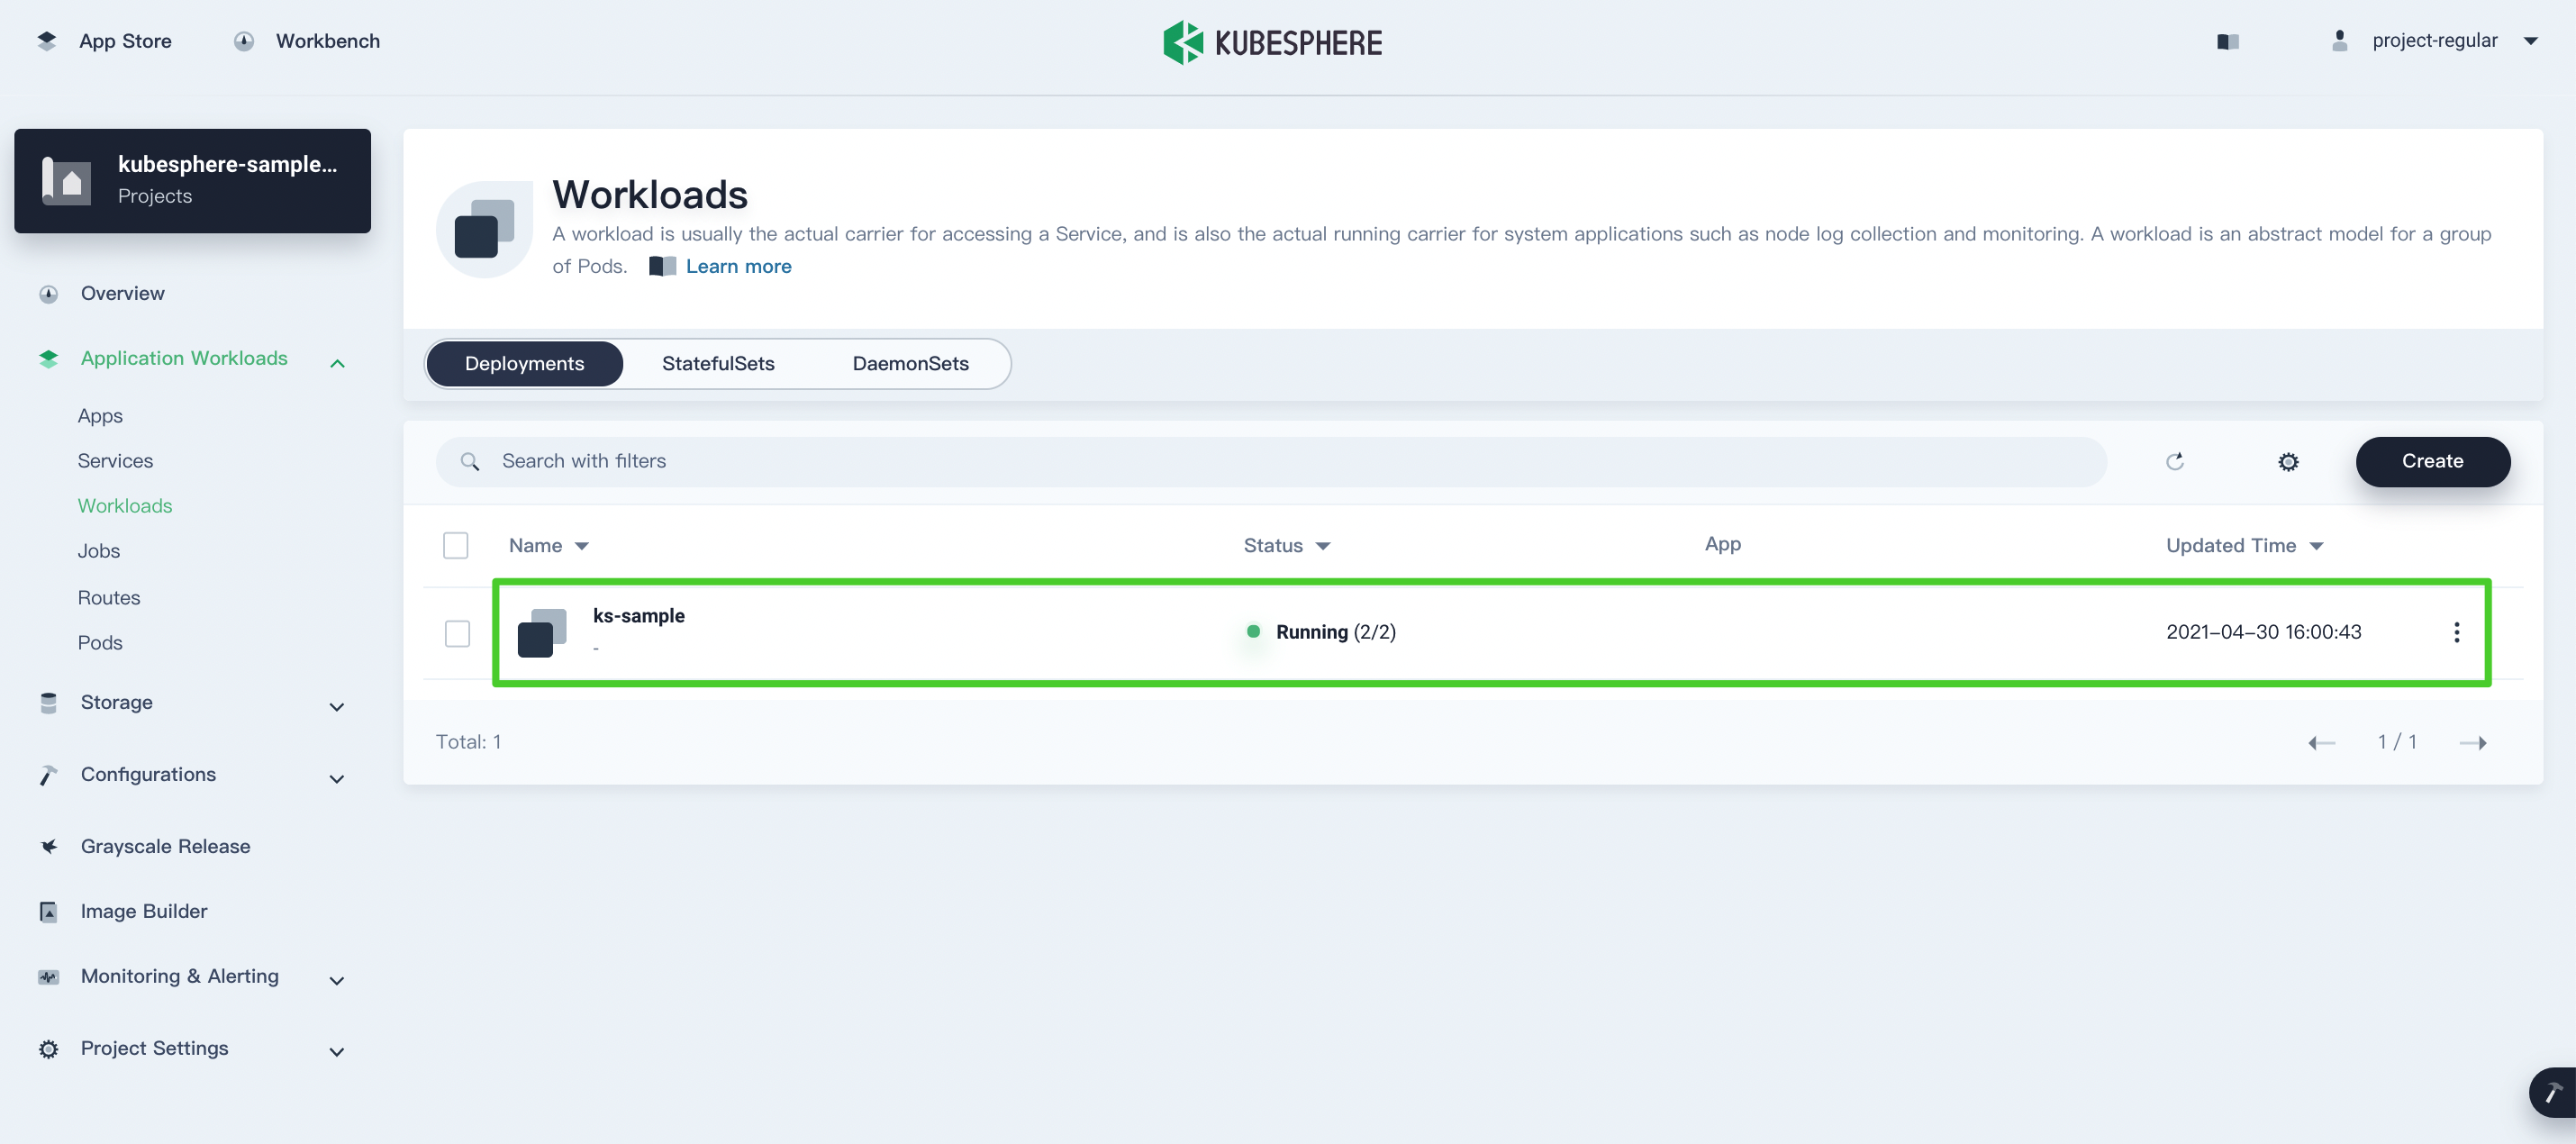
The sample application will be deployed to
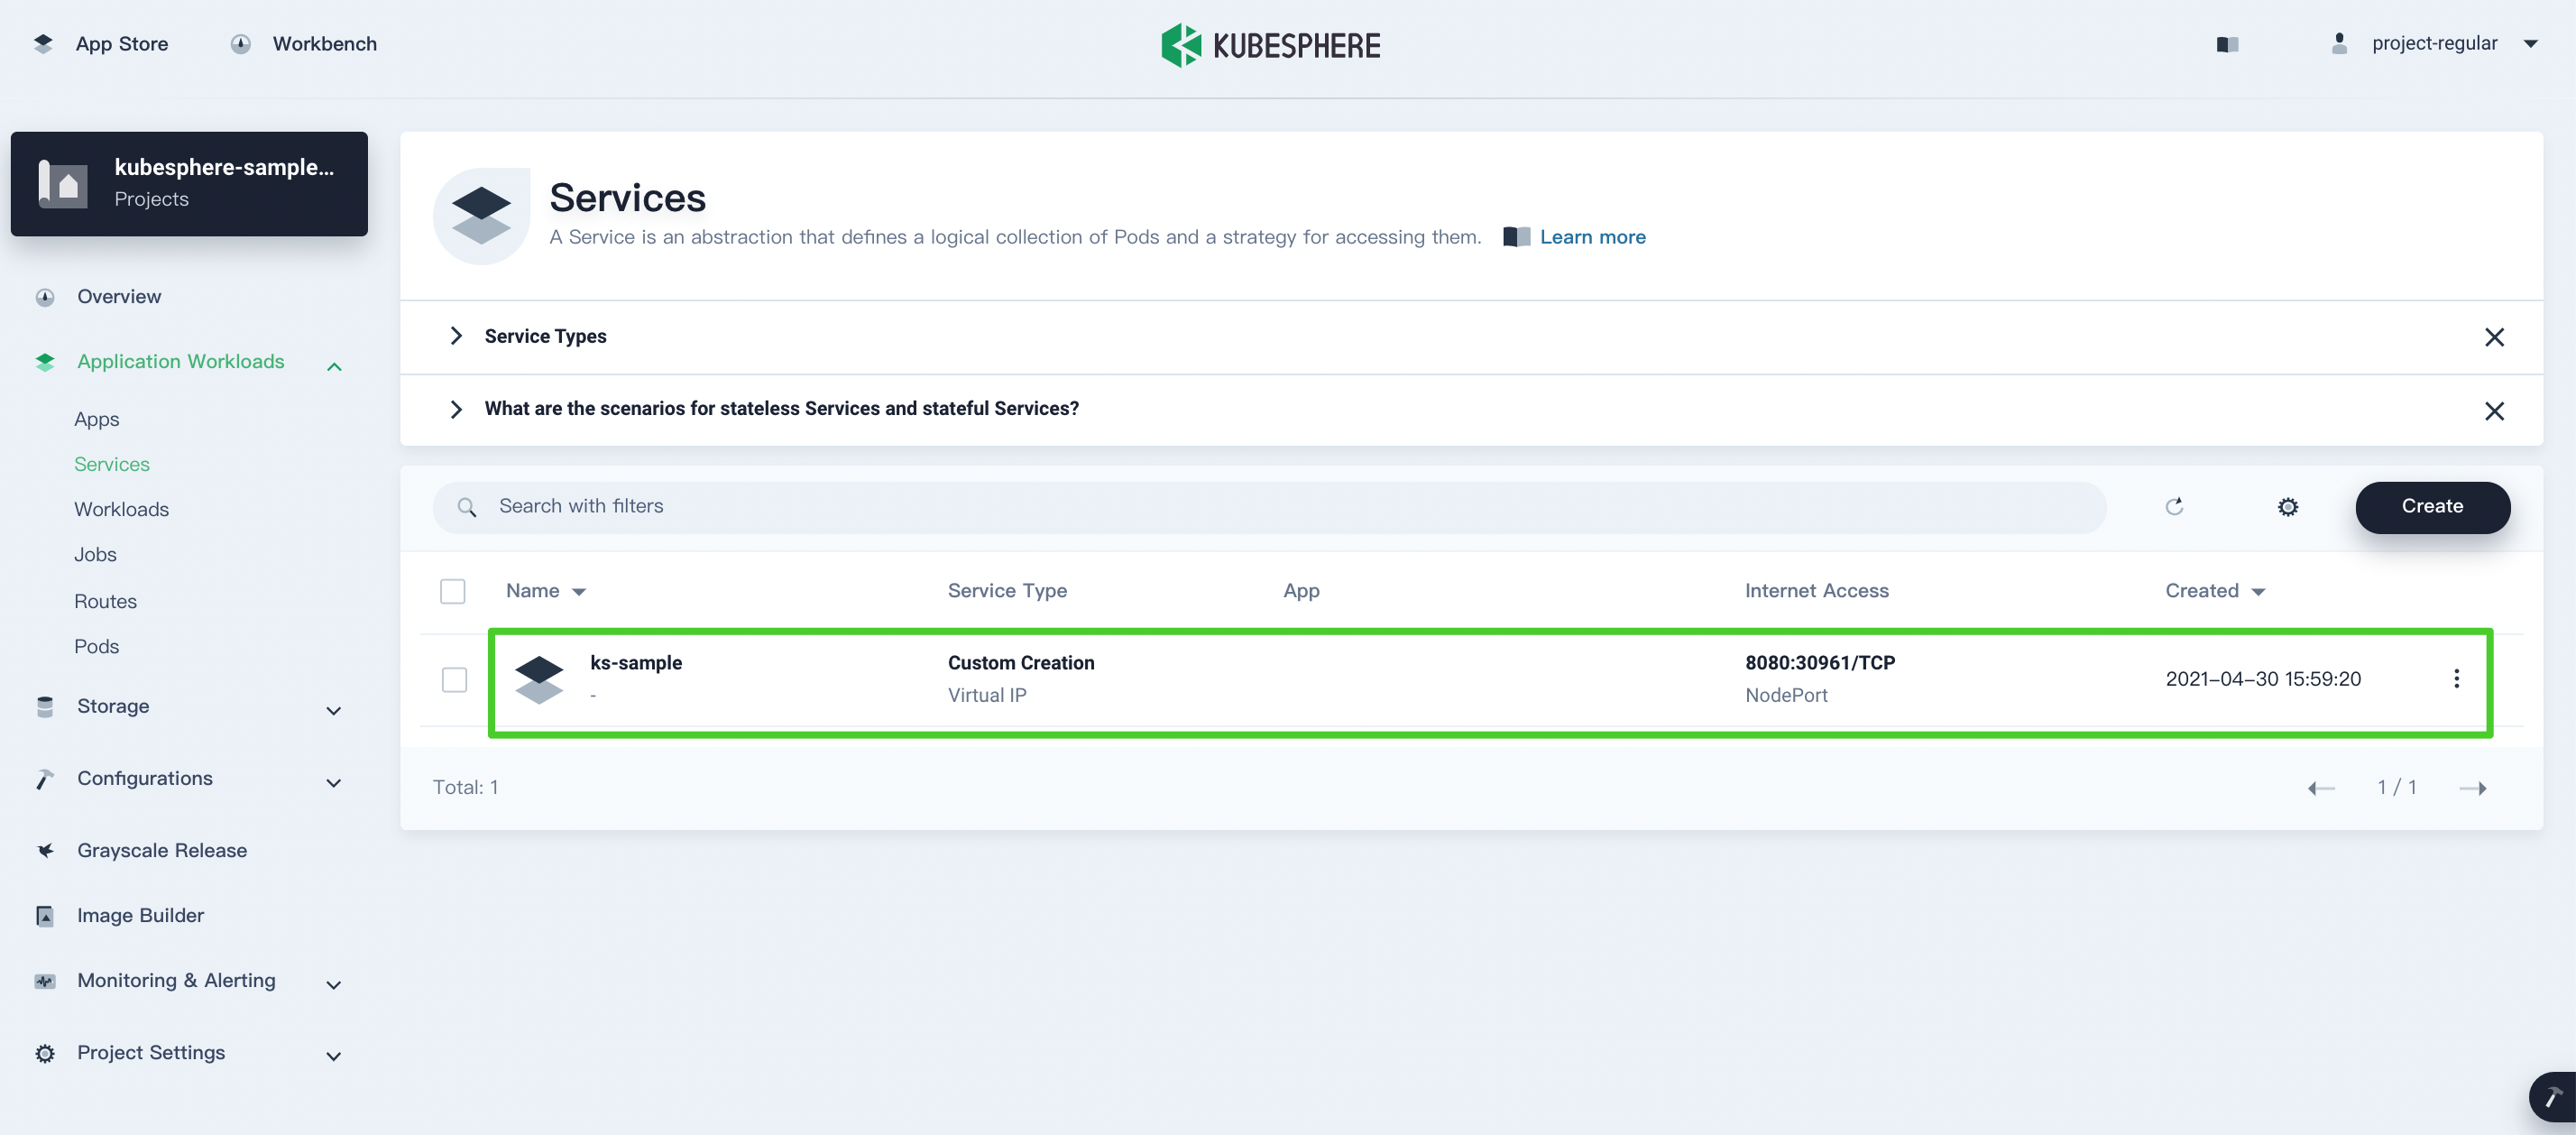
kubesphere-sample-devandkubesphere-sample-prodwith corresponding Deployments and Services created. Go to these two projects and here are the expected result:Environment URL Namespace Deployment Service Development http://{$NodeIP}:{$30861}kubesphere-sample-dev ks-sample-dev ks-sample-dev Production http://{$NodeIP}:{$30961}kubesphere-sample-prod ks-sample ks-sample Deployments
Services
Note
You may need to open the port in your security groups so that you can access the app with the URL.
Step 8: Access the example Service
-
To access the Service, log in to KubeSphere as
adminto use the web kubectl from Toolbox. Go to the projectkubesphere-sample-dev, and selectks-sample-devin Services under Application Workloads. The endpoint can be used to access the Service.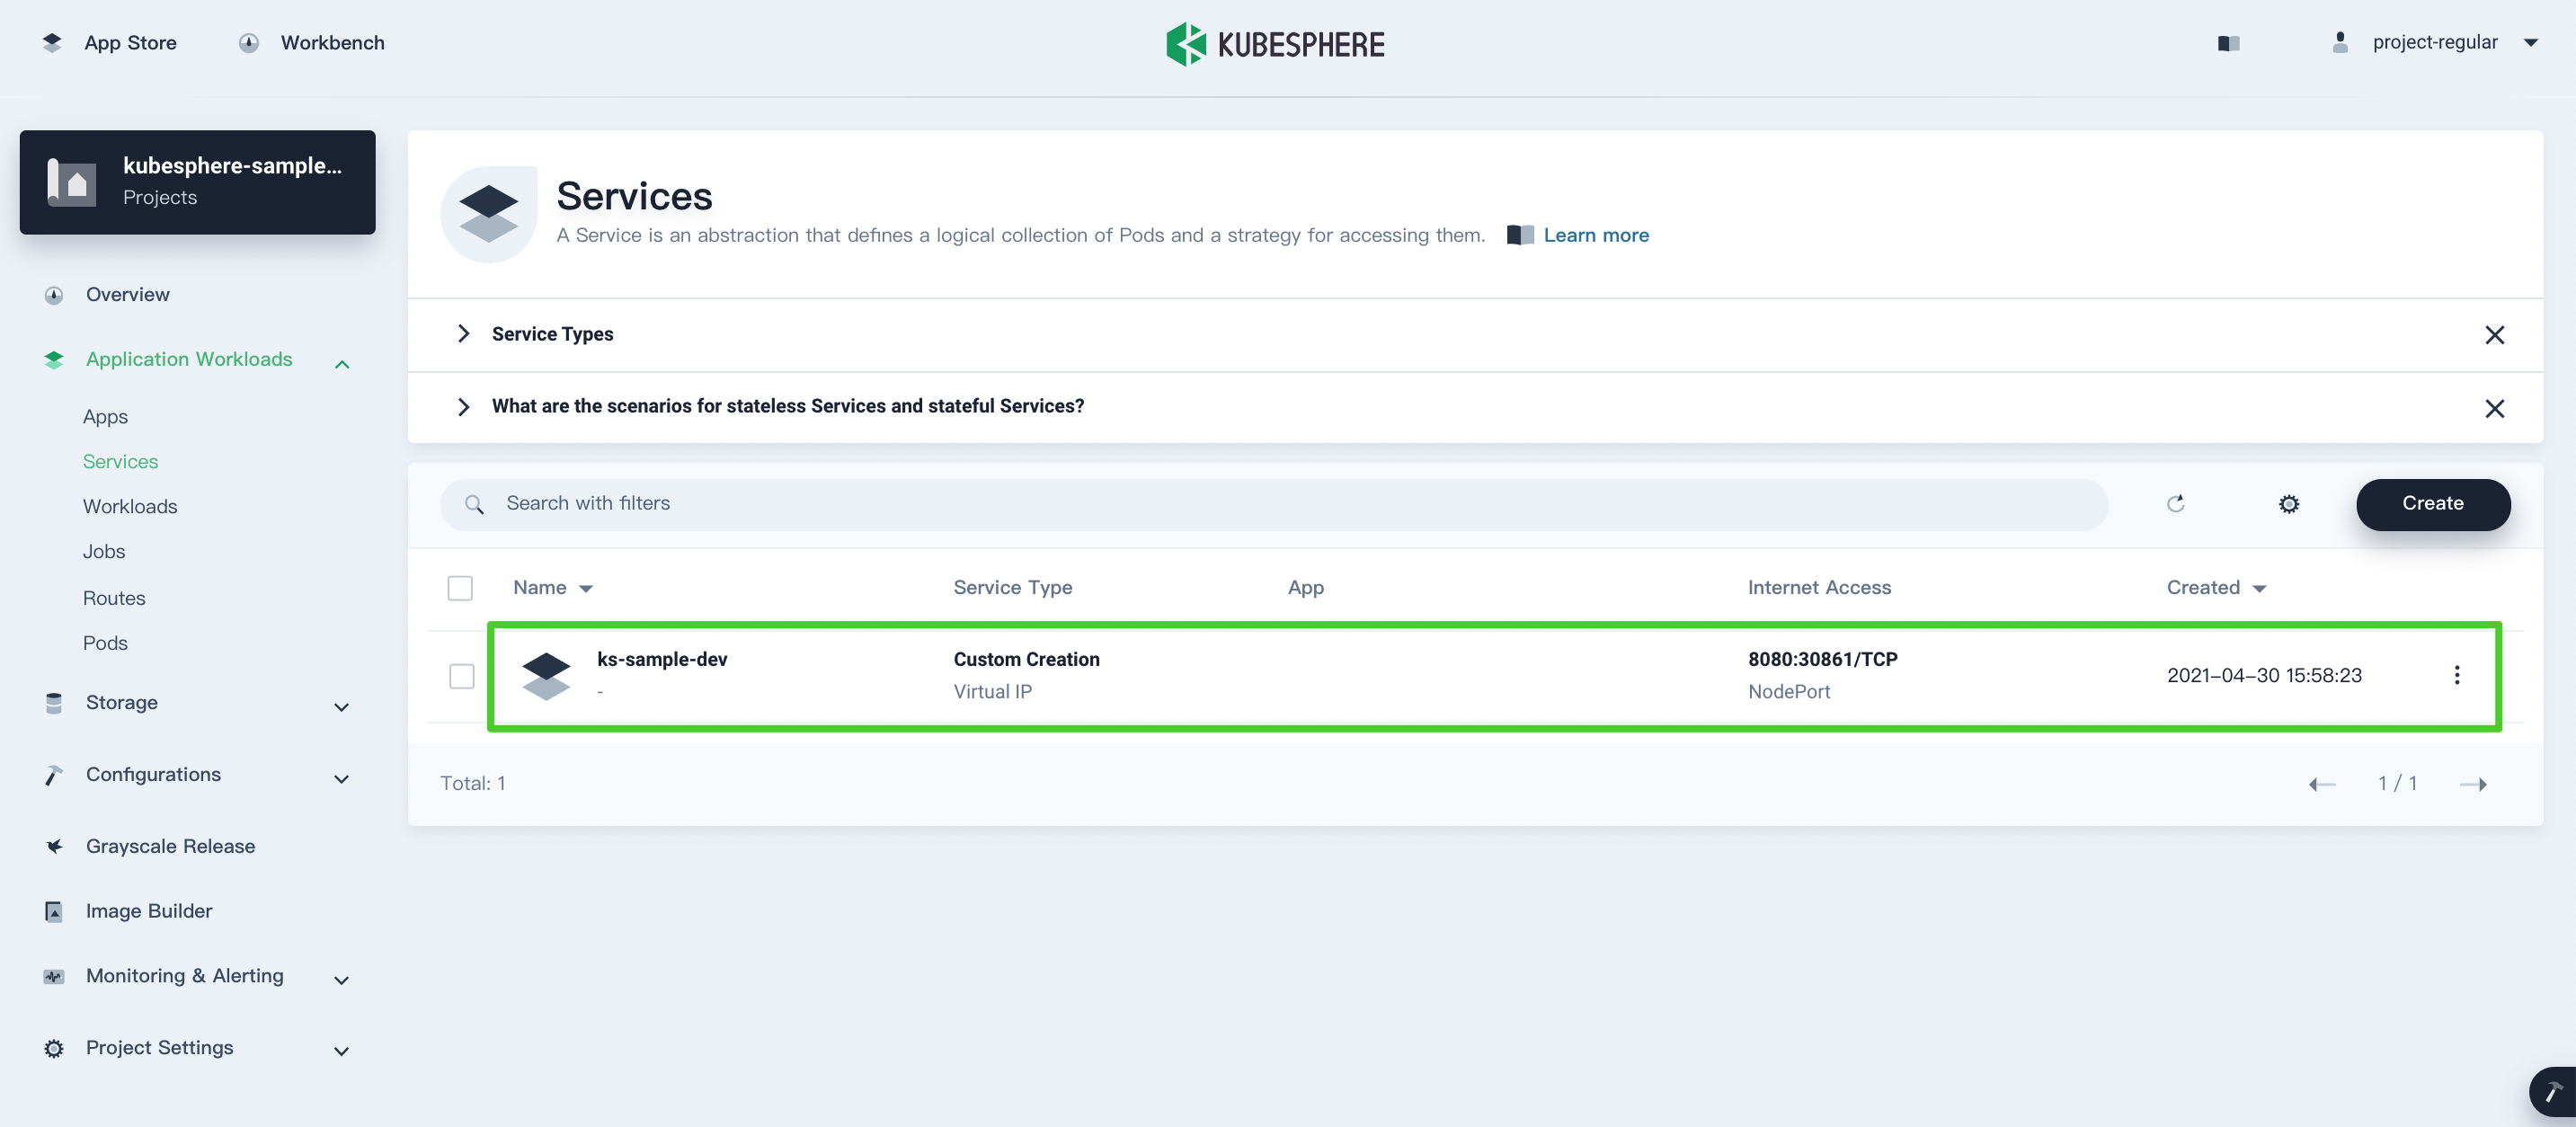

-
Use the web kubectl from Toolbox in the bottom-right corner by executing the following command:
curl 10.233.120.230:8080 -
Expected output:
Really appreciate your star, that's the power of our life.Note
Usecurlendpoints or {$Virtual IP}:{$Port} or {$Node IP}:{$NodePort} -
Similarly, you can test the Service in the project
kubesphere-sample-prodand you will see the same result.$ curl 10.233.120.236:8080 Really appreciate your star, that's the power of our life.
Feedback
Was this page Helpful?
Thanks for the feedback. If you have a specific question about how to use KubeSphere, ask it on Slack. Open an issue in the GitHub repo if you want to report a problem or suggest an improvement.
 Previous

What’s on this Page