Workspace Quotas
Workspace quotas are used to control the total resource usage of all projects and DevOps projects in a workspace. Similar to project quotas, workspace quotas contain requests and limits of CPU and memory. Requests make sure projects in the workspace can get the resources they needs as they are specifically guaranteed and reserved. On the contrary, limits ensure that the resource usage of all projects in the workspace can never go above a certain value.
In a multi-cluster architecture, as you need to assign one or multiple clusters to a workspace, you can decide the amount of resources that can be used by the workspace on different clusters.
This tutorial demonstrates how to manage resource quotas for a workspace.
Prerequisites
You have an available workspace and an account (ws-manager). The account must have the workspaces-manager role at the platform level. For more information, see Create Workspaces, Projects, Accounts and Roles.
Set Workspace Quotas
-
Log in to the KubeSphere web console as
ws-managerand go to a workspace. -
Navigate to Quota Management under Workspace Settings.
-
The Quota Management page lists all the available clusters assigned to the workspace and their respective requests and limits of CPU and memory. Click Edit Quota on the right of a cluster.
-
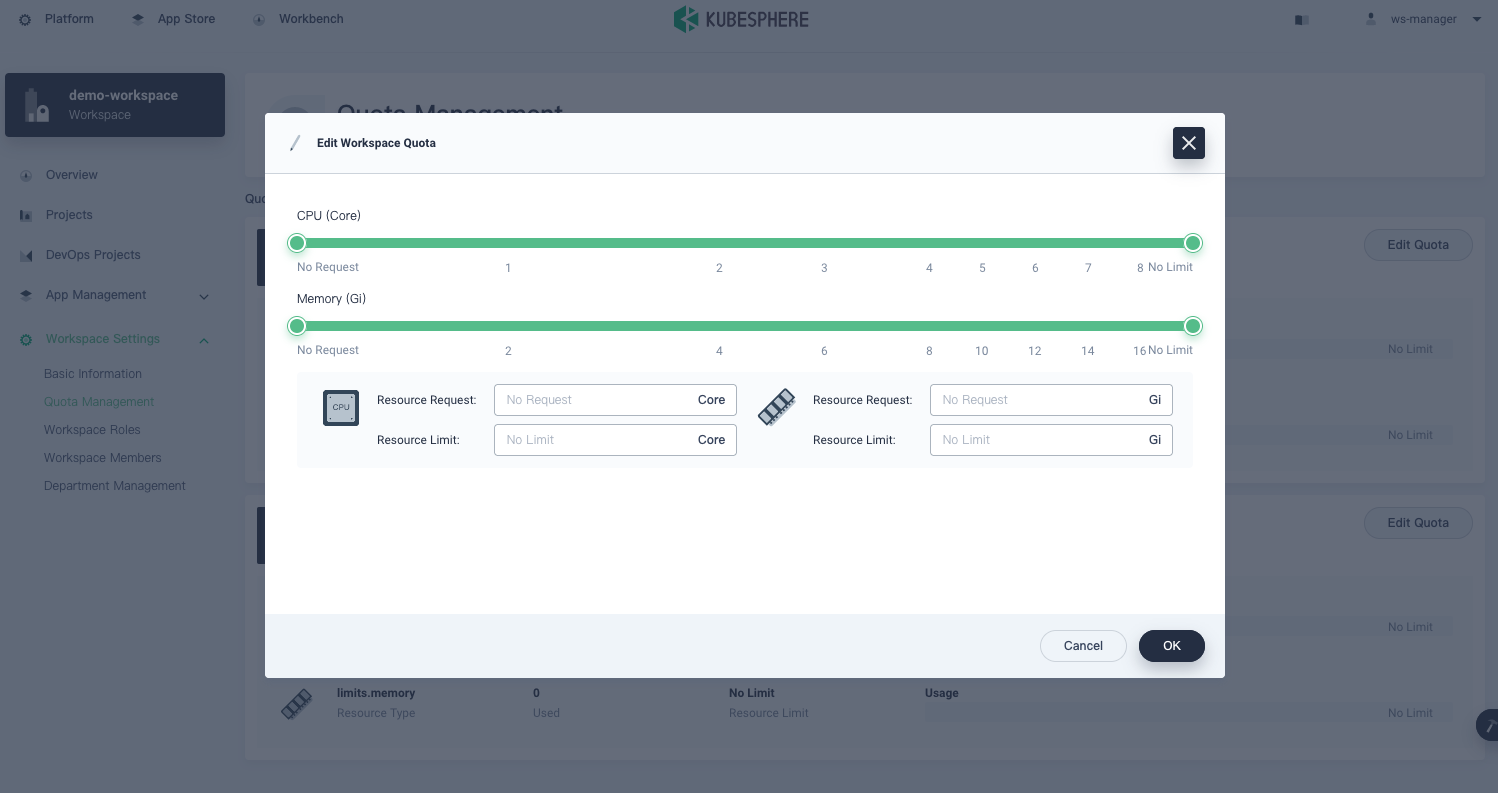
In the dialog that appears, you can see that KubeSphere does not set any requests or limits for the workspace by default. To set requests and limits to control CPU and memory resources, use the slider to move to a desired value or enter numbers directly. Leaving a field blank means you do not set any requests or limits.

Note
The limit can never be lower than the request. -
Click OK to finish setting quotas.
See Also
Feedback
Was this page Helpful?


 Previous
