
Use Nexus in Pipelines
Nexus is a repository manager that stores, organizes, and distributes artifacts. With Nexus, developers can have better control over the artifacts needed in a development process.
This tutorial demonstrates how to use Nexus in pipelines on KubeSphere.
Prerequisites
- You need to enable the KubeSphere DevOps System.
- You need to prepare a Nexus instance.
- You need to have a GitHub account.
- You need to create a workspace, a DevOps project (for example,
demo-devops), and an account (for example,project-regular). This account needs to be invited into the DevOps project with the role ofoperator. For more information, see Create Workspaces, Projects, Accounts and Roles.
Hands-on Lab
Step 1: Get a Repository URL on Nexus
-
Log in to the Nexus console as
adminand click on the top navigation bar.
 -
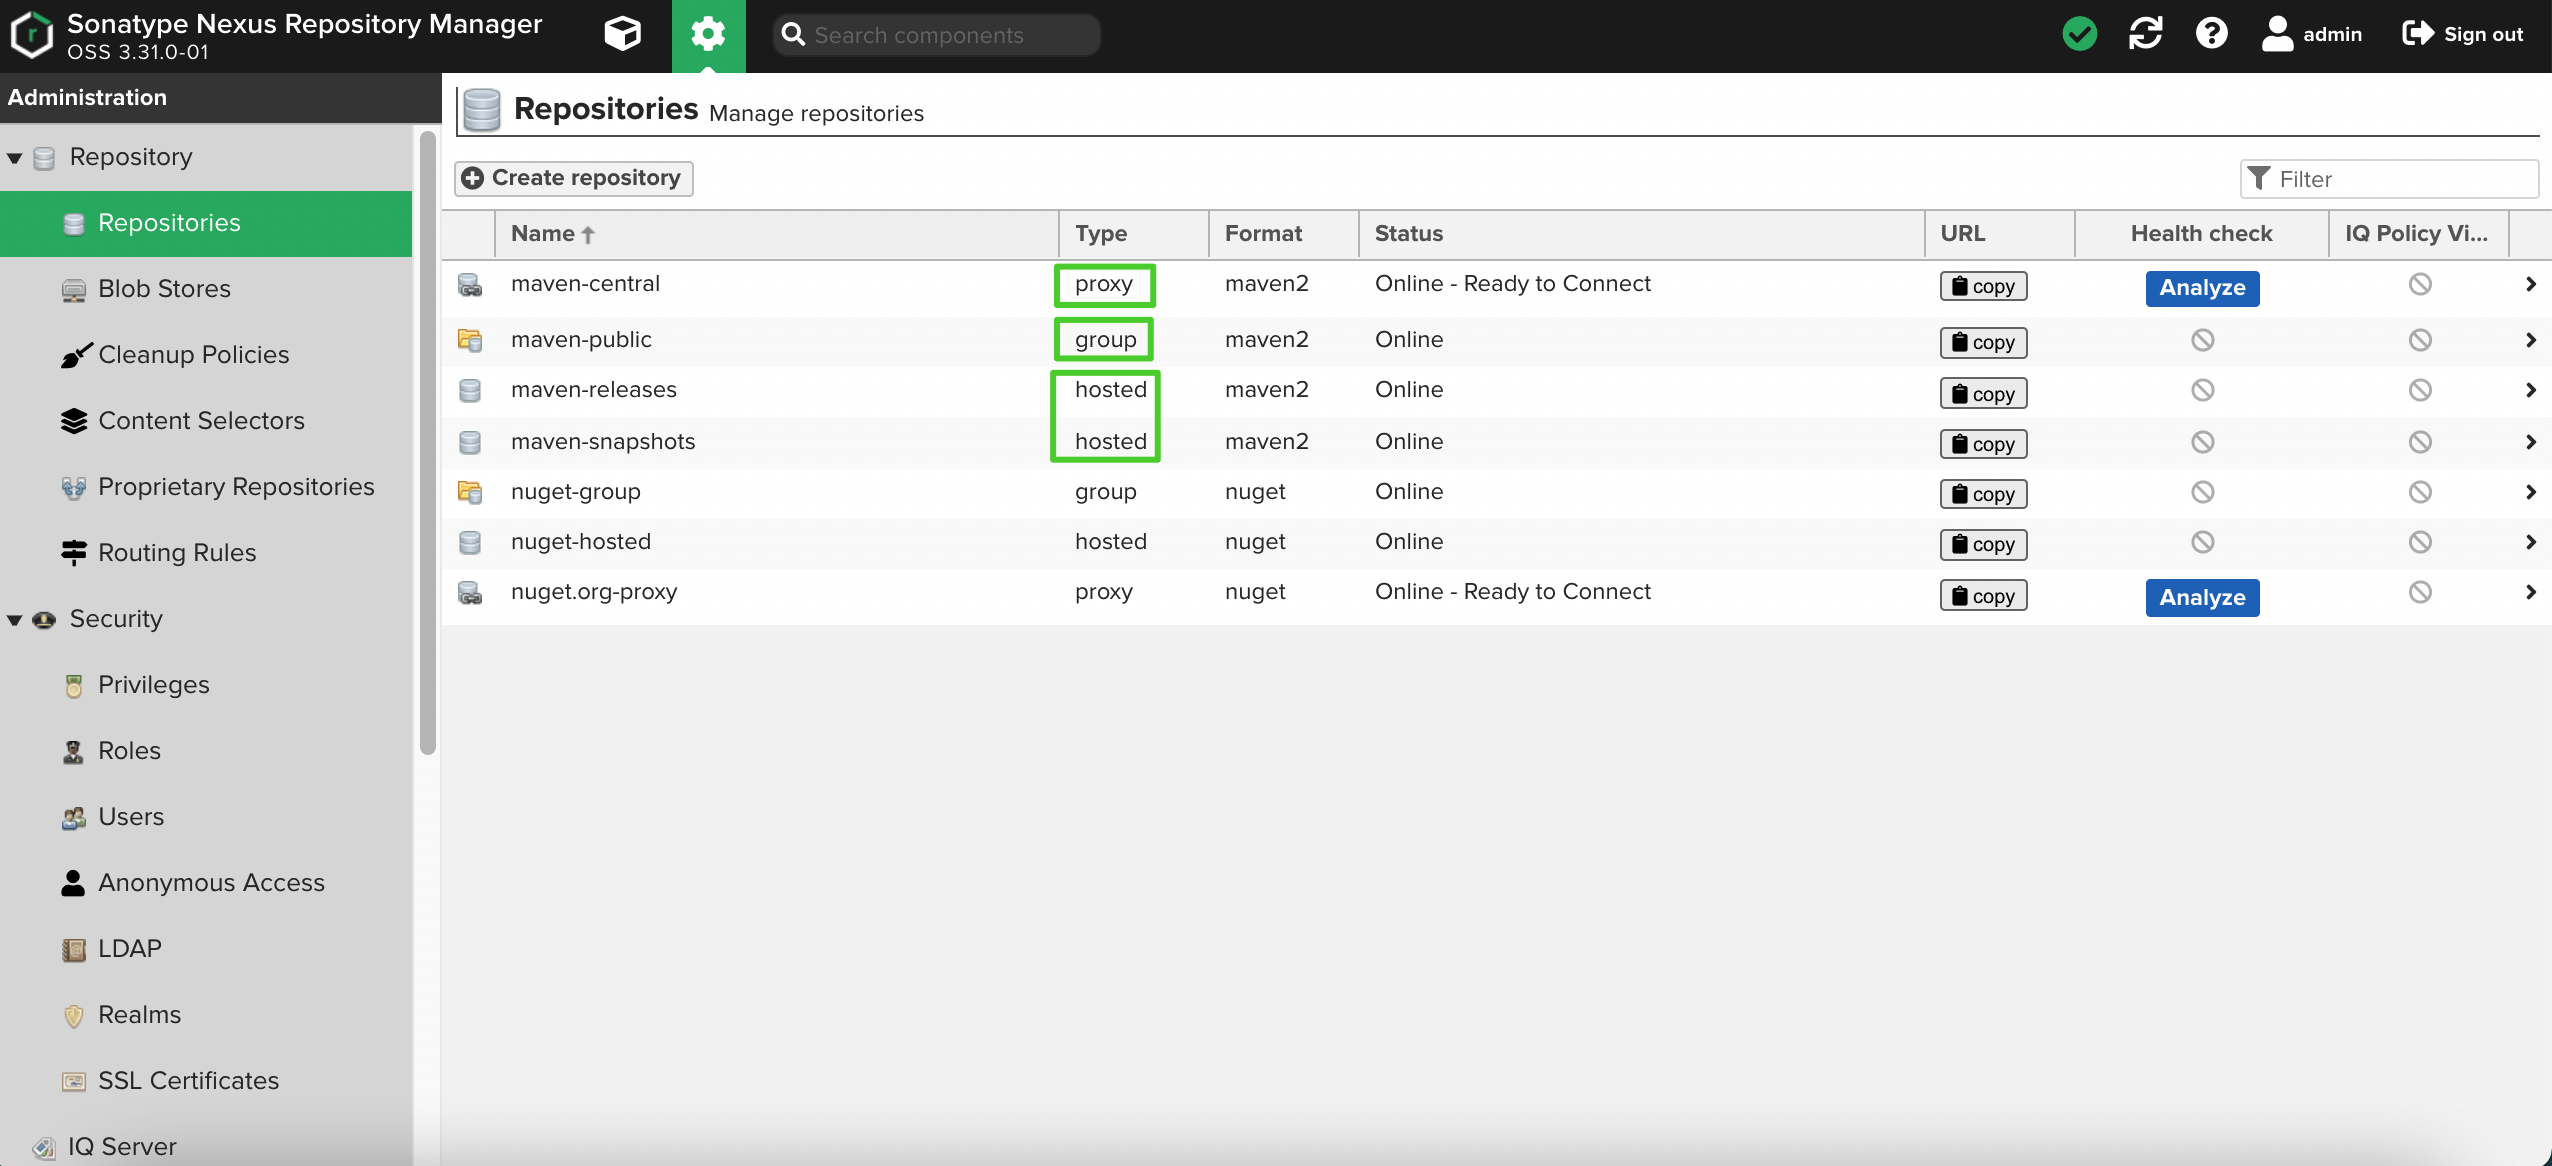
Go to the Repositories page and you can see that Nexus provides three types of repository.
proxy: the proxy for a remote repository to download and store resources on Nexus as cache.hosted: the repository storing artifacts on Nexus.group: a group of configured Nexus repositories.
-
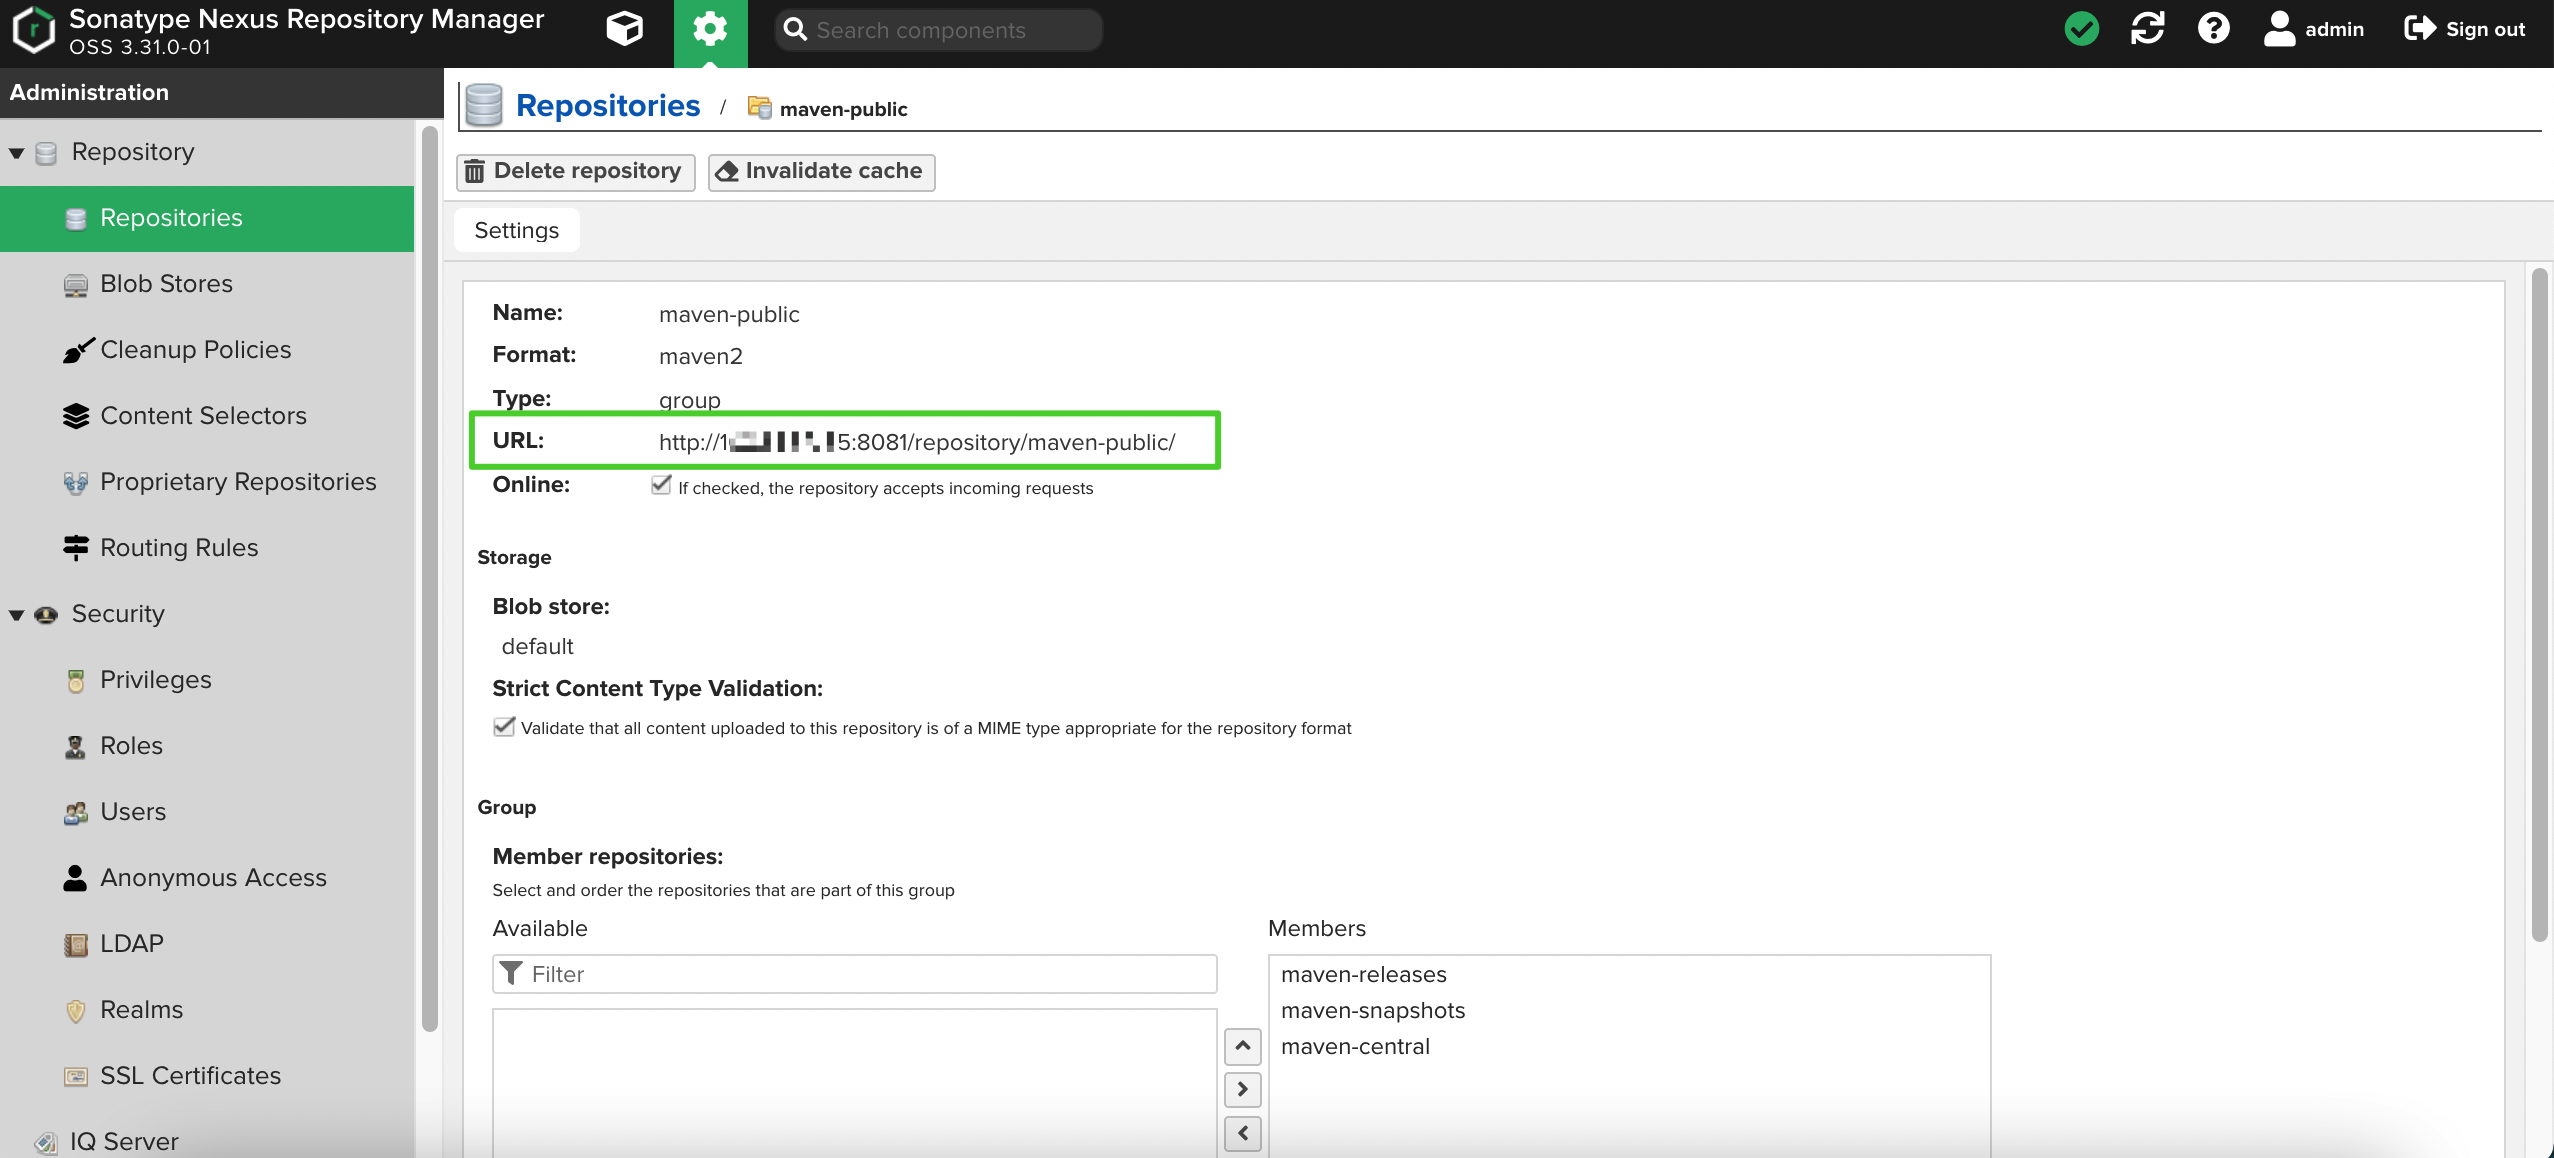
You can click a repository to view its details. For example, click maven-public to go to its detail page and you can see its URL.
Step 2: Modify pom.xml in your GitHub repository
-
Log in to GitHub. Fork the example repository to your own GitHub account.
-
In your own GitHub repository of learn-pipeline-java, click the file
pom.xmlin the root directory.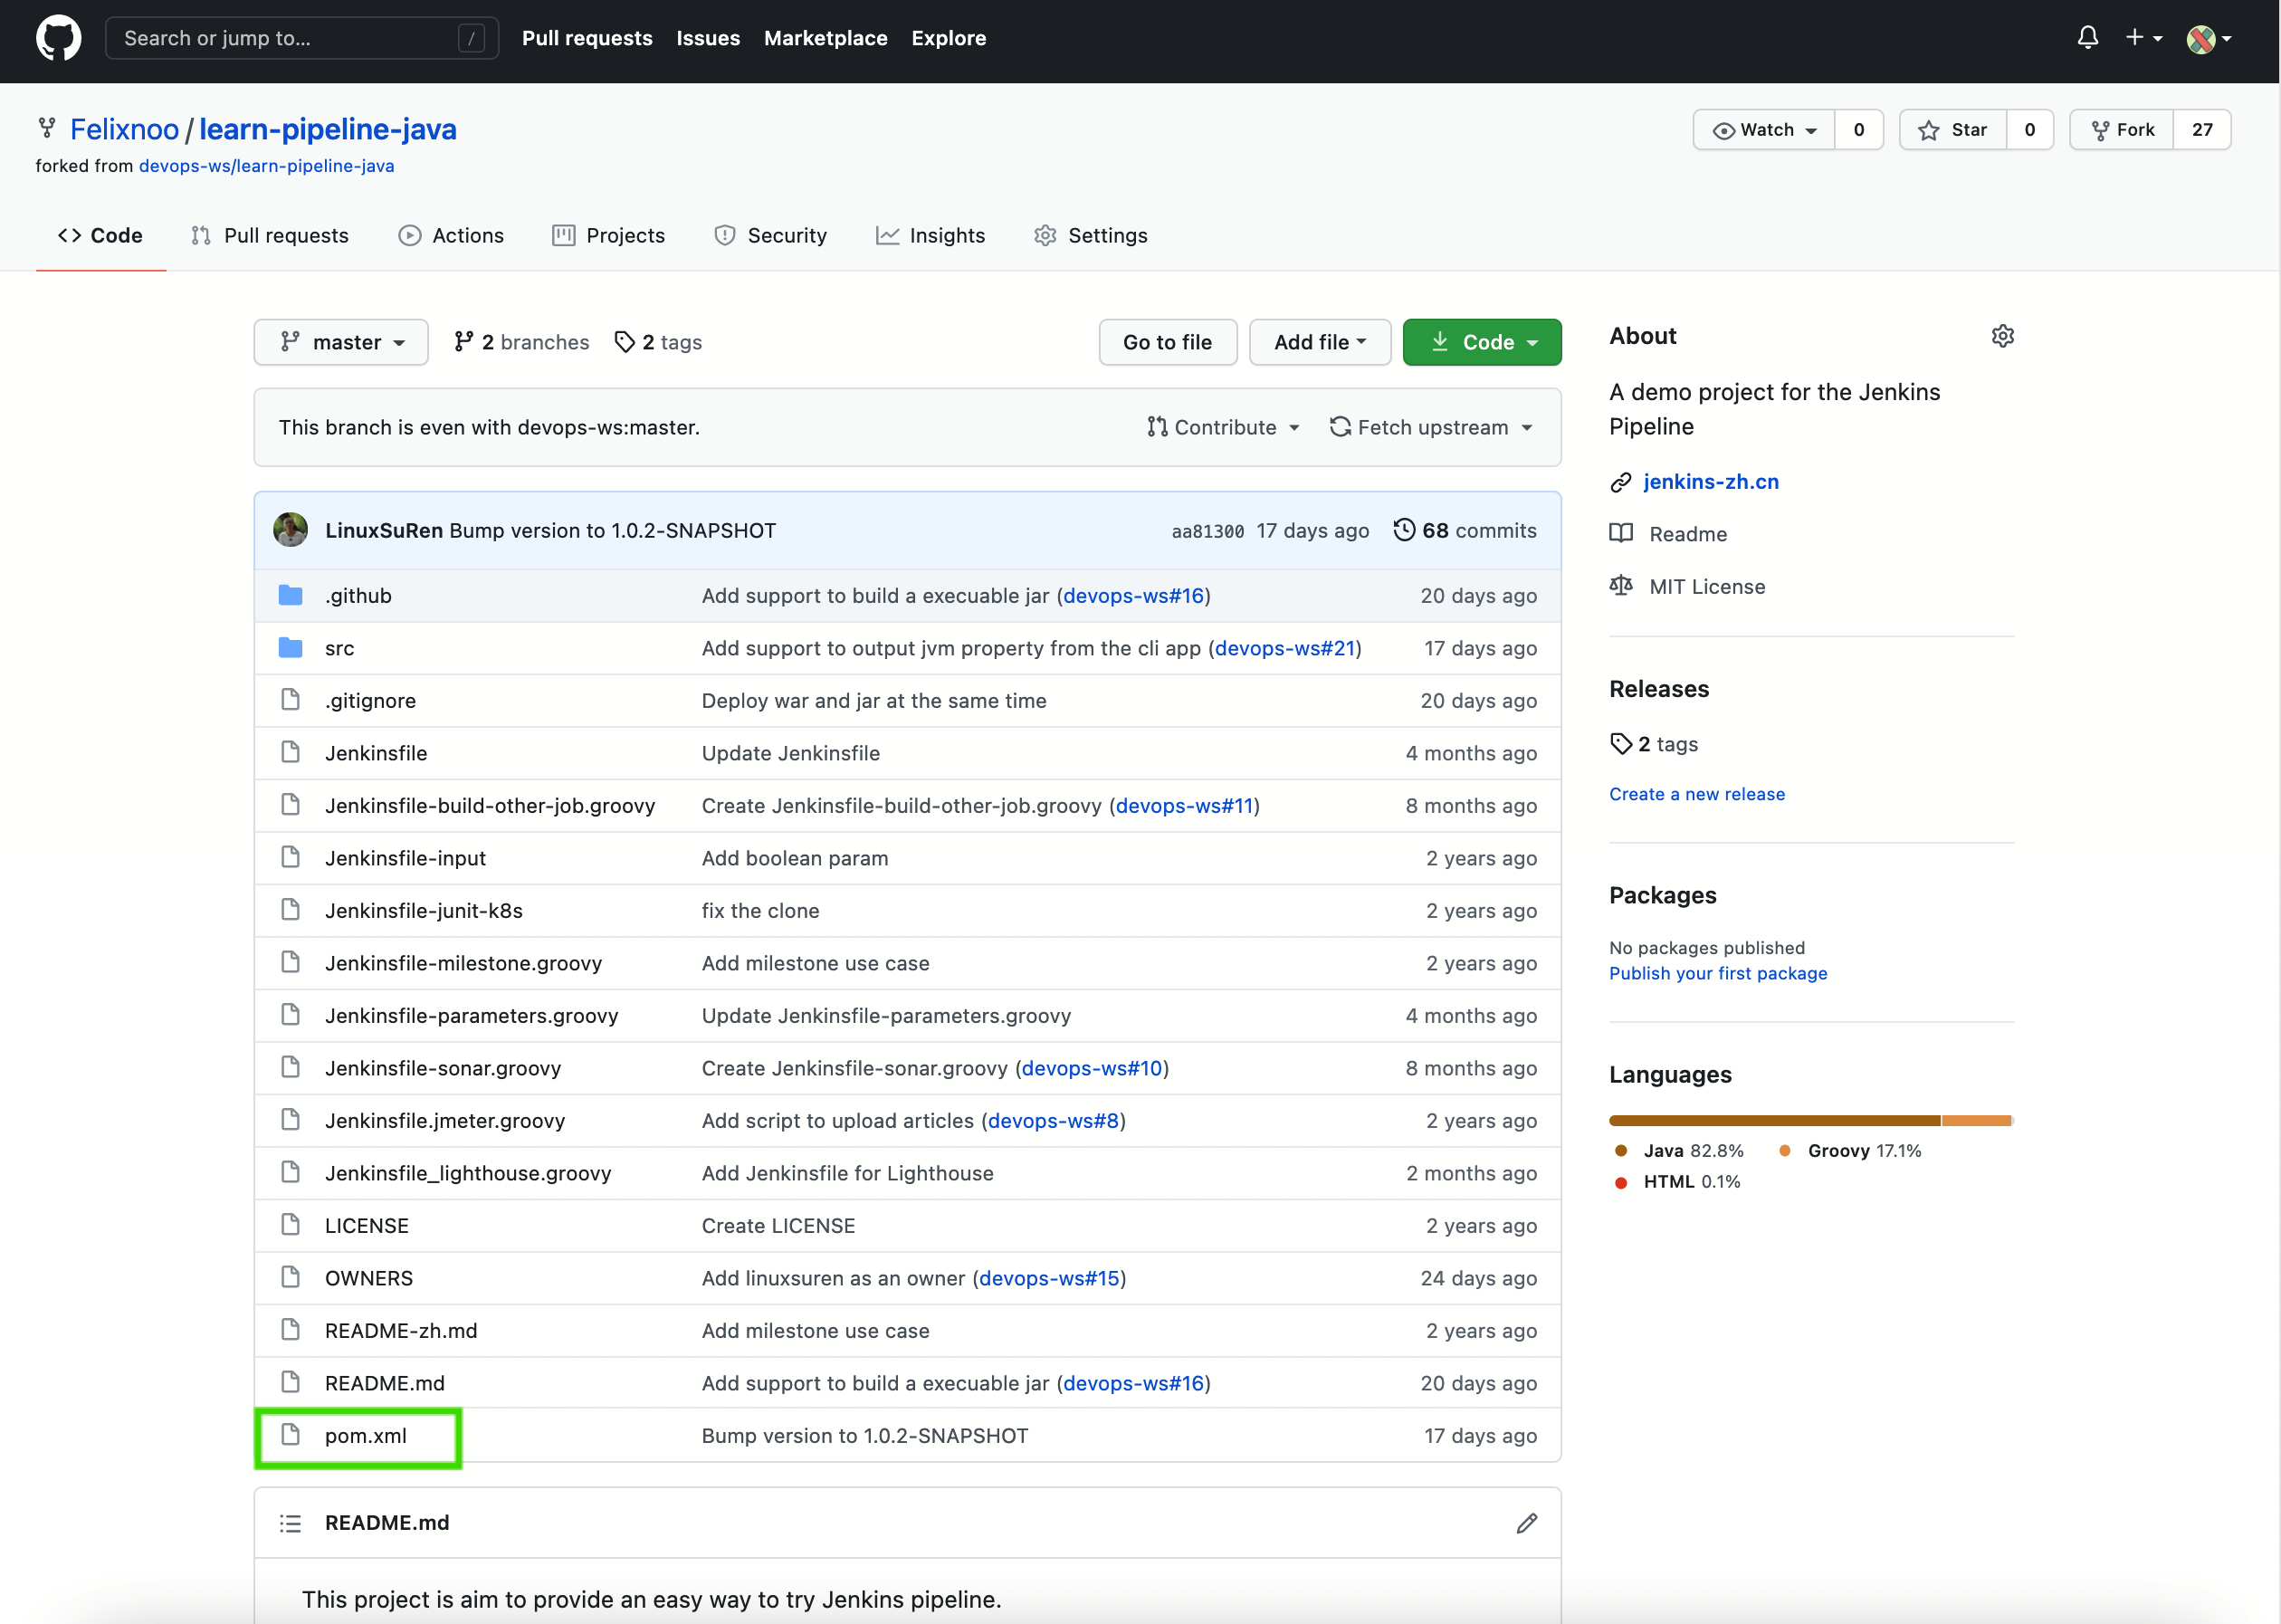
-
Click
 to modify the code segment of
 <distributionManagement>in the file. Set the<id>and use the URLs of your own Nexus repositories .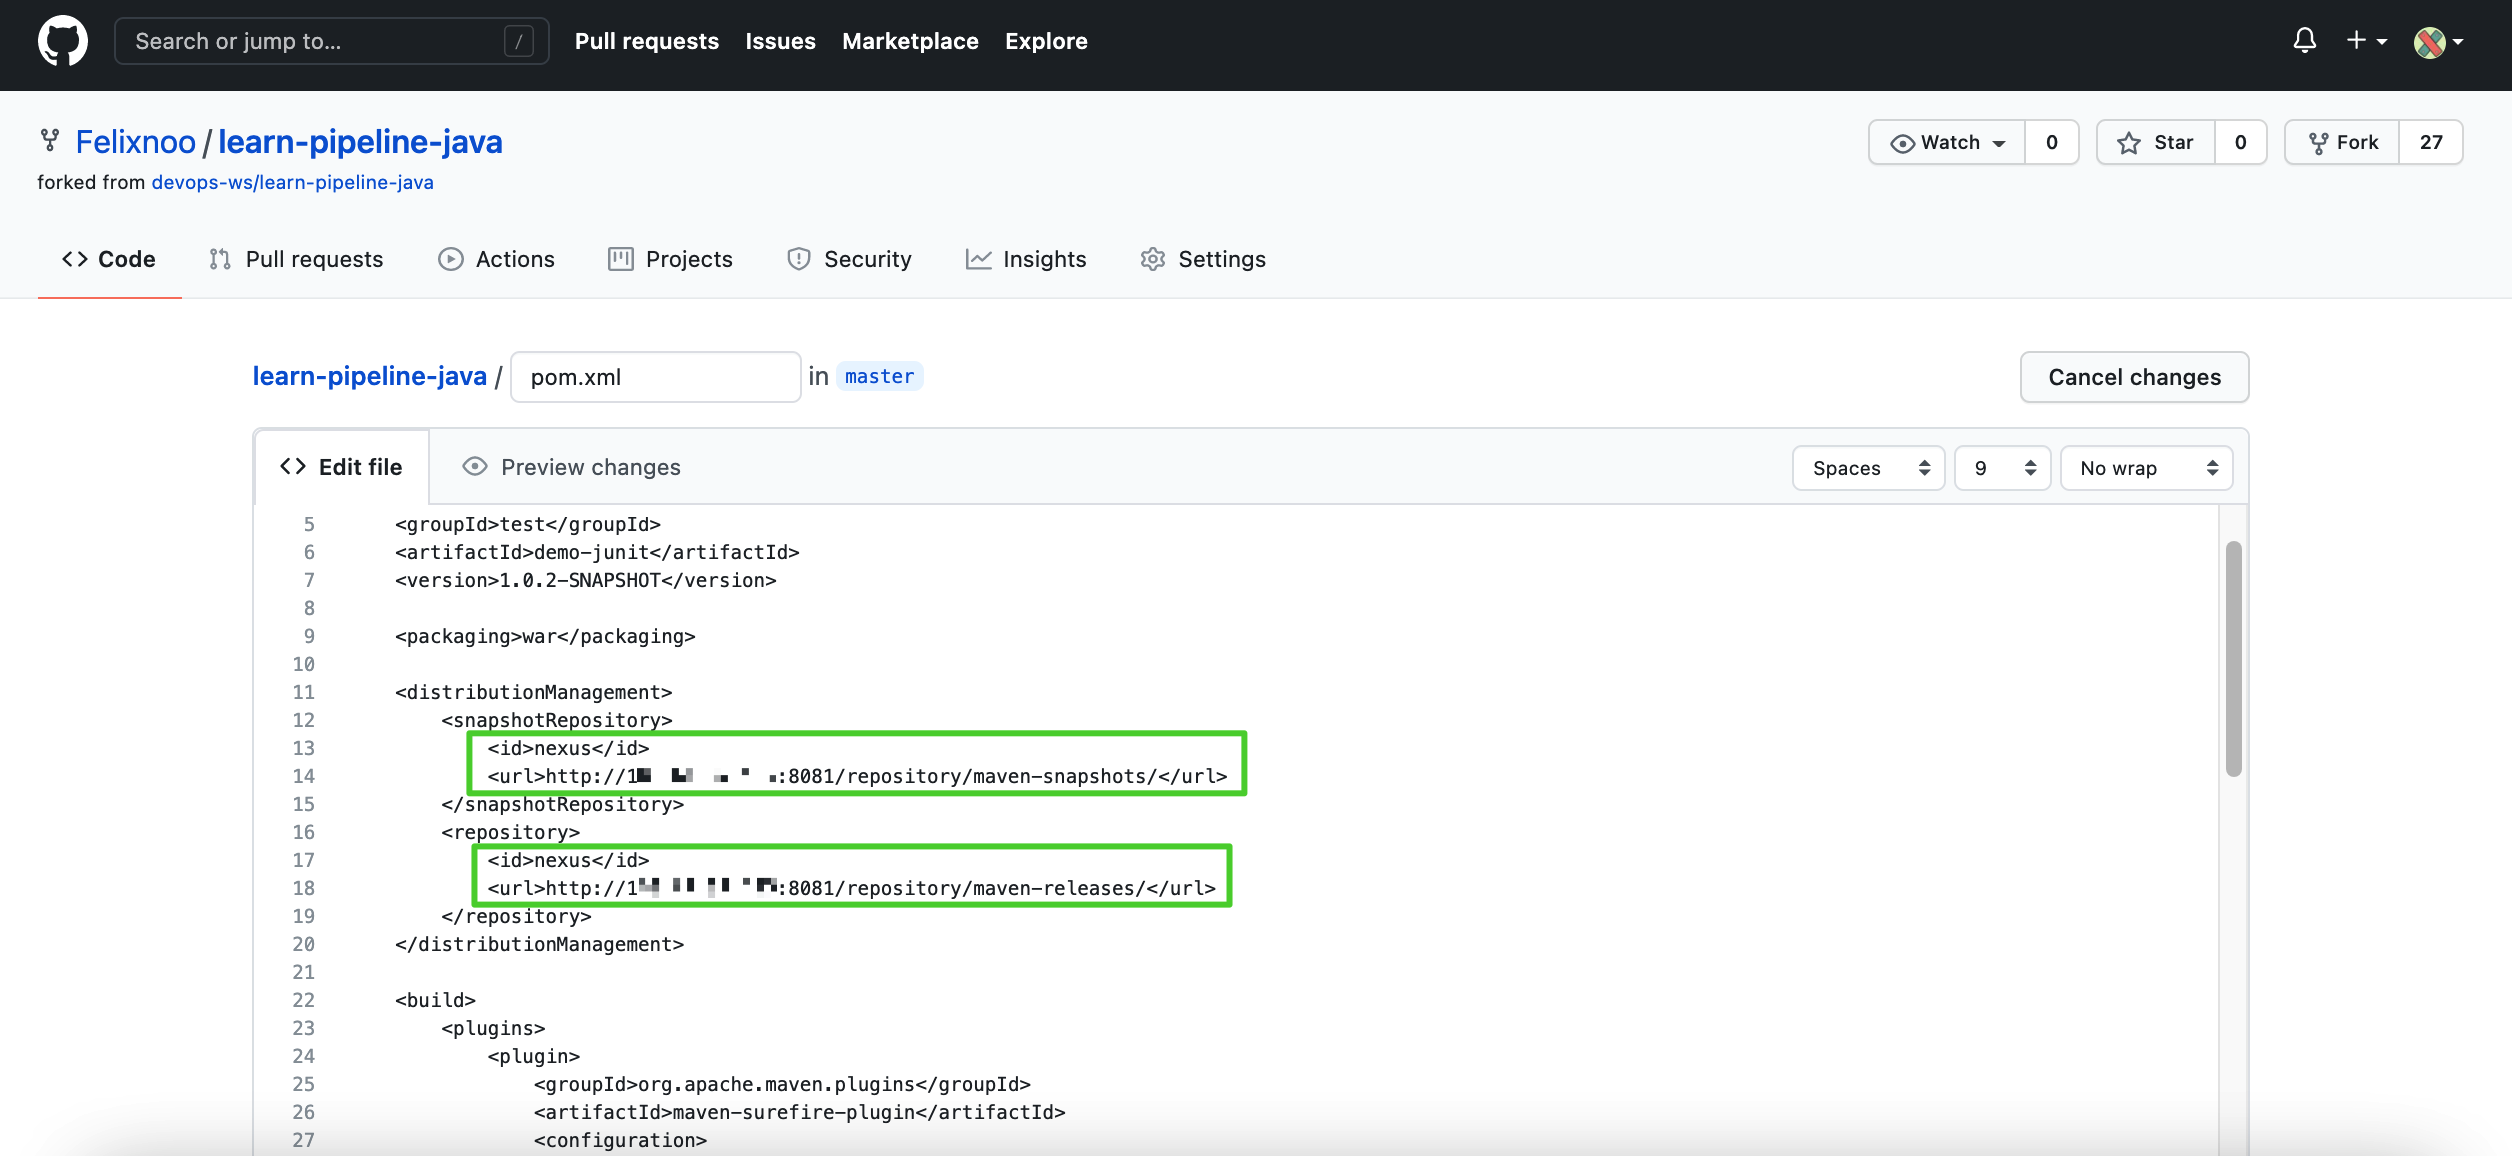
-
When you finish, click Commit changes at the bottom of the page.
Step 3: Modify the ConfigMap
-
Log in to the KubeSphere web console as
admin, click Platform in the upper-left corner, and select Cluster Management. -
Select ConfigMaps under Configurations. On the ConfigMaps page, select
kubesphere-devops-systemfrom the drop-down list and clickks-devops-agent.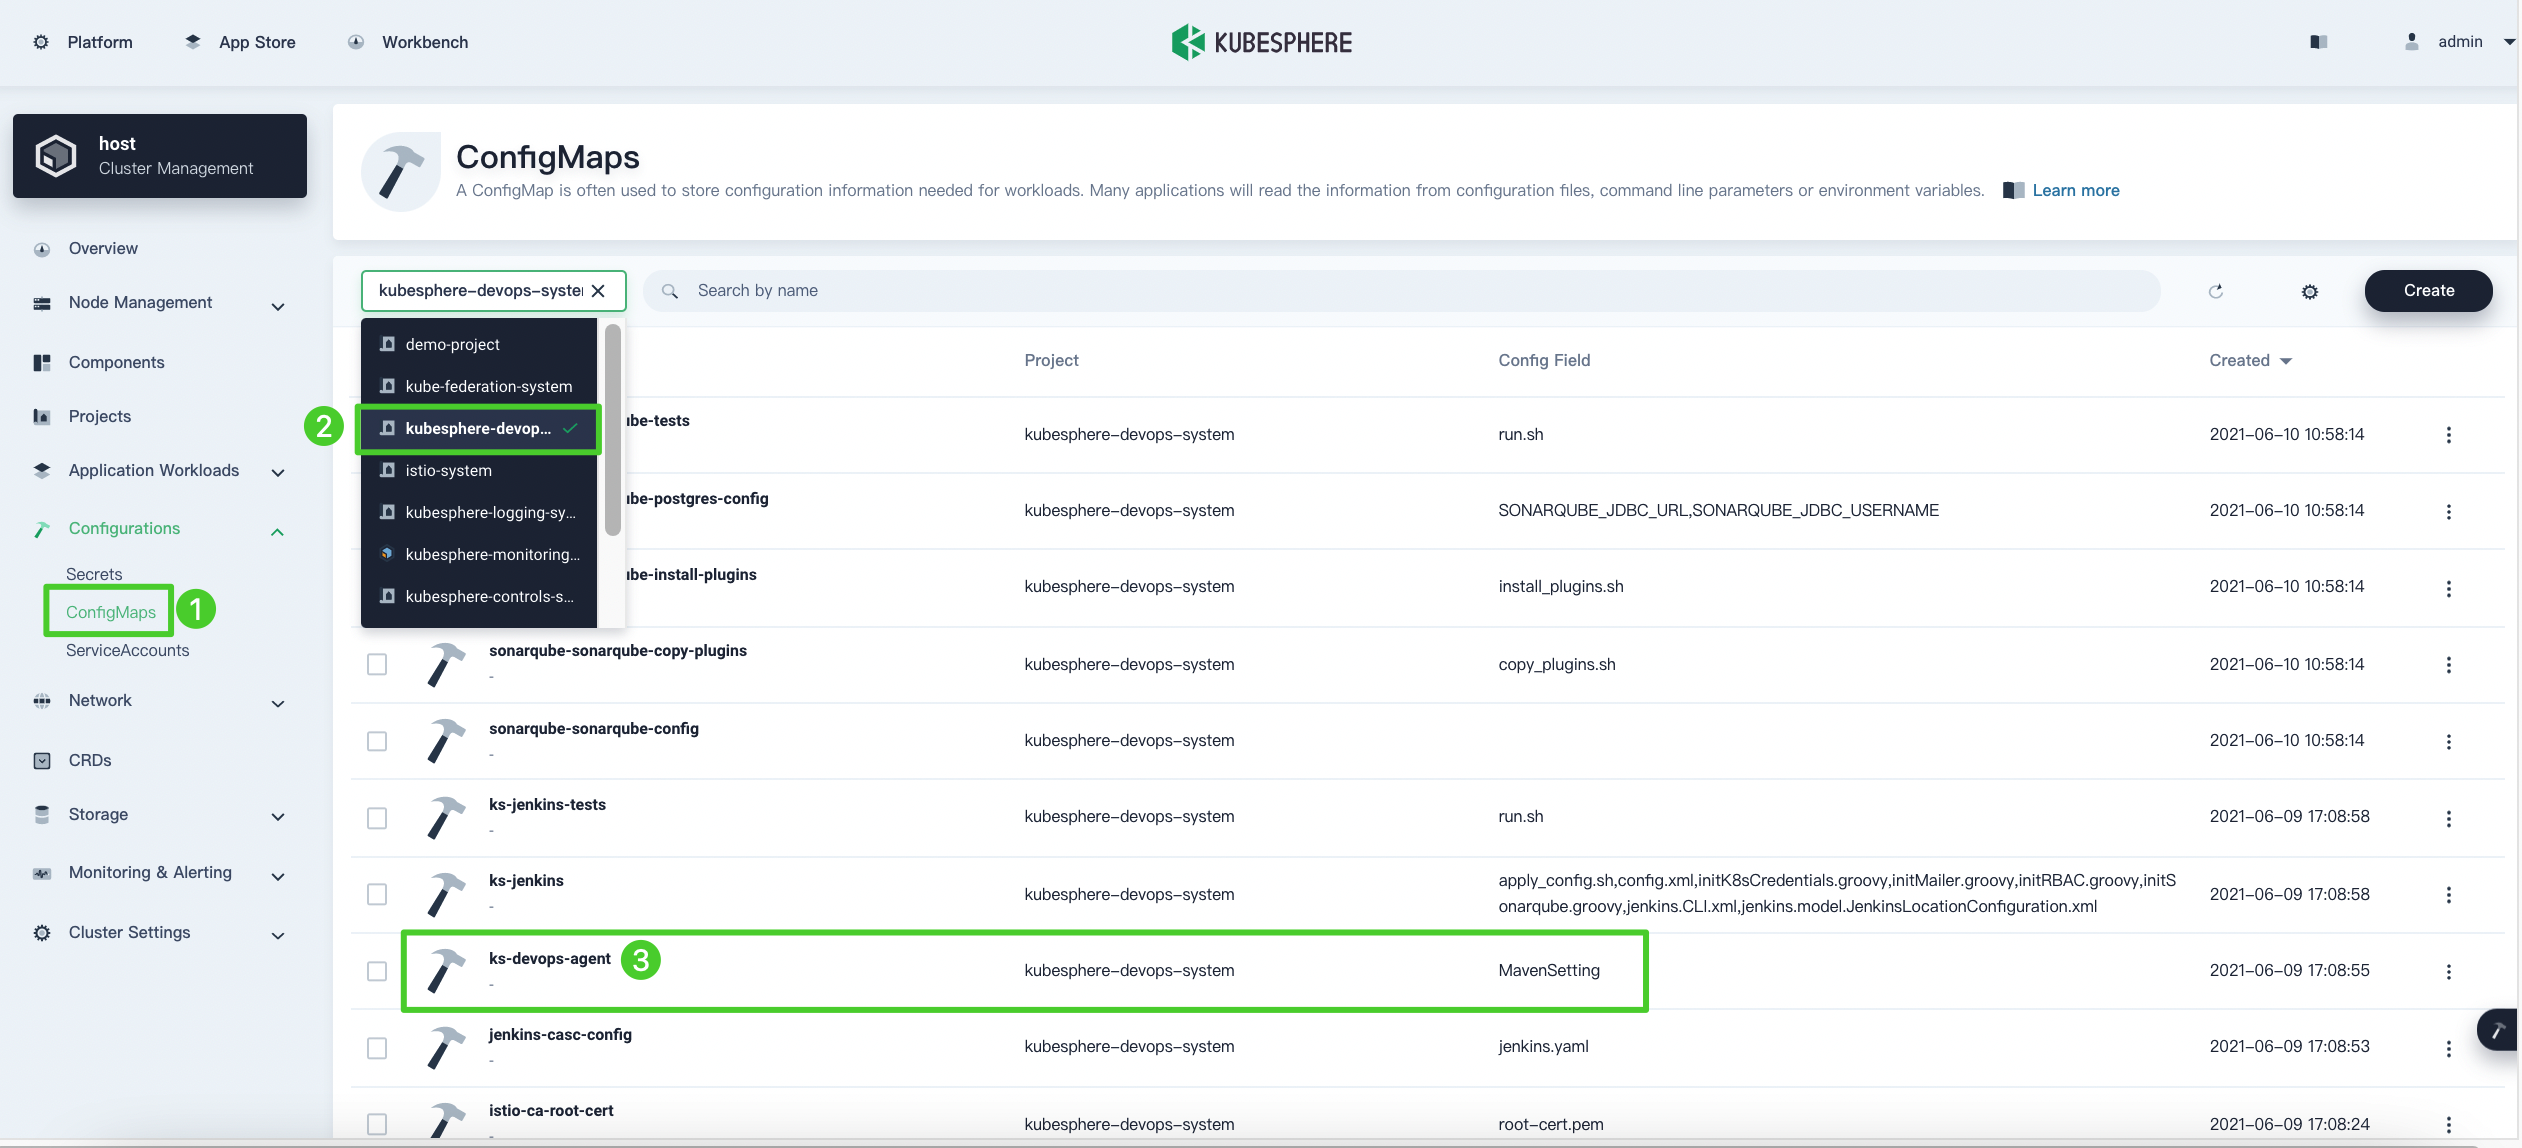
-
On the detail page, click Edit YAML from the More drop-down menu.
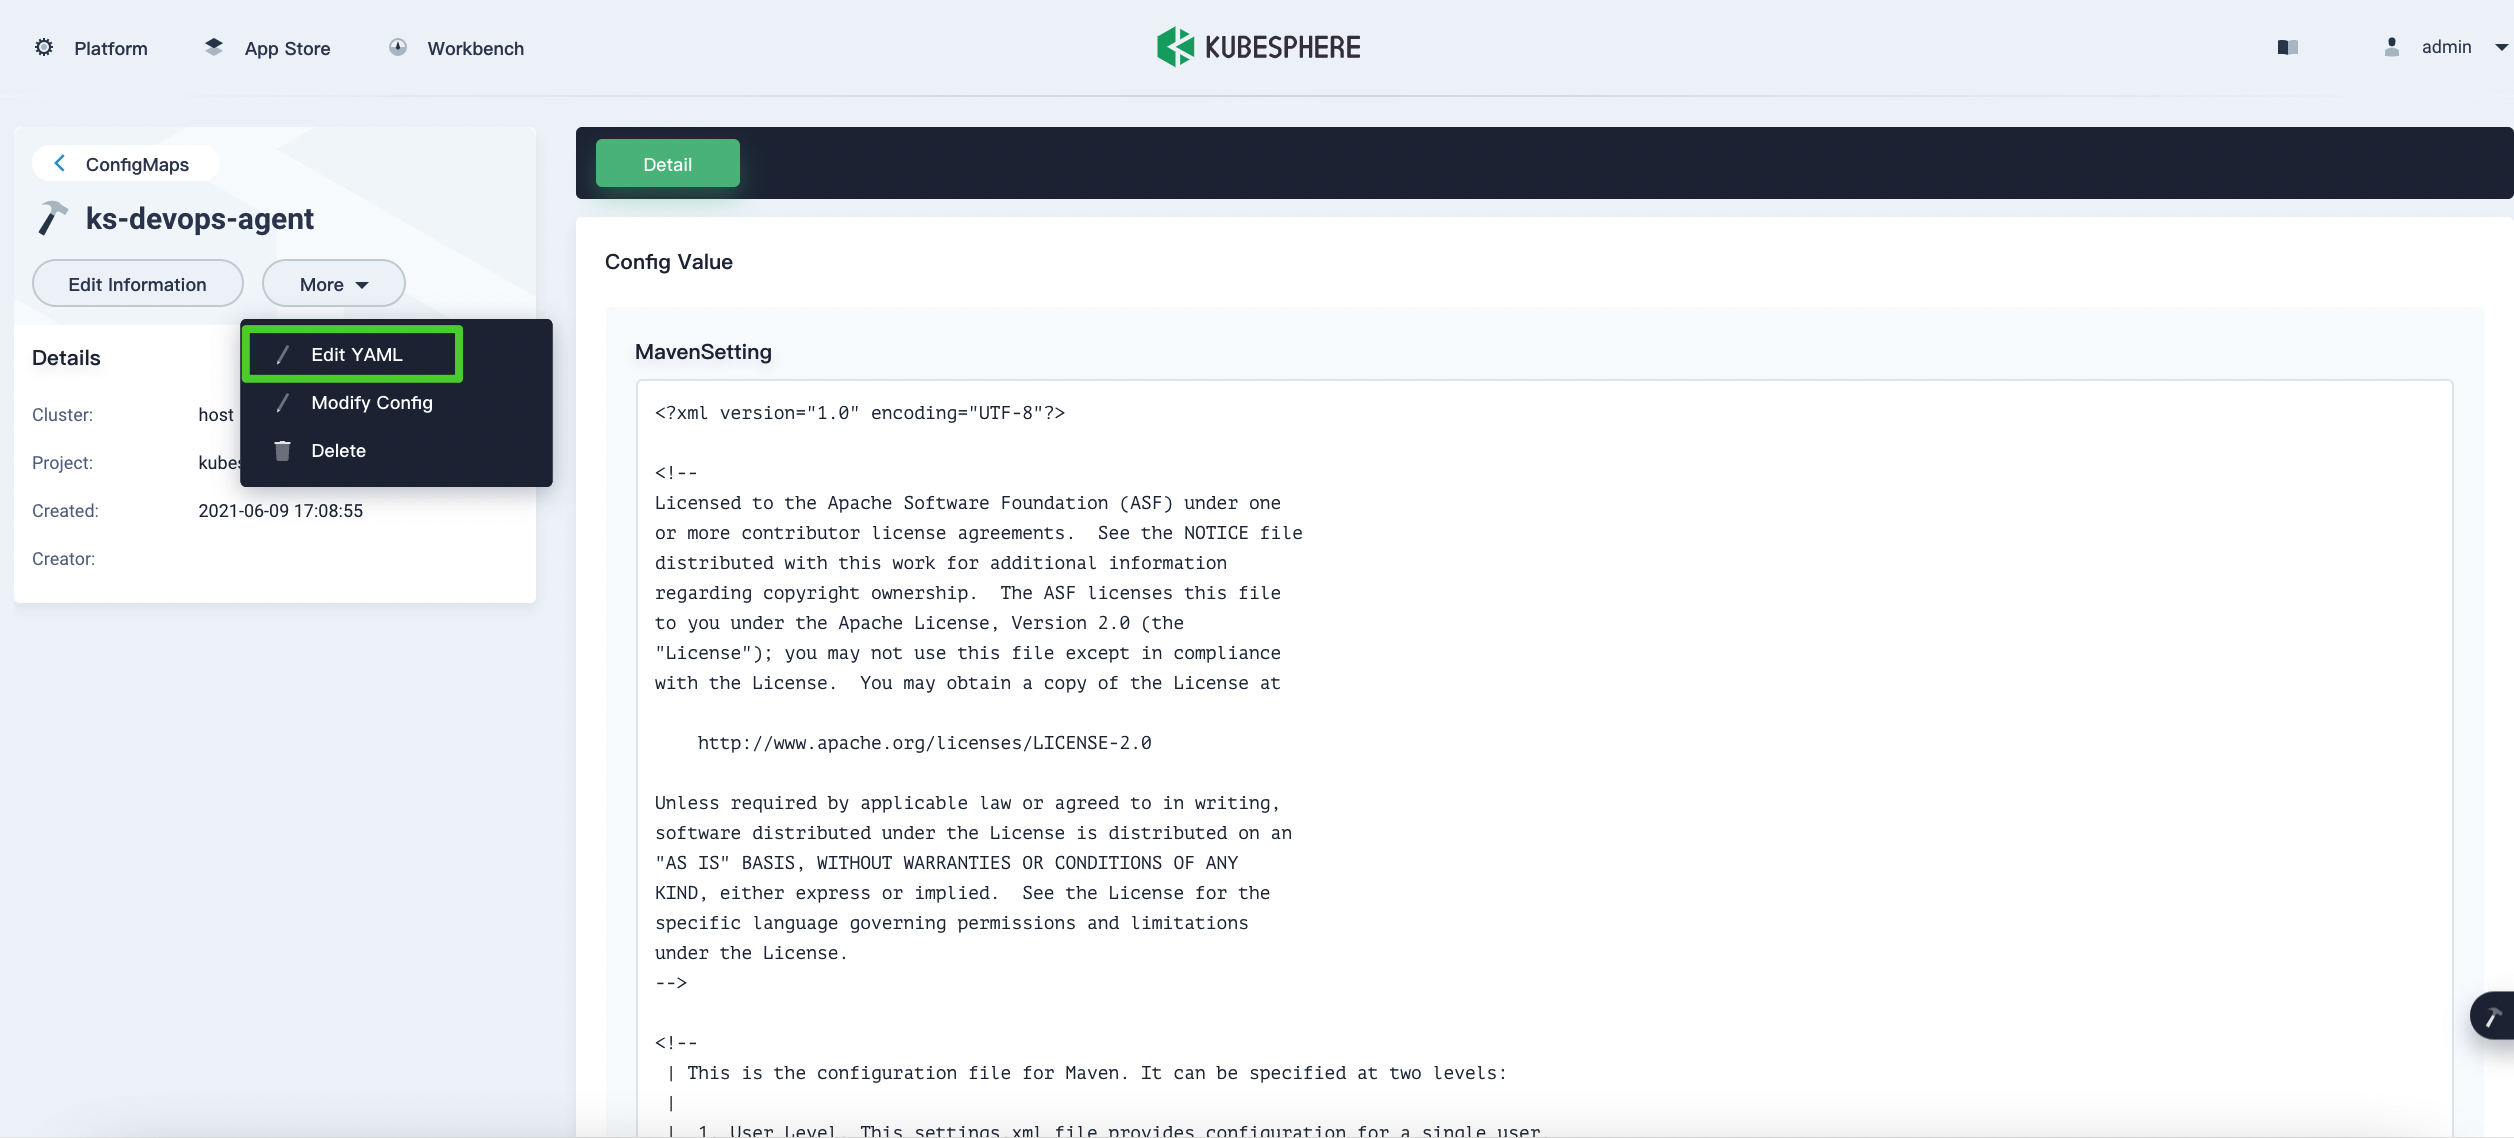
-
In the displayed dialog box, scroll down, find the code segment of
<servers>, and enter the following code:<servers> <server> <id>nexus</id> <username>admin</username> <password>admin</password> </server> </servers>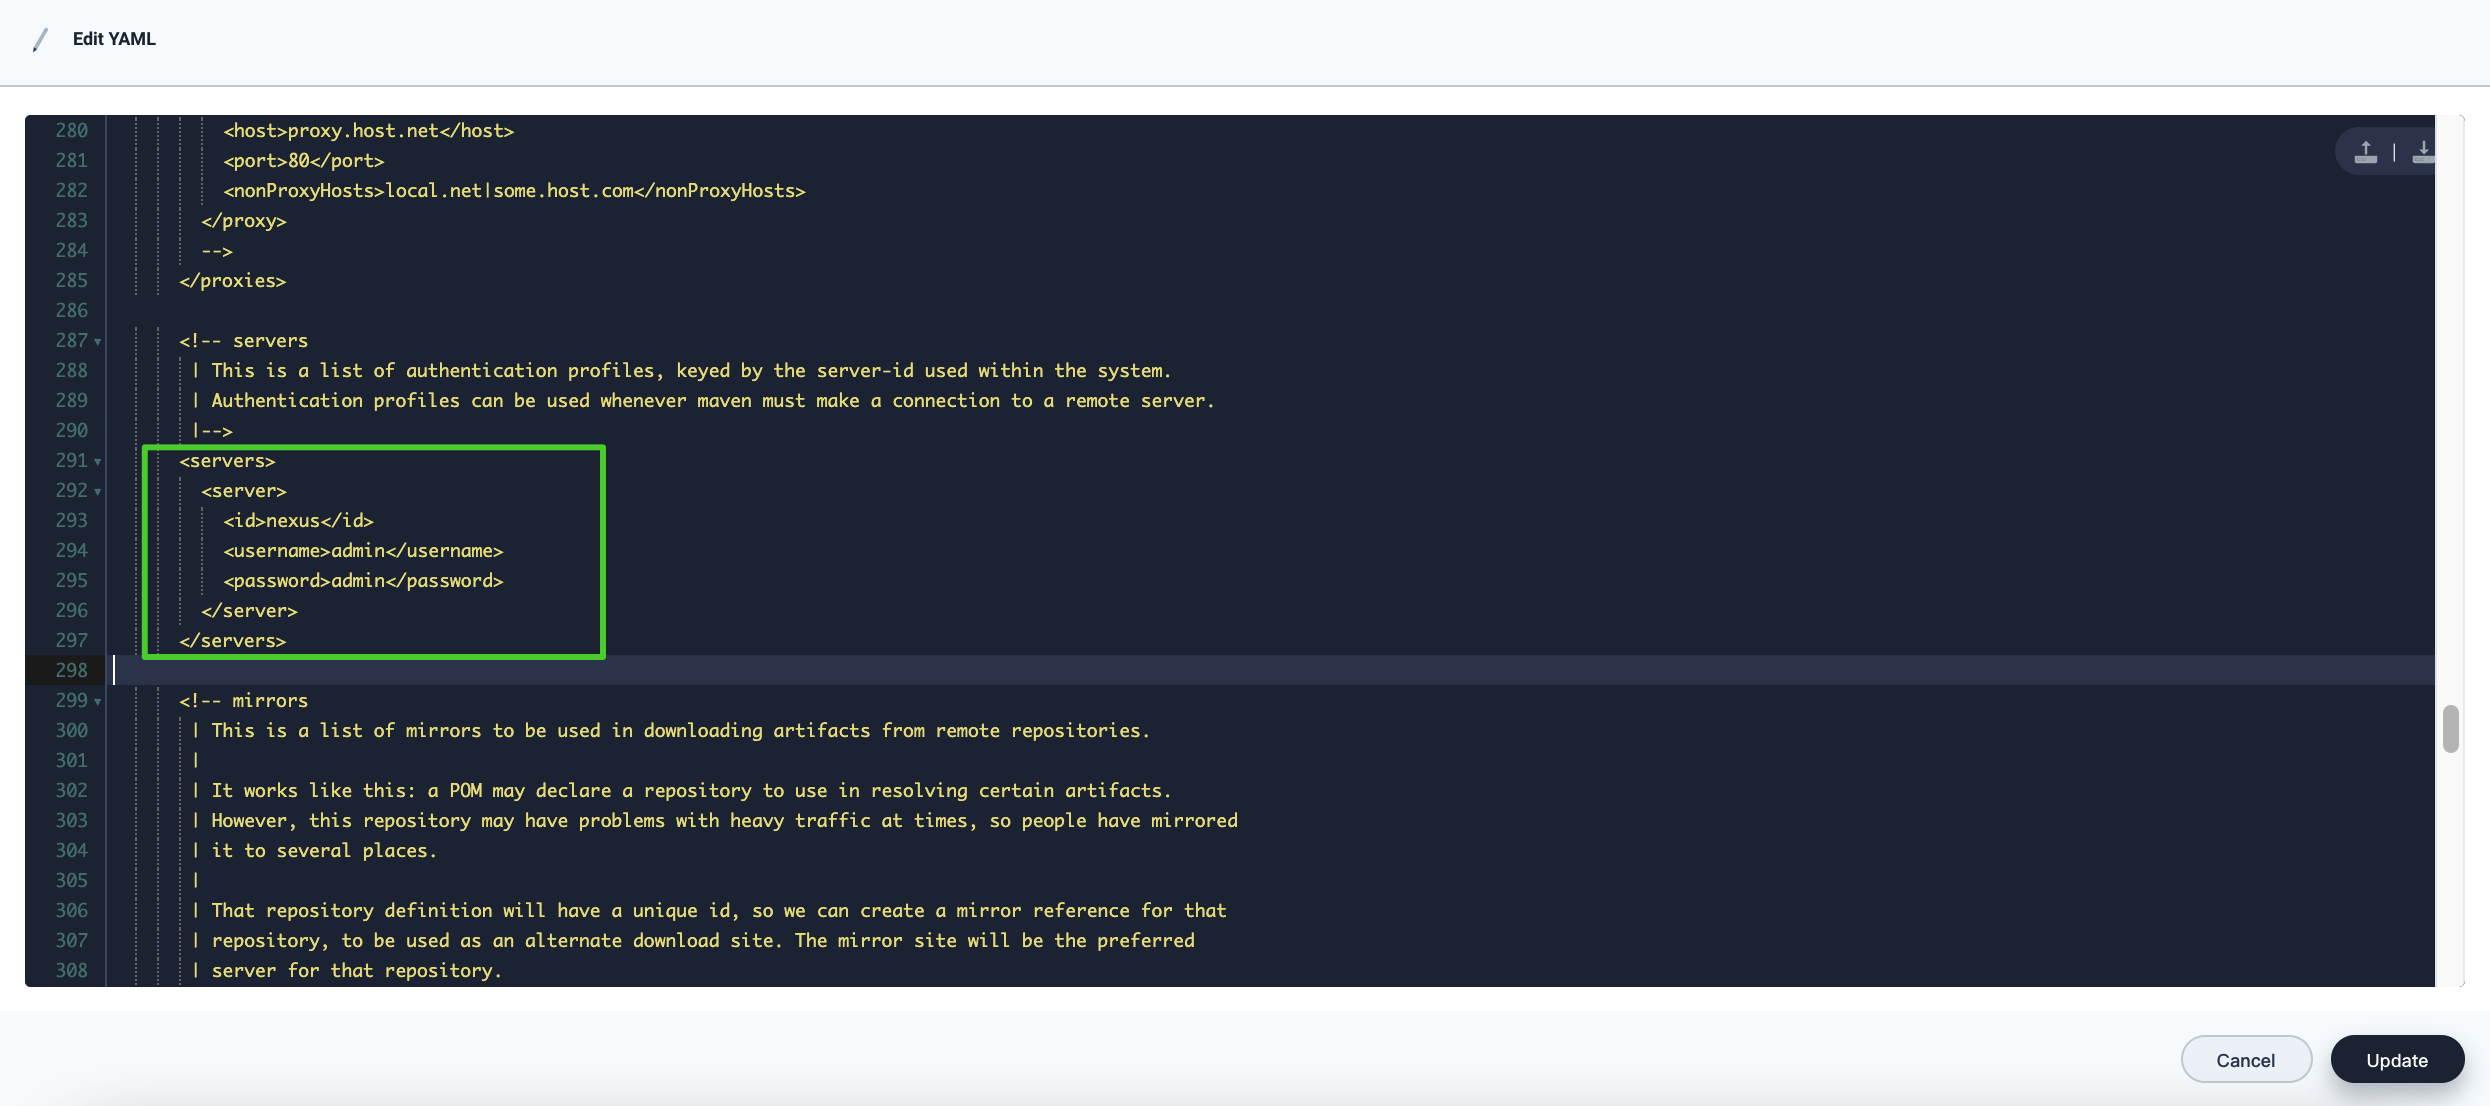
Note
<id>is the unique identifier you set for your Nexus in step 2.<username>is your Nexus username.<password>is your Nexus password. You can also configure aNuGet API Keyon Nexus and use it here for better security. -
Continue to find the code segment of
<mirrors>and enter the following code:<mirrors> <mirror> <id>nexus</id> <name>maven-public</name> <url>http://135.68.37.85:8081/repository/maven-public/</url> <mirrorOf>*</mirrorOf> </mirror> </mirrors>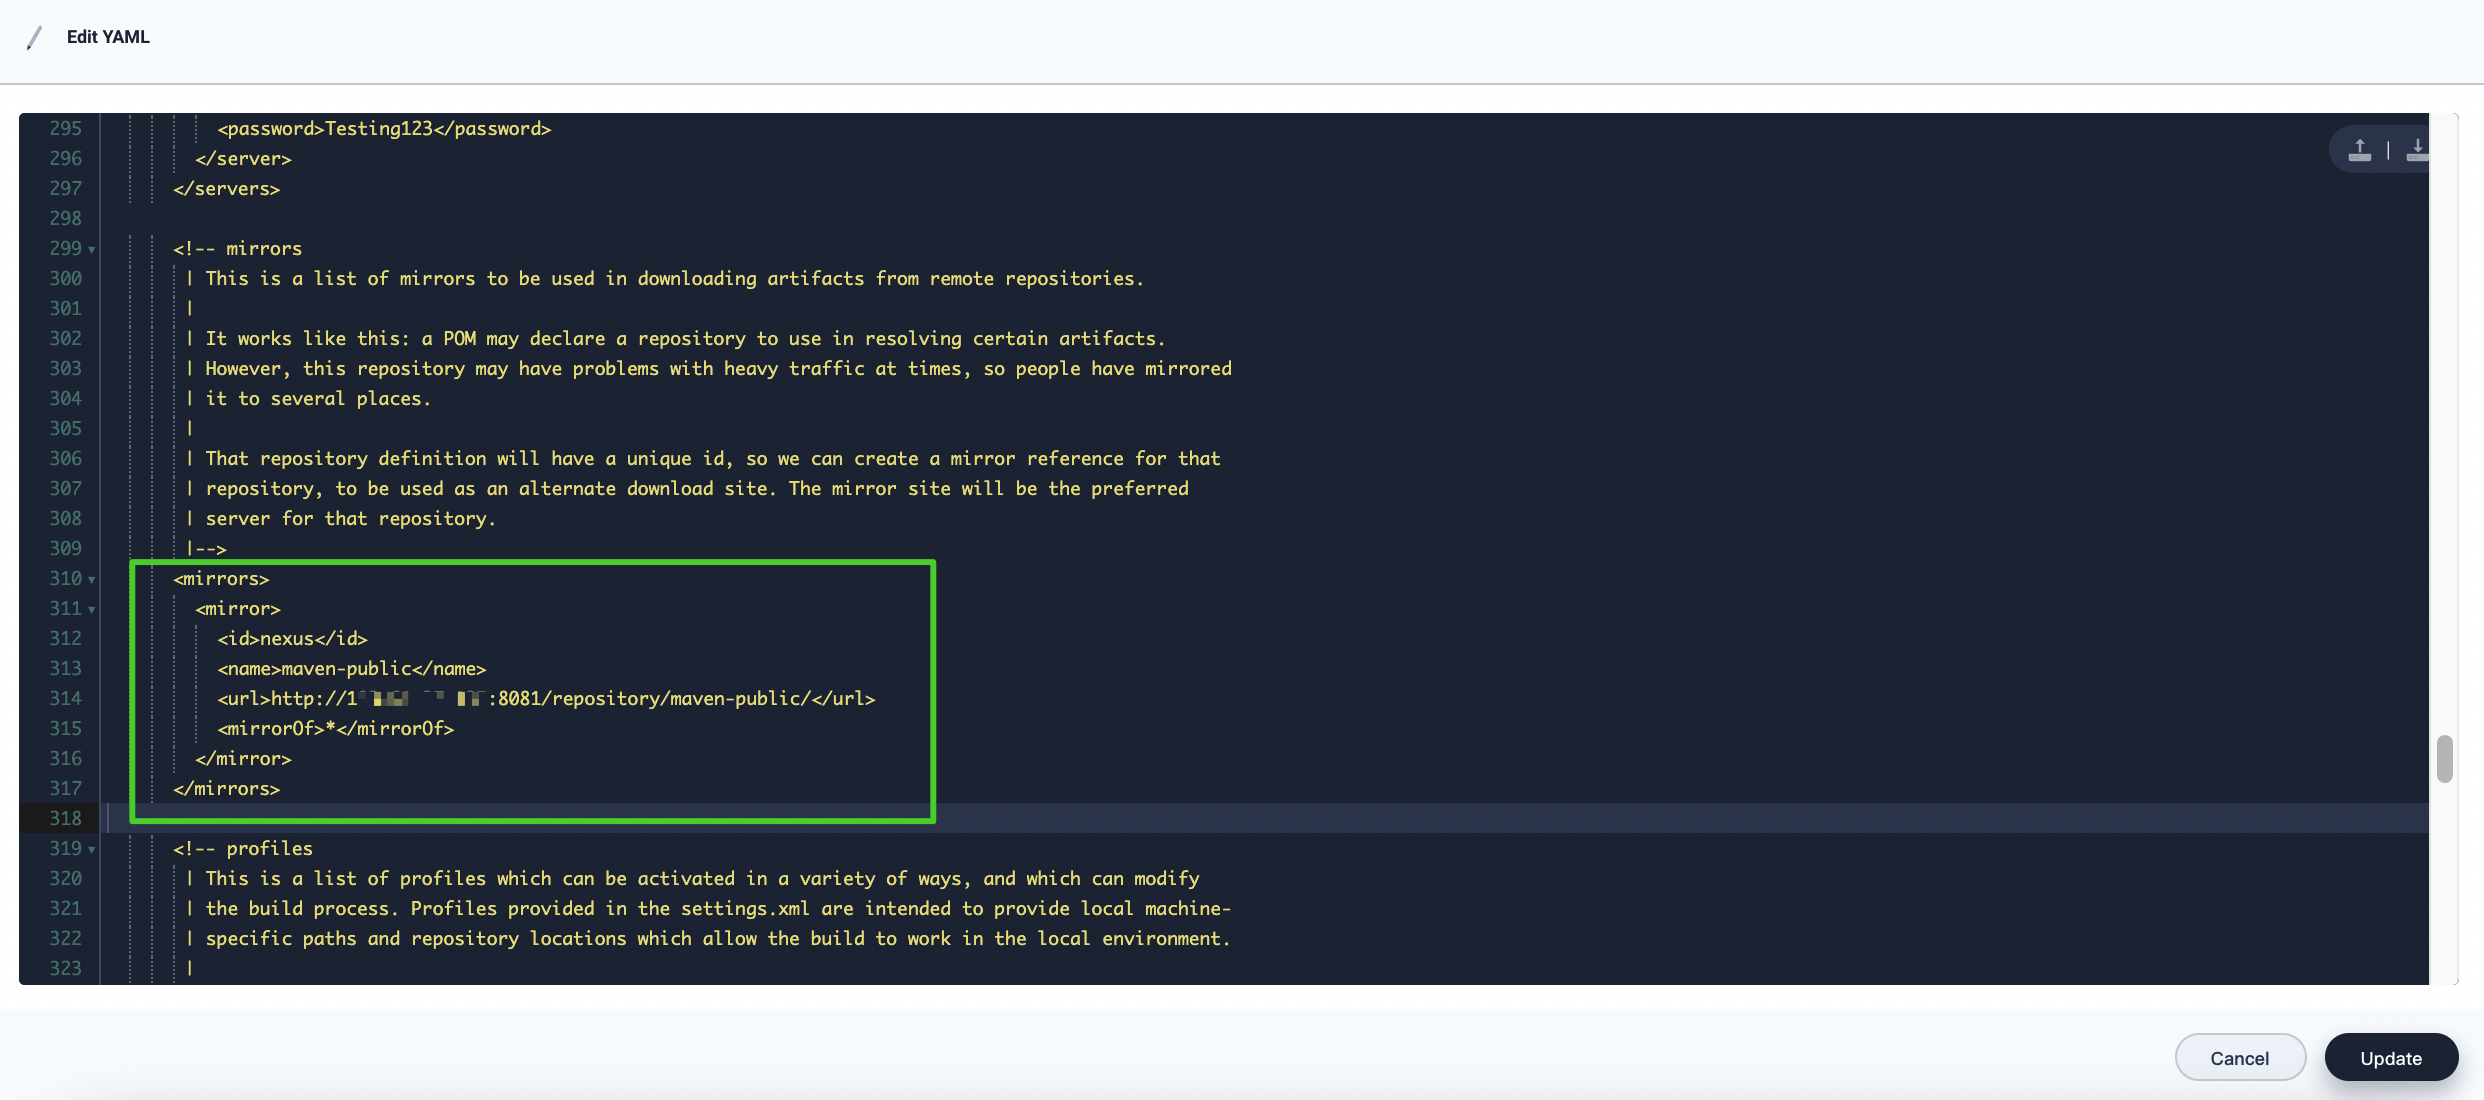
Note
<id>is the unique identifier you set for your Nexus in step 2.<name>is the Nexus repository name.<url>is the URL of your Nexus repository.<mirrorOf>is the Maven repository to be mirrored. In this tutorial, enter*to mirror all Maven repositories. For more information, refer to Using Mirrors for Repositories. -
When you finish, click Update.
Step 4: Create a pipeline
-
Log out of the KubeSphere web console and log back in as
project-regular. Go to your DevOps project and click Create on the Pipelines page. -
On the Basic Information tab, set a name for the pipeline (for example,
nexus-pipeline) and click Next.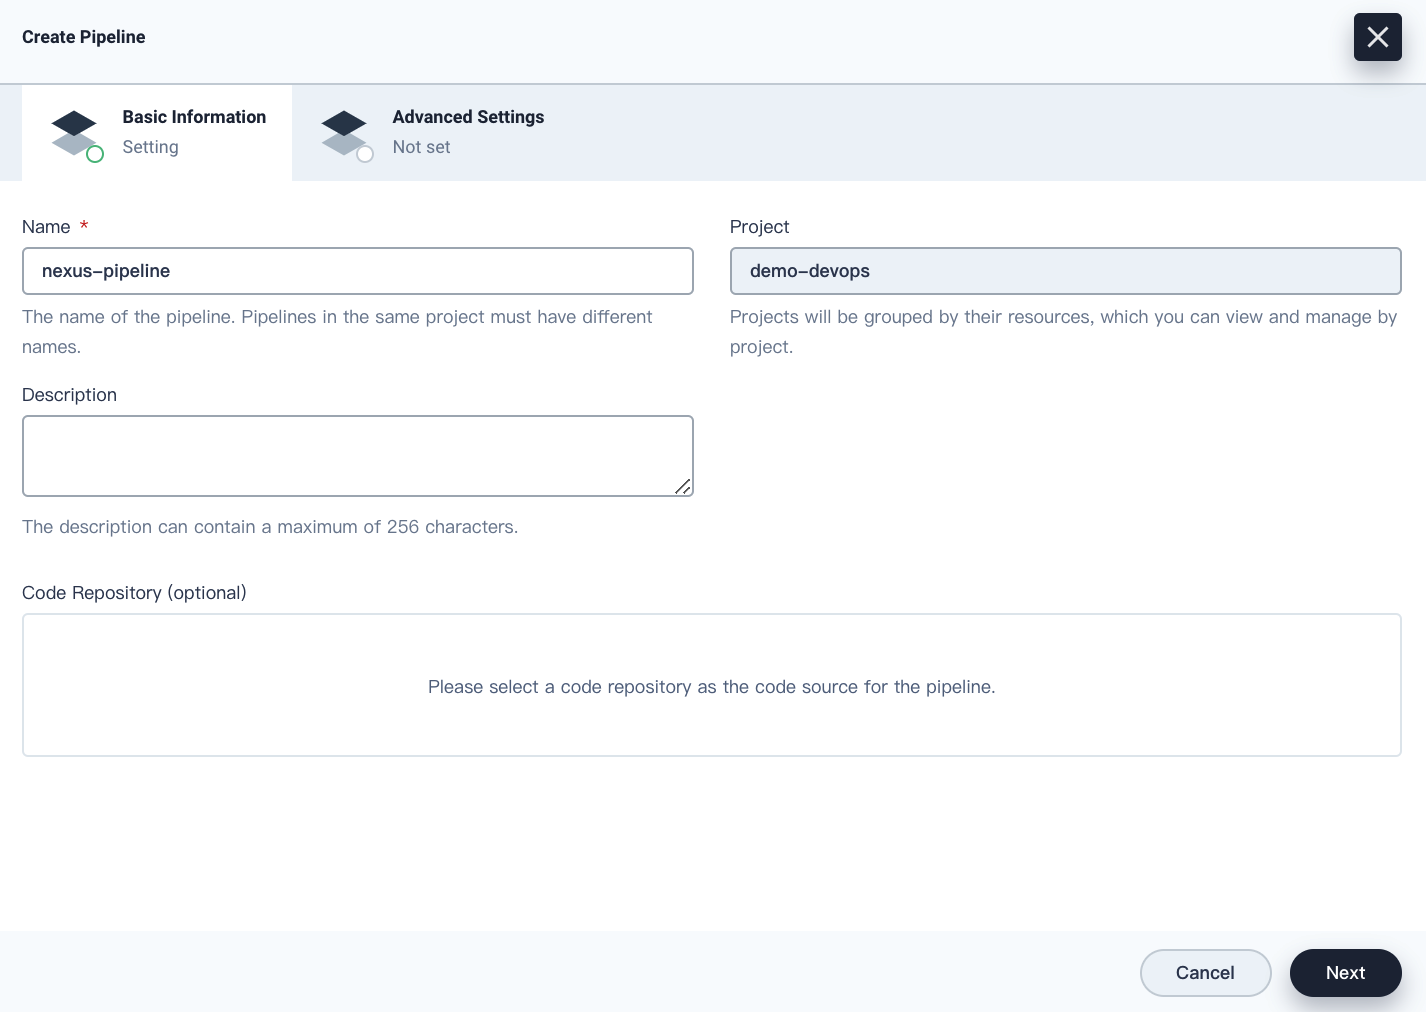
-
On the Advanced Settings tab, click Create to use the default settings.
-
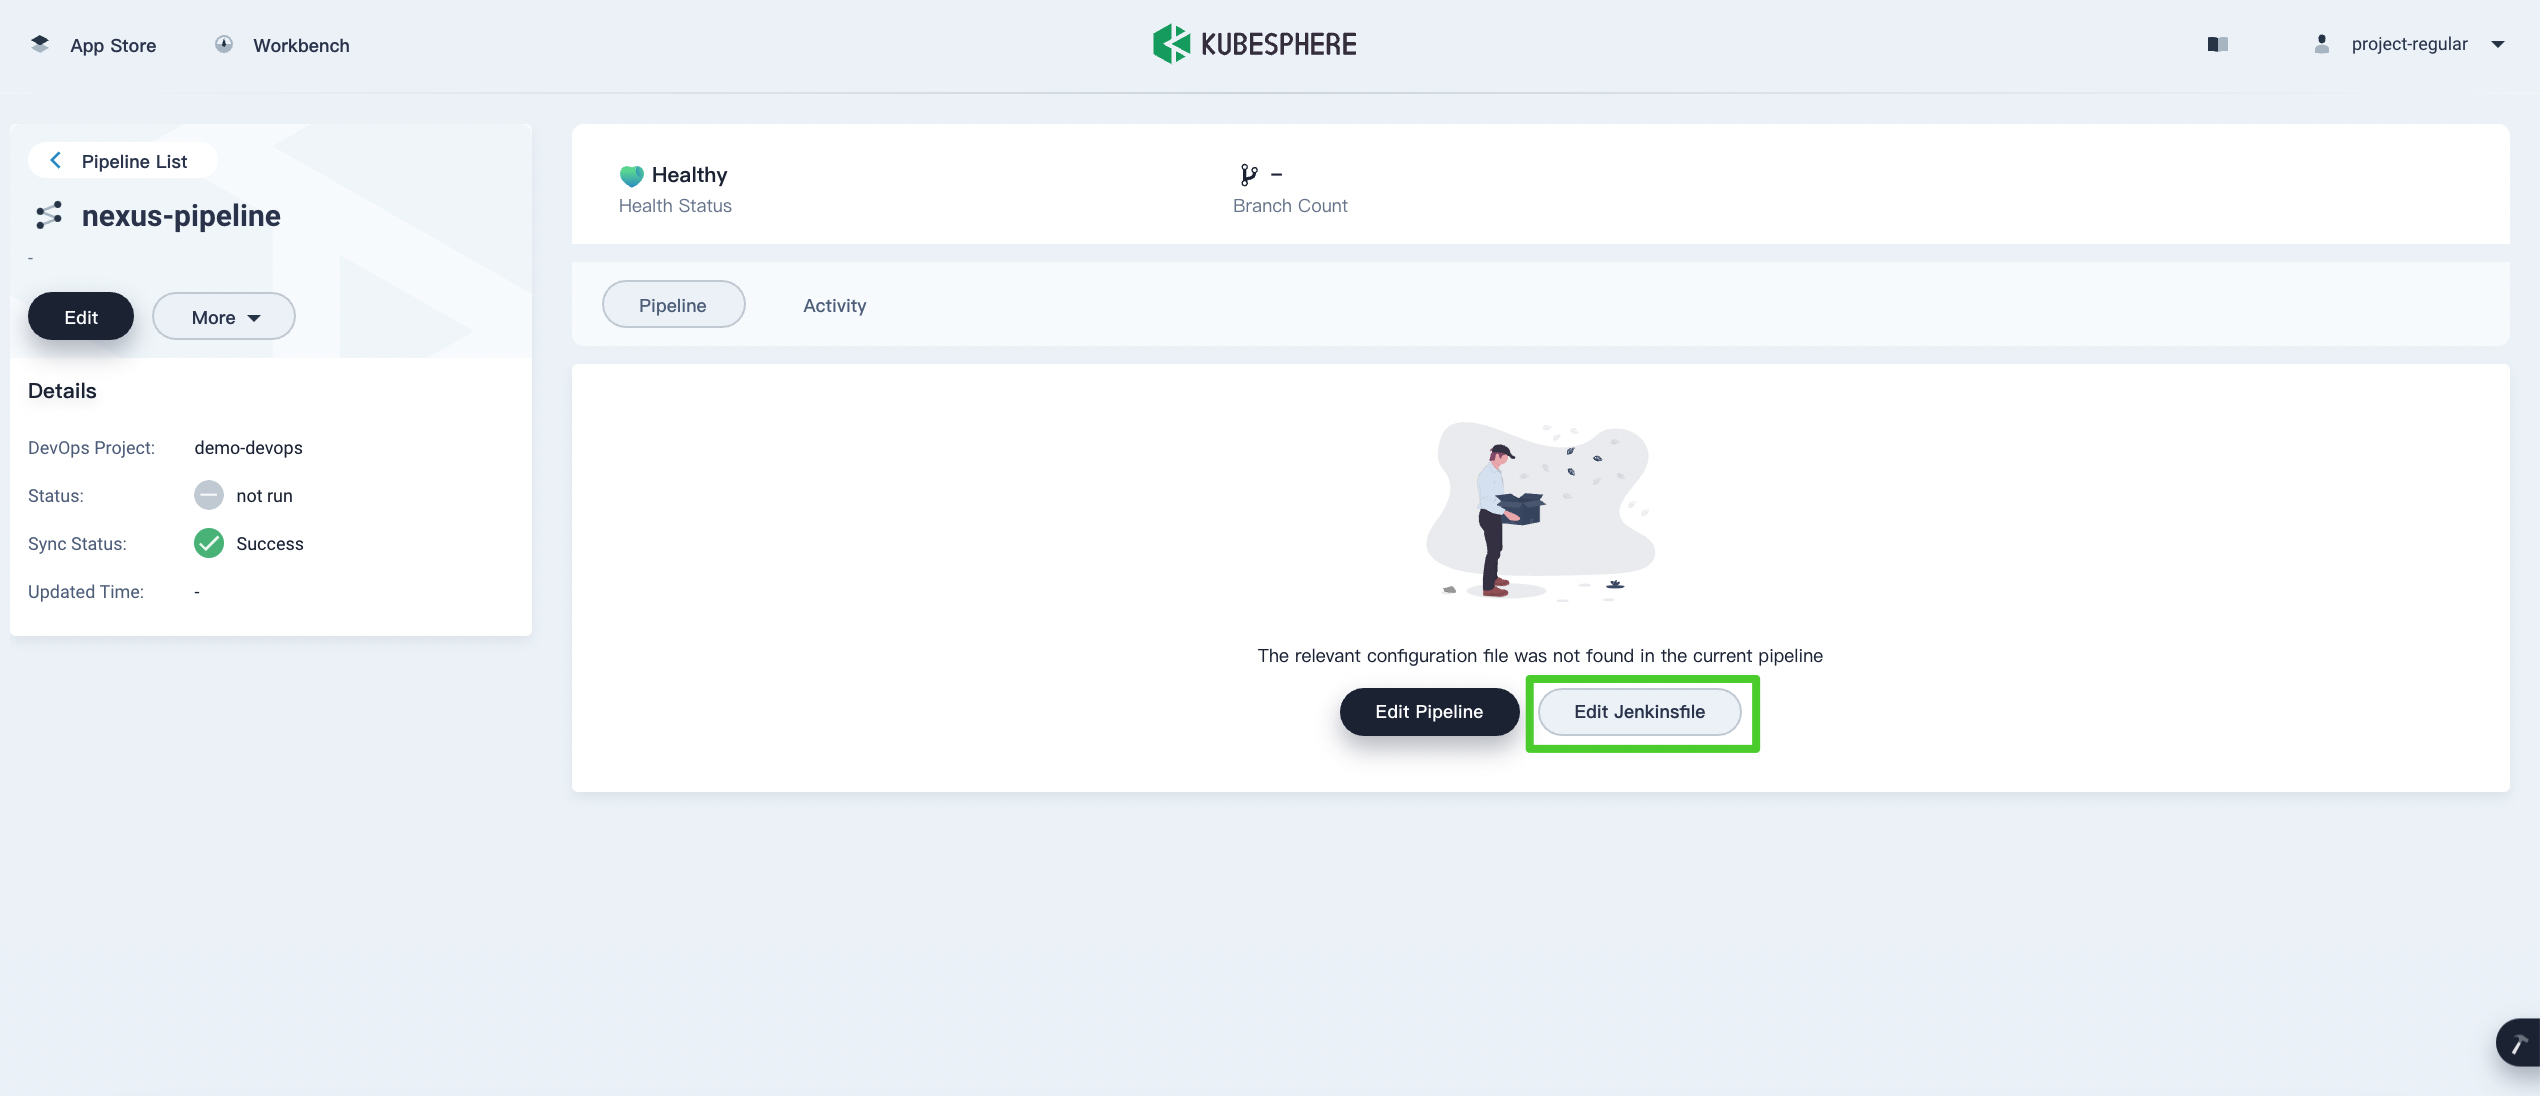
Click the pipeline to go to its detail page and click Edit Jenkinsfile.
-
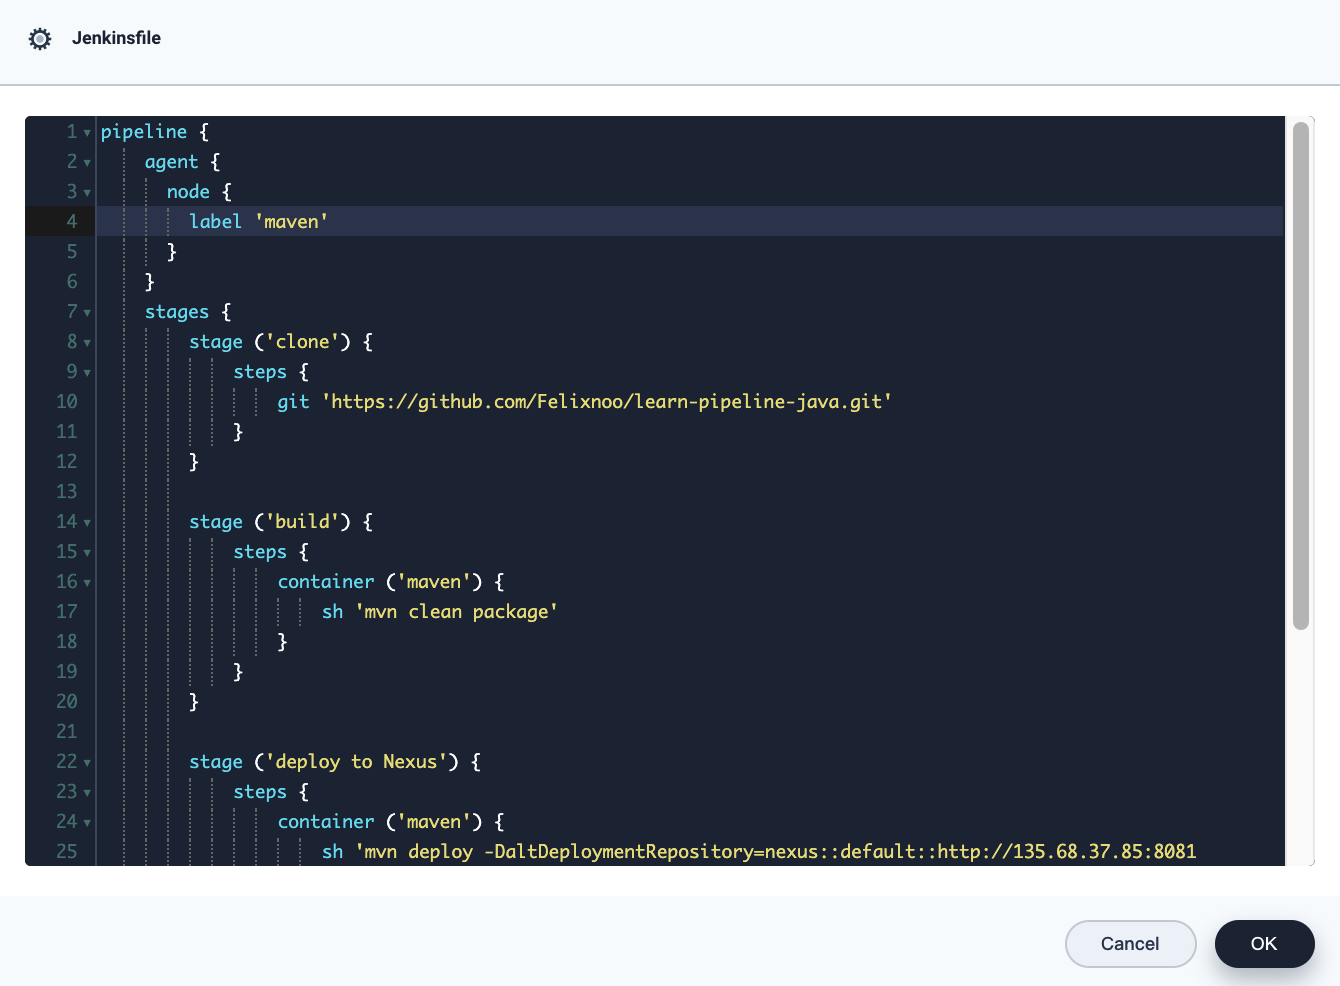
In the displayed dialog box, enter the Jenkinsfile as follows. When you finish, click OK.
pipeline {
    agent {
      node {
        label 'maven'
      }
    }
    stages {
        stage ('clone') {
            steps {
                git 'https://github.com/Felixnoo/learn-pipeline-java.git'
            }
        }

        stage ('build') {
            steps {
                container ('maven') {
                    sh 'mvn clean package'
                }
            }
        }

        stage ('deploy to Nexus') {
            steps {
                container ('maven') {
                    sh 'mvn deploy -DaltDeploymentRepository=nexus::default::http://135.68.37.85:8081/repository/maven-snapshots/'
                }
            }
        }
        stage ('upload') {
            steps {
                archiveArtifacts artifacts: 'target/*.jar', followSymlinks: false
            }
        }
    }
}
Note
You need to replace the GitHub repository address with your own. In the command from the step in the stagedeploy to Nexus,nexusis the name you set in<id>in the ConfigMap andhttp://135.68.37.85:8081/repository/maven-snapshots/is the URL of your Nexus repository.
Step 5: Run the pipeline and check results
-
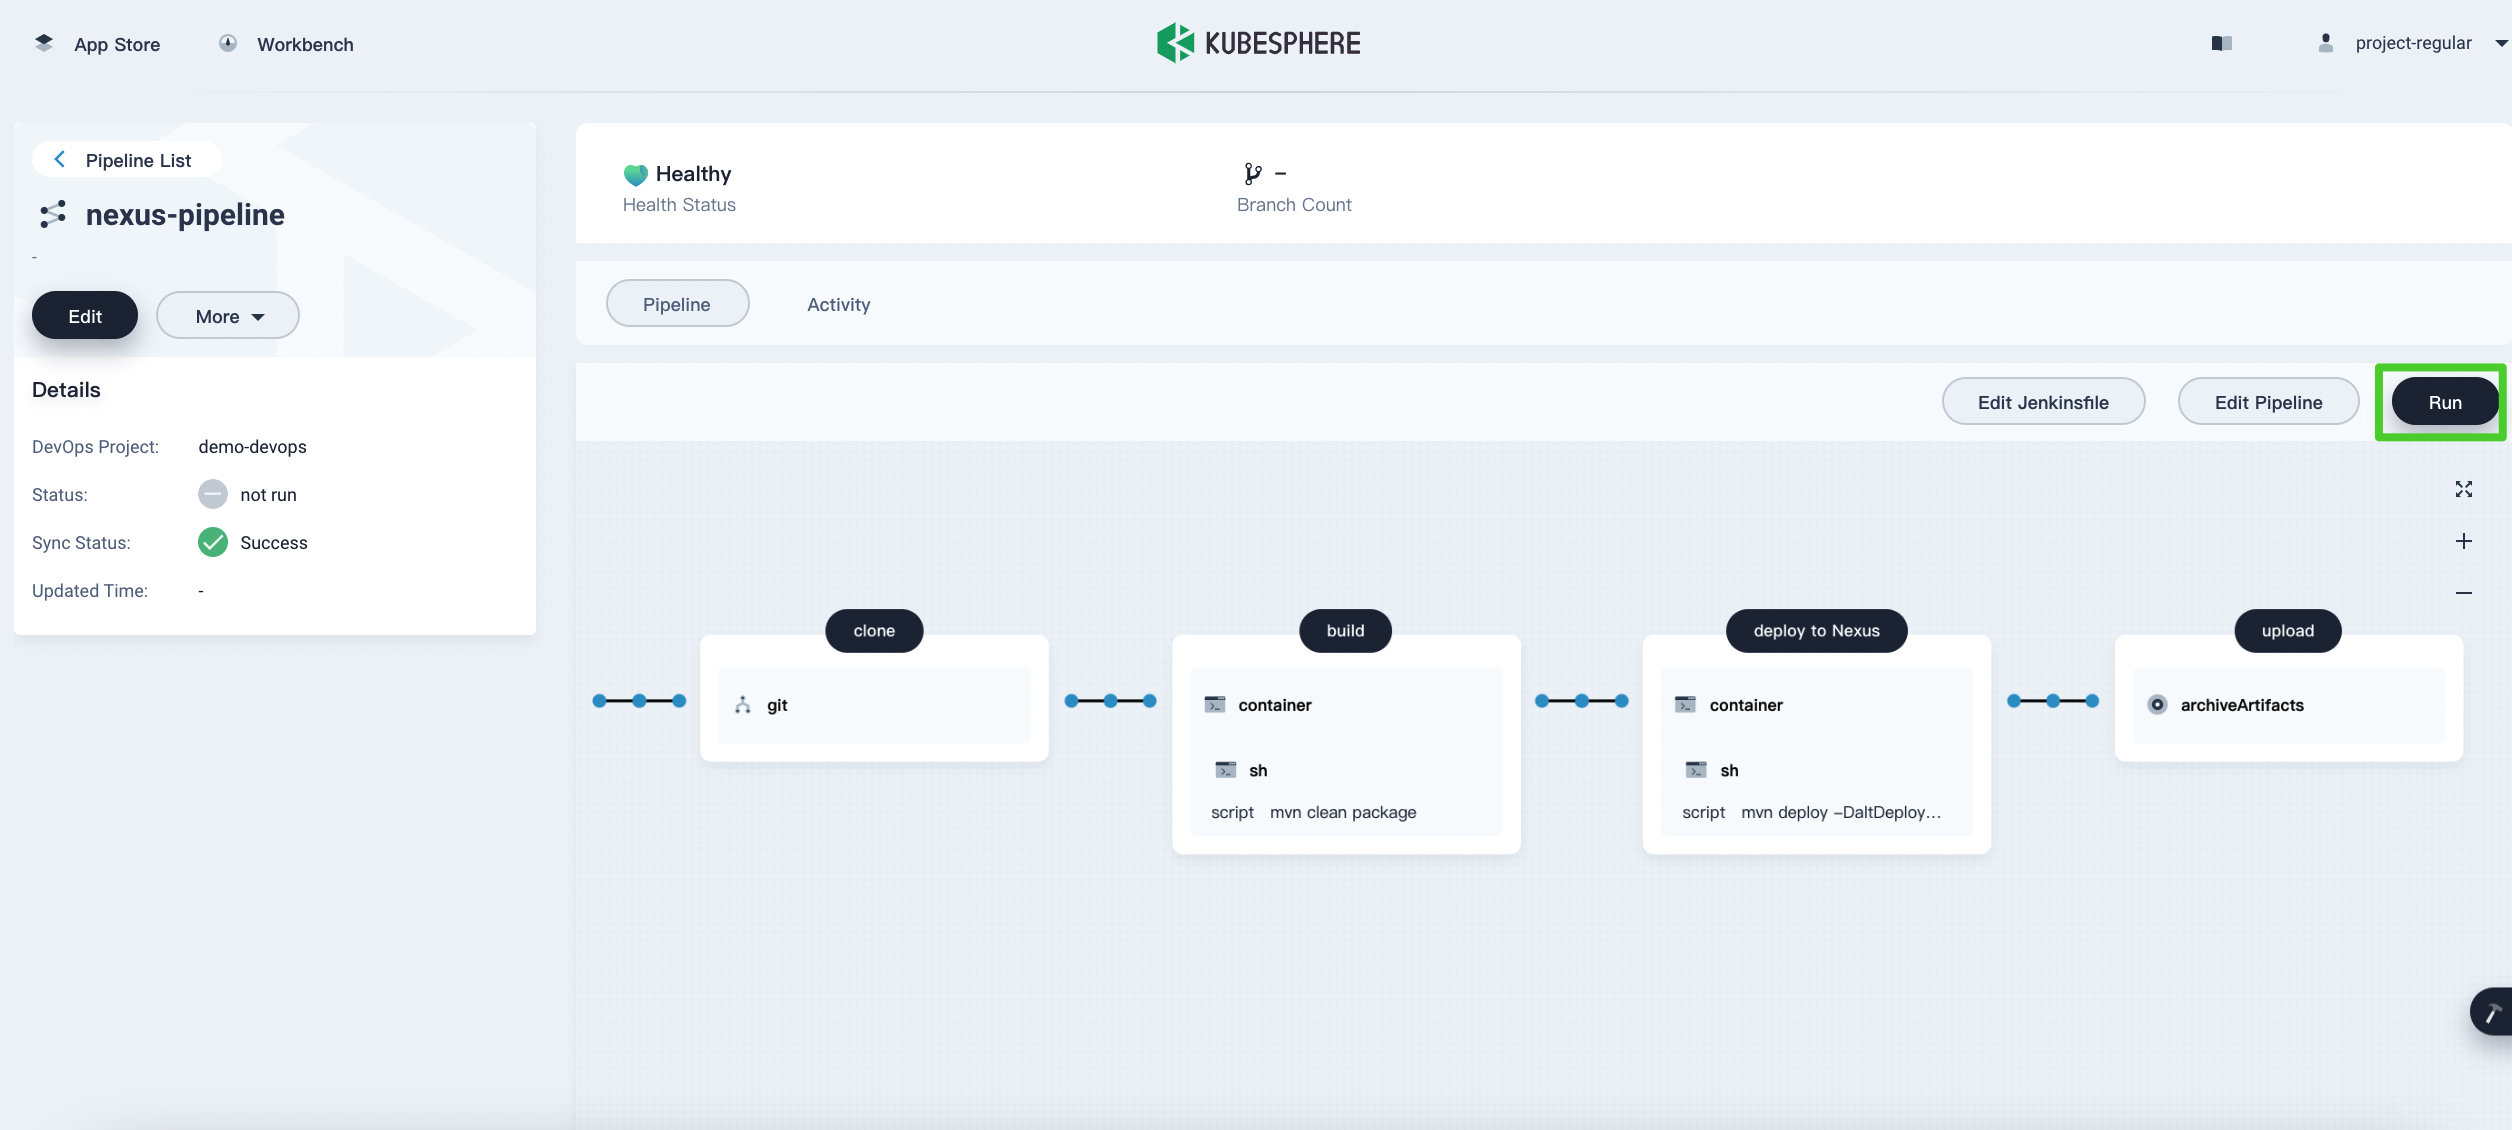
You can see all the stages and steps shown on the graphical editing panels. Click Run to run the pipeline.
-
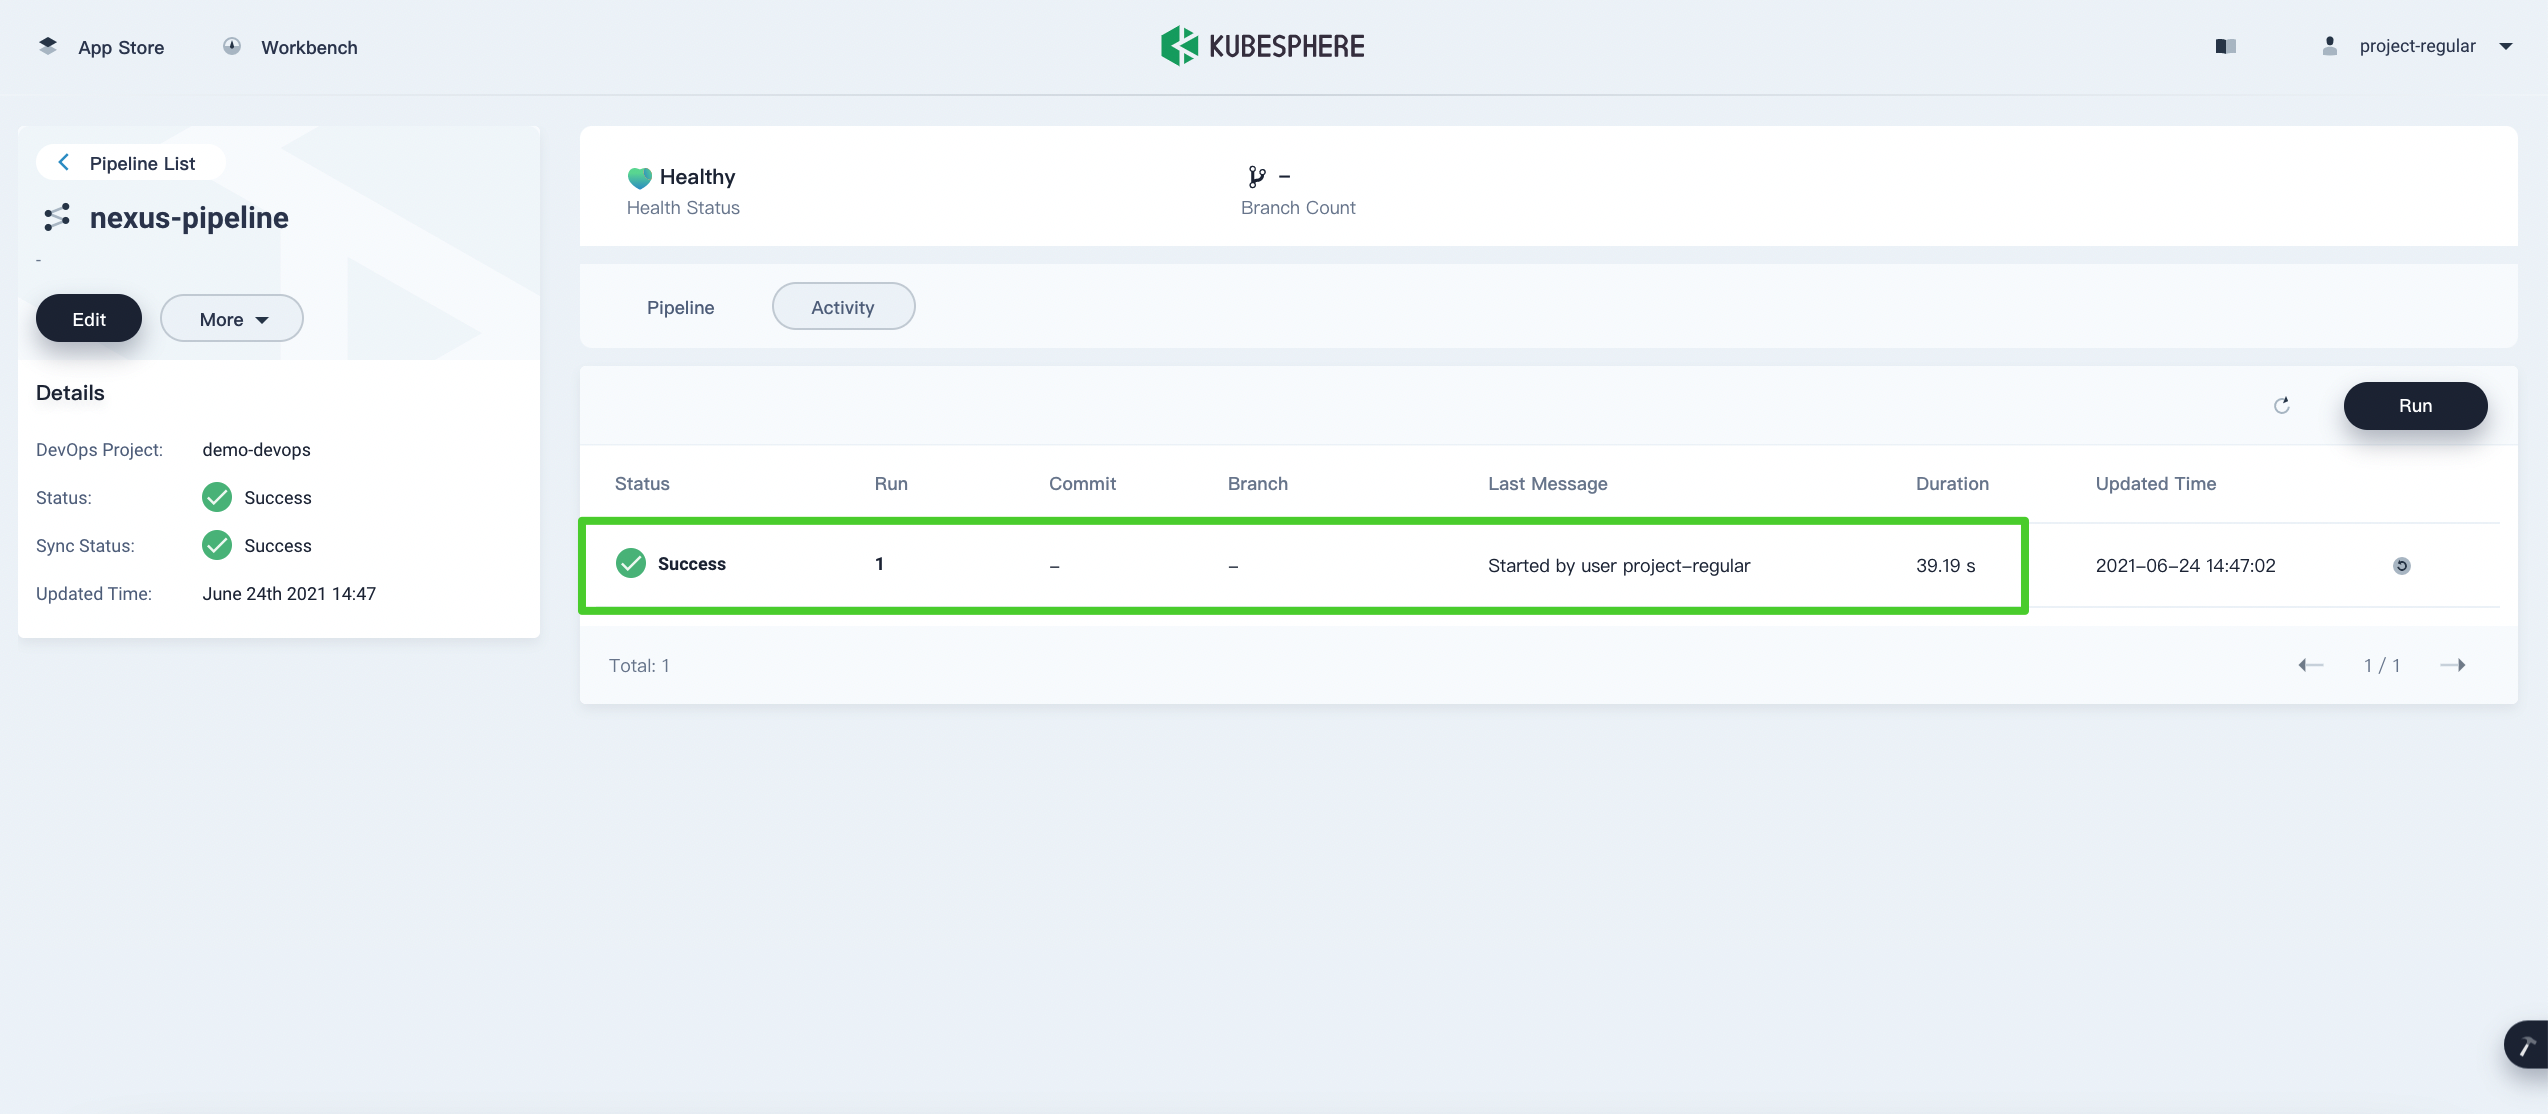
After a while, you can see the pipeline status shown as Success. Click the Success record to see its details.
-
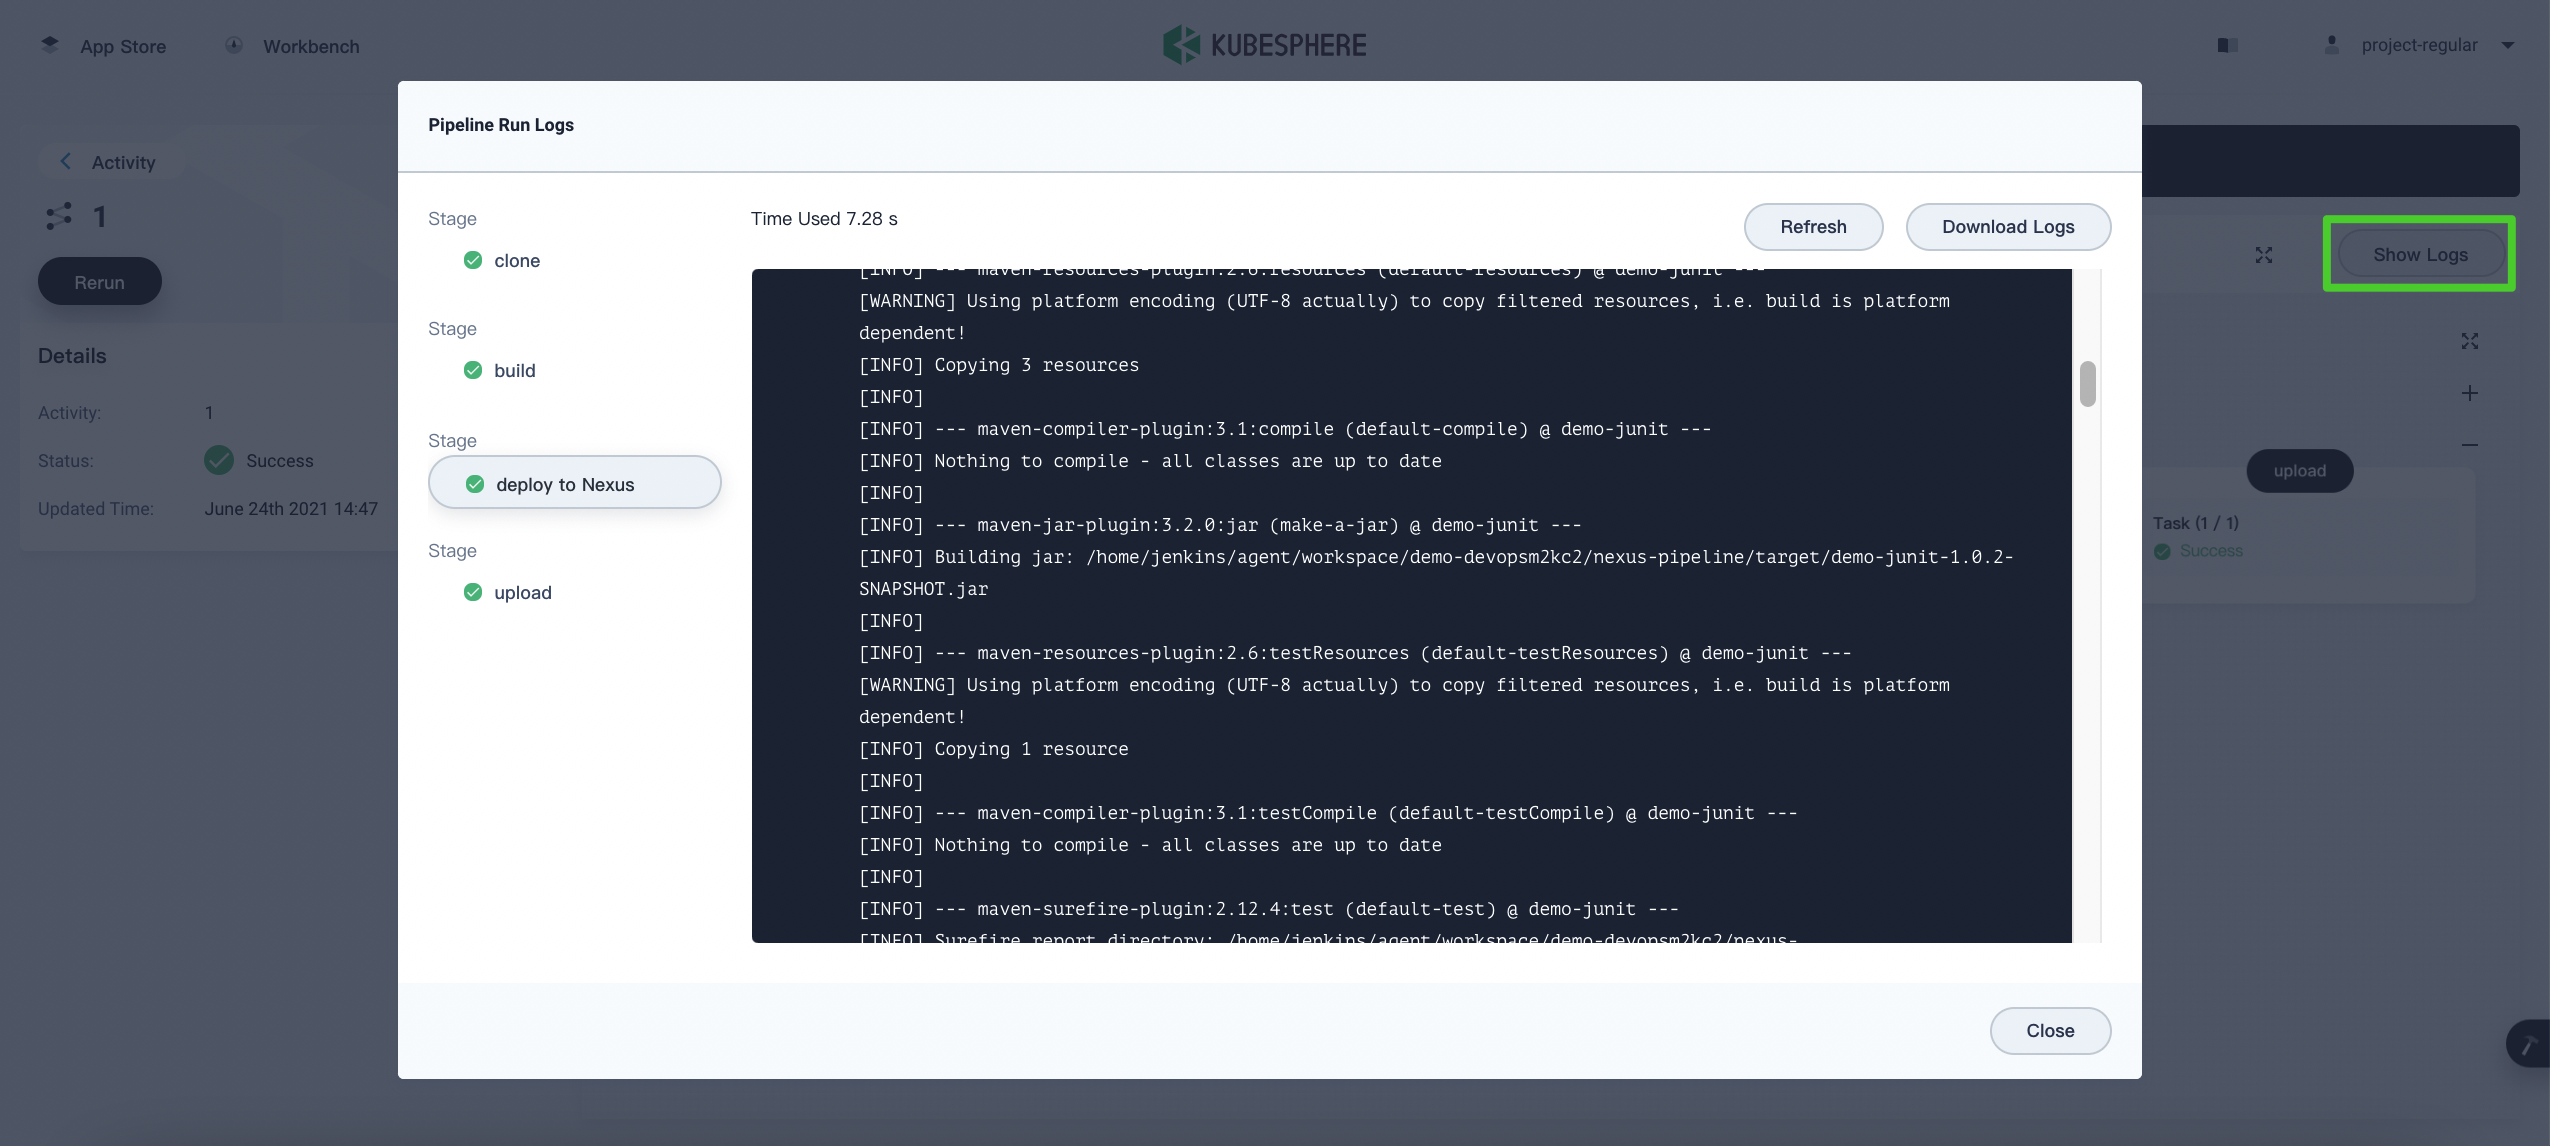
You can click Show Logs to view the detailed logs.
-
Log in to Nexus and click Browse. Click maven-public and you can see all the dependencies have been downloaded.

-
Go back to the Browse page and click maven-snapshots. You can see the JAR package has been uploaded to the repository.

Feedback
Was this page Helpful?
Thanks for the feedback. If you have a specific question about how to use KubeSphere, ask it on Slack. Open an issue in the GitHub repo if you want to report a problem or suggest an improvement.


 Previous
