


CronJobs
CronJobs are useful for creating periodic and recurring tasks, like running backups or sending emails. CronJobs can also schedule individual tasks at a specific time or interval, such as scheduling a Job for when your cluster is likely to be idle.
For more information, see the official documentation of Kubernetes.
Prerequisites
You need to create a workspace, a project and an account (project-regular). The account must be invited to the project with the role of operator. For more information, see Create Workspaces, Projects, Accounts and Roles.
Create a CronJob
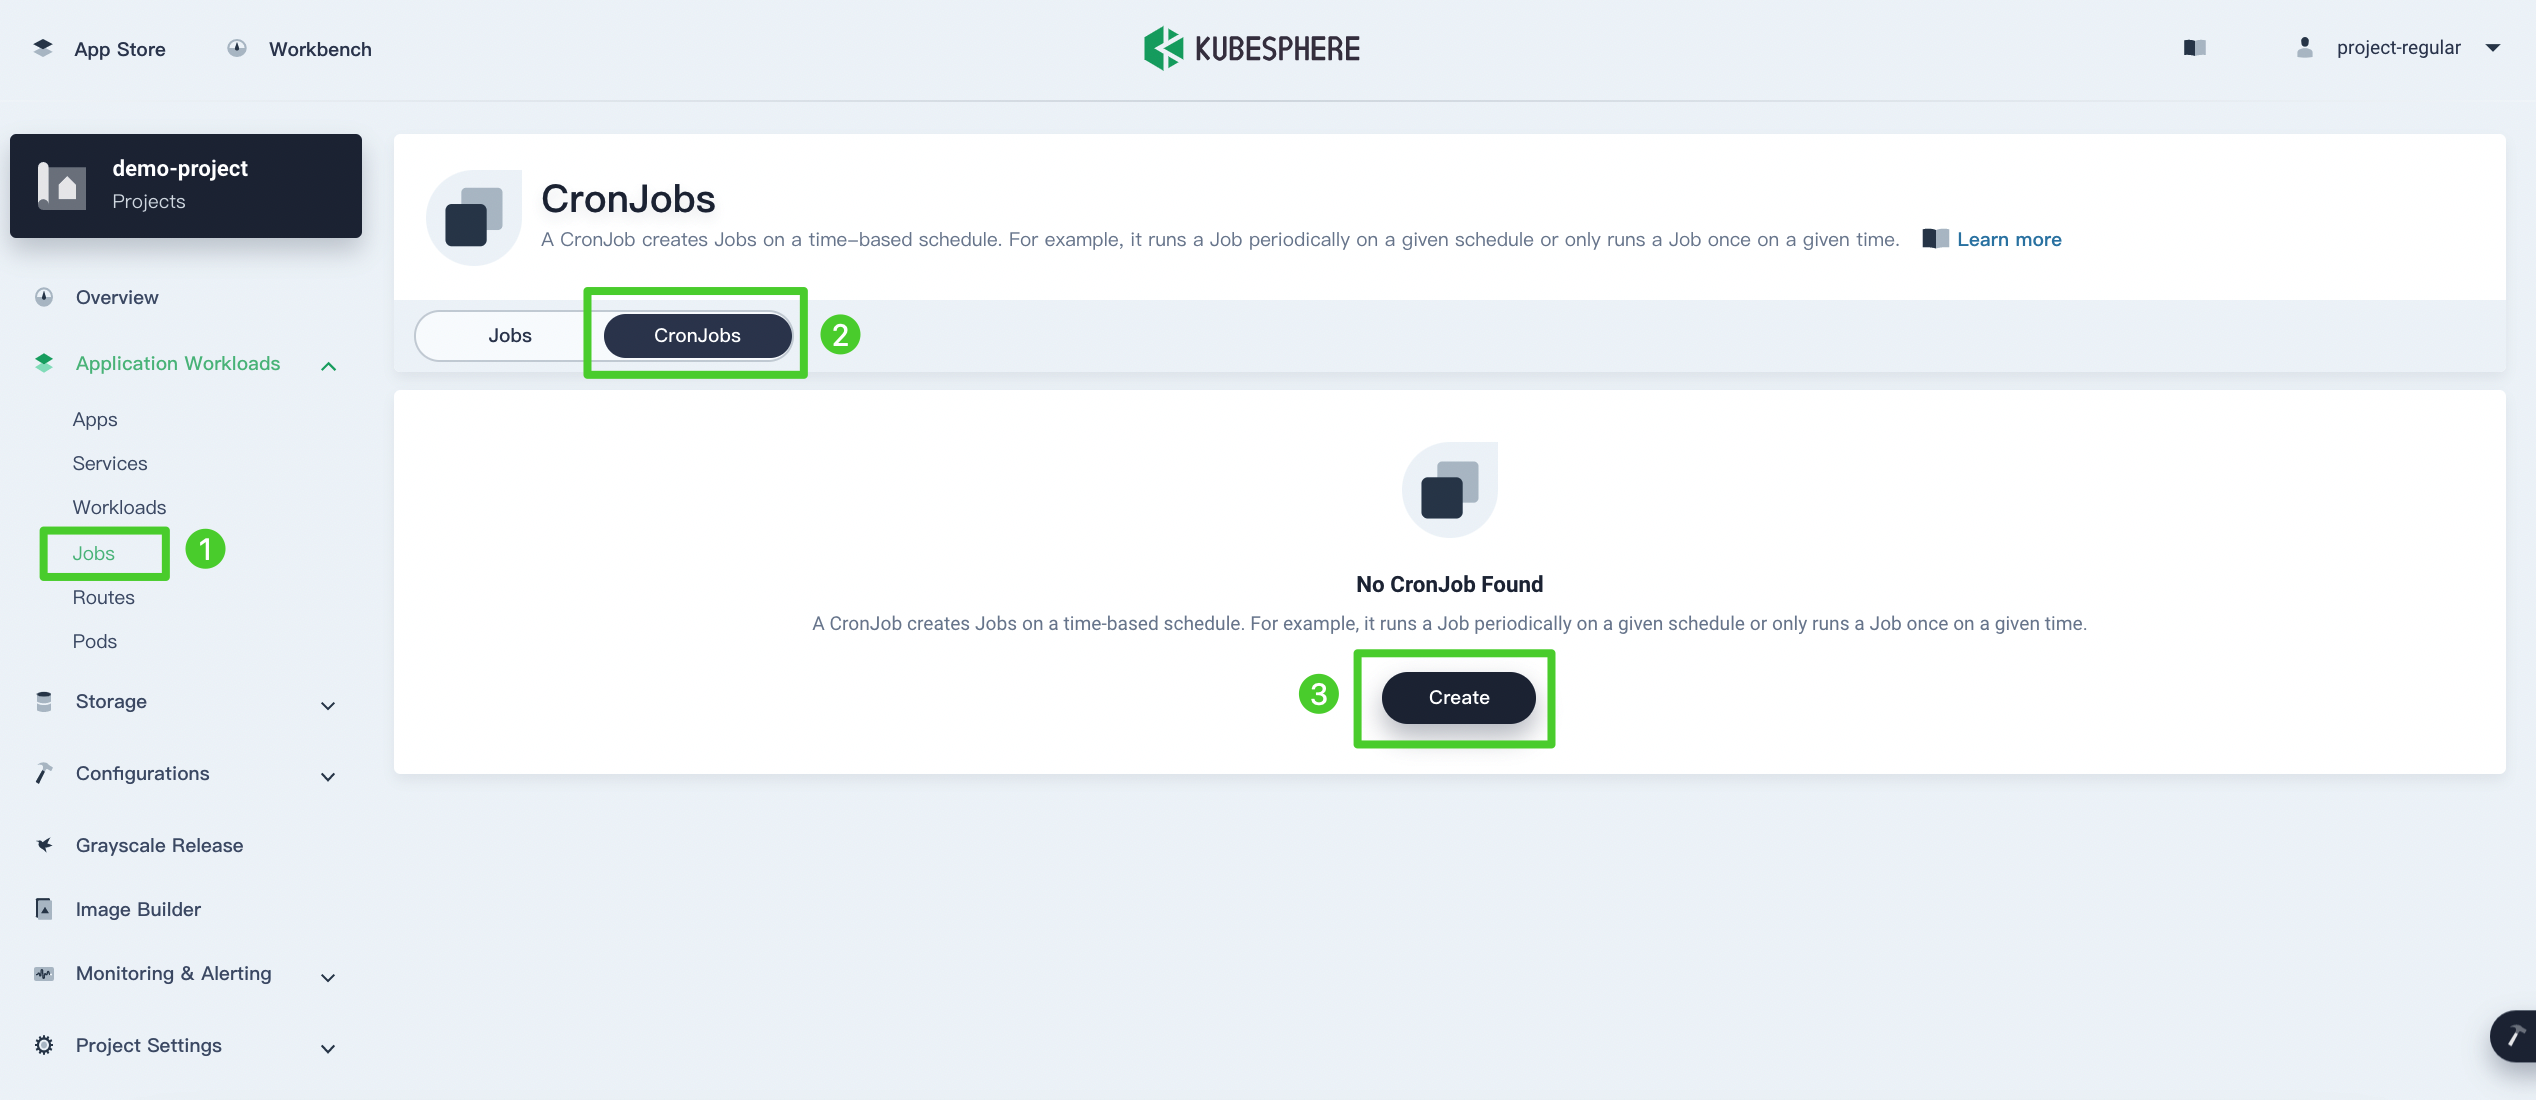
Step 1: Open the dashboard
Log in to the console as project-regular. Go to Jobs of a project, choose CronJobs and click Create.
Step 2: Enter basic information
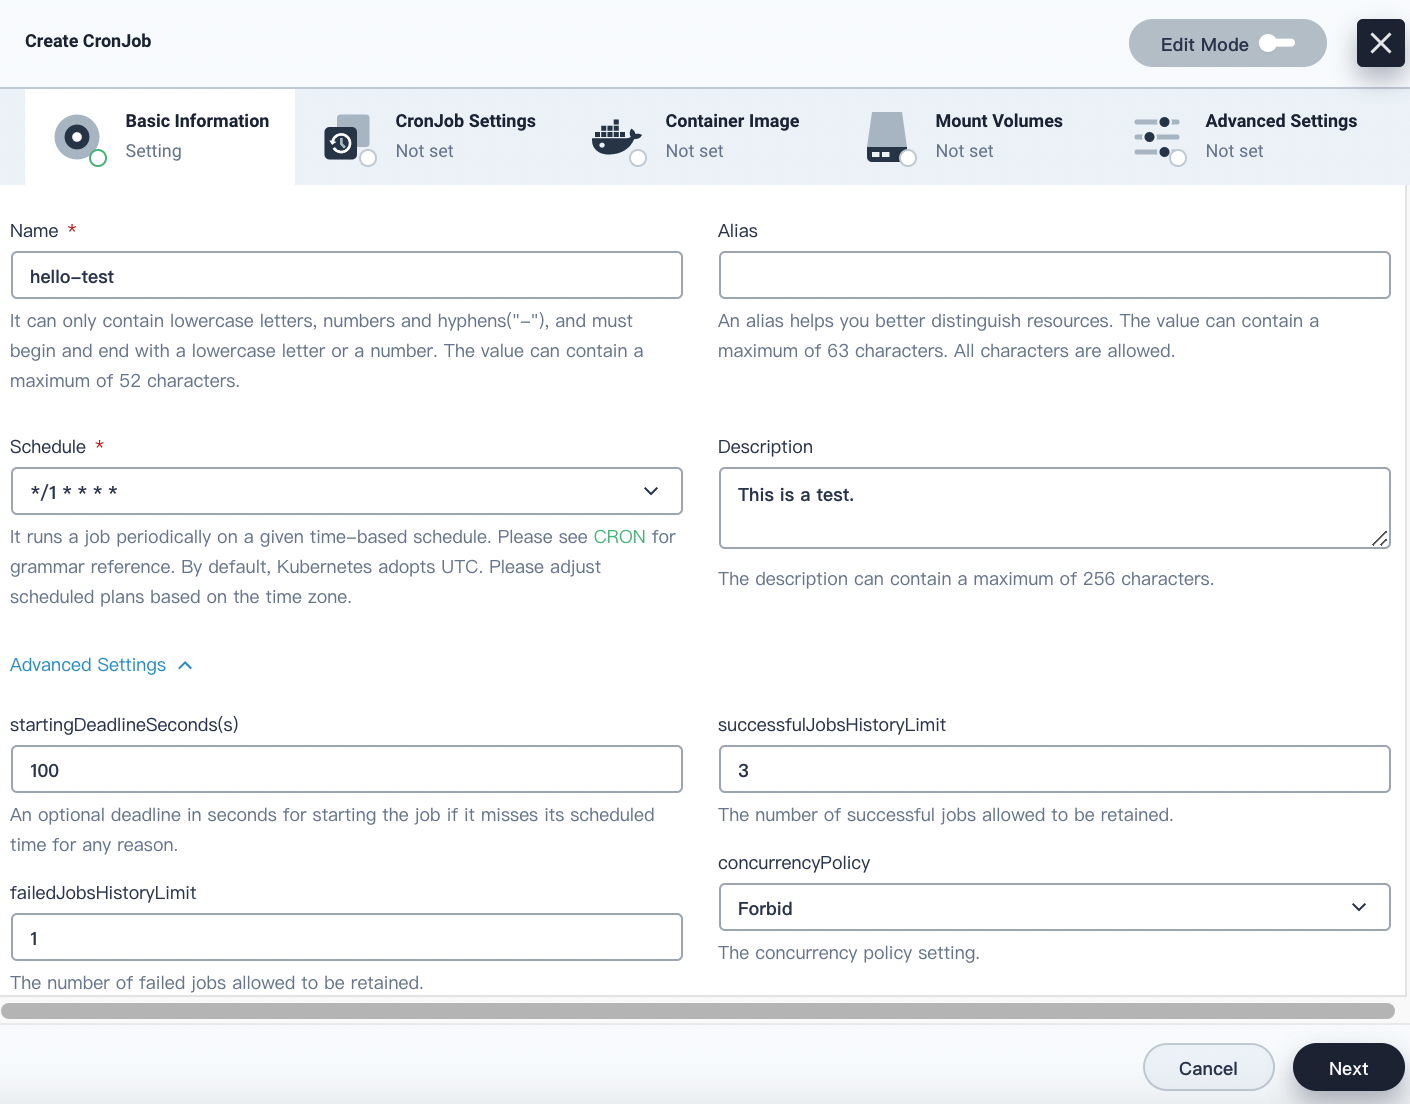
Enter the basic information. You can refer to the image below for each field. When you finish, click Next.
-
Name: The name of the CronJob, which is also the unique identifier.
-
Alias: The alias name of the CronJob, making resources easier to identify.
-
Schedule: It runs a Job periodically on a given time-based schedule. Please see CRON for grammar reference. Some preset CRON statements are provided in KubeSphere to simplify the input. This field is specified by
.spec.schedule. For this CronJob, enter*/1 * * * *, which means it runs once per minute.Type CRON Every Hour 0 * * * *Every Day 0 0 * * *Every Week 0 0 * * 0Every Month 0 0 1 * * -
Advanced Settings (Execution Parameters):
- staringDeadlineSeconds. Specified by
.spec.startingDeadlineSecondsin the manifest file, this optional field represents the maximum number of seconds that a ConJob can take to start if it misses the scheduled time for any reason. CronJobs that have missed executions will be counted as failed ones. If you do not specify this field, there is no deadline for the CronJob. - successfulJobsHistoryLimit. Specified by
.spec.successfulJobsHistoryLimitin the manifest file, this field represents the number of successful CronJob executions to retain. This is a pointer to distinguish between explicit zero and not specified. It defaults to 3. - failedJobsHistoryLimit. Specified by
.spec.failedJobsHistoryLimitin the manifest file, this field represents the number of failed CronJob executions to retain. This is a pointer to distinguish between explicit zero and not specified. It defaults to 1. - concurrencyPolicy. Specified by
.spec.concurrencyPolicy, it represents how to treat concurrent executions of a Job. Valid values are:- Allow (default): It allows CronJobs to run concurrently.
- Forbid: It forbids concurrent runs, skipping the next run if the previous run hasn’t finished yet.
- Replace: It cancels currently running Job and replaces it with a new one.
- staringDeadlineSeconds. Specified by
Note
You can enable Edit Mode in the top-right corner to see the YAML manifest of this CronJob.
Step 3: ConJob settings (Optional)
Please refer to Jobs.
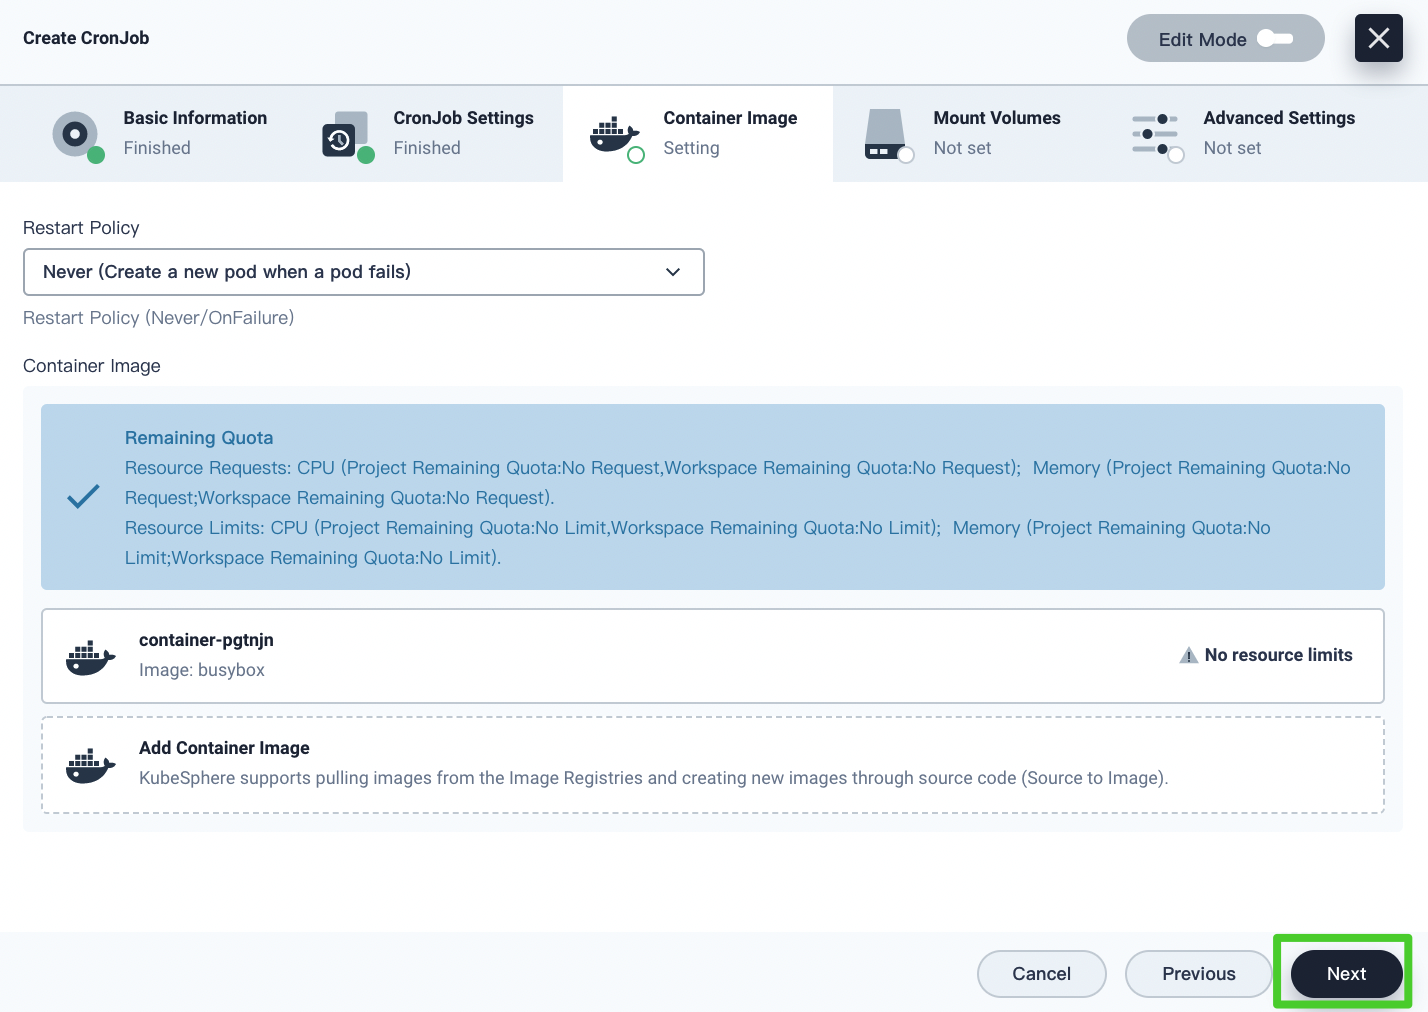
Step 4: Set an image
-
Click Add Container Image in Container Image, enter
busyboxin the search bar, and press Enter.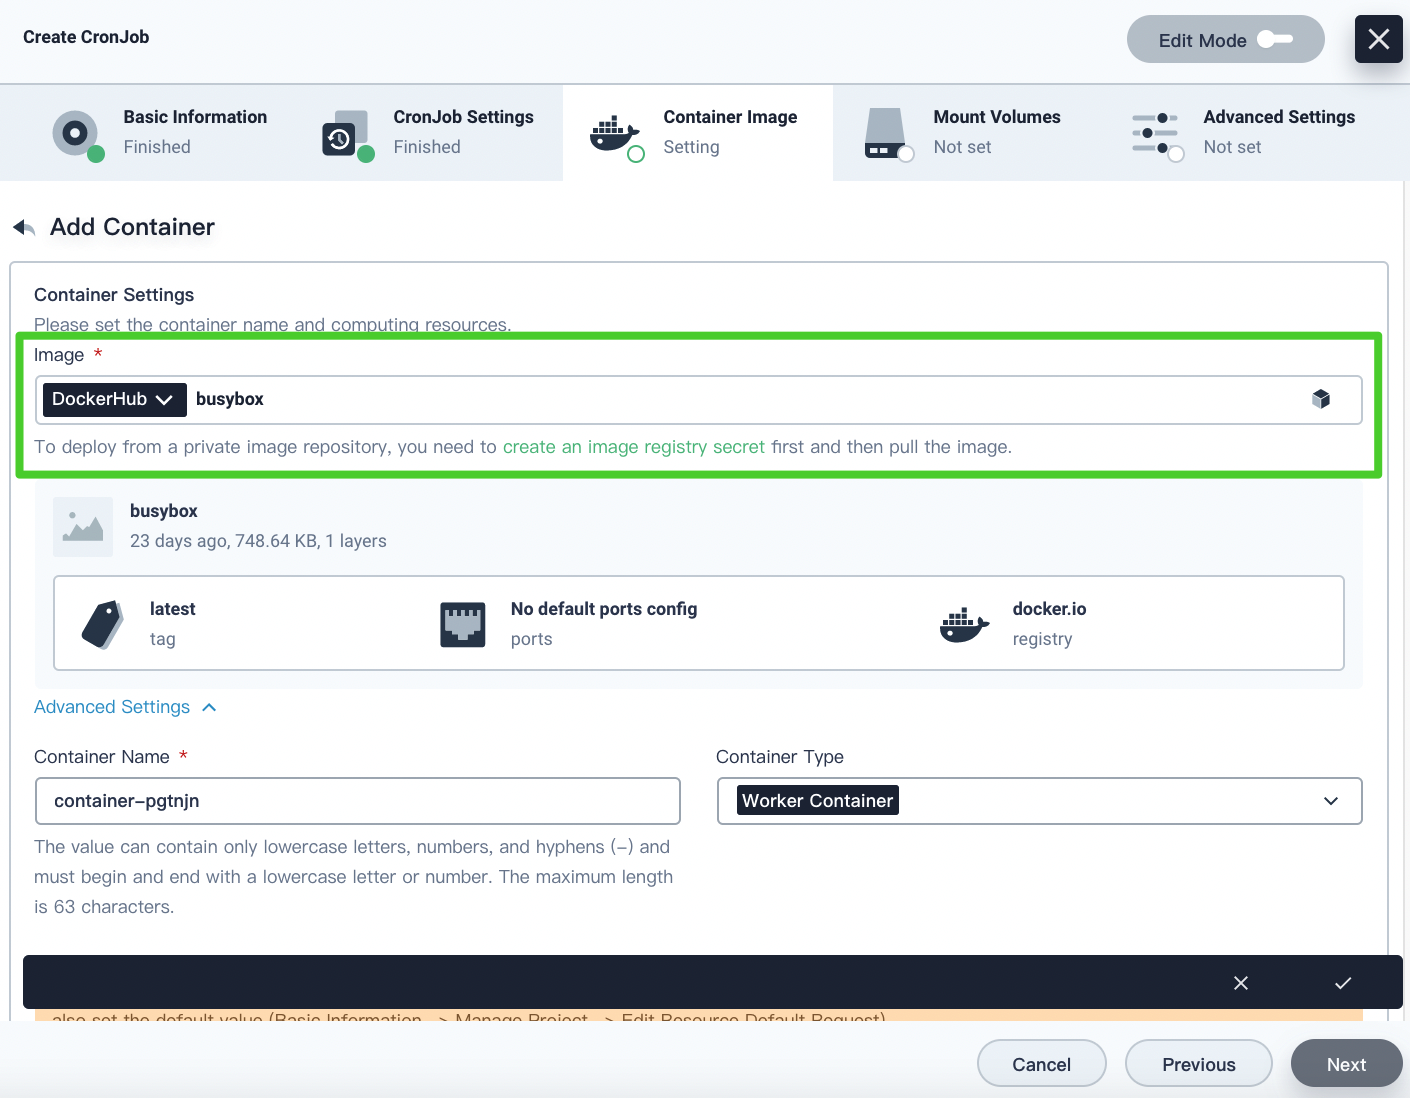
-
Scroll down to Start Command and enter
/bin/sh,-c,date; echo "KubeSphere!"in the box under Parameters.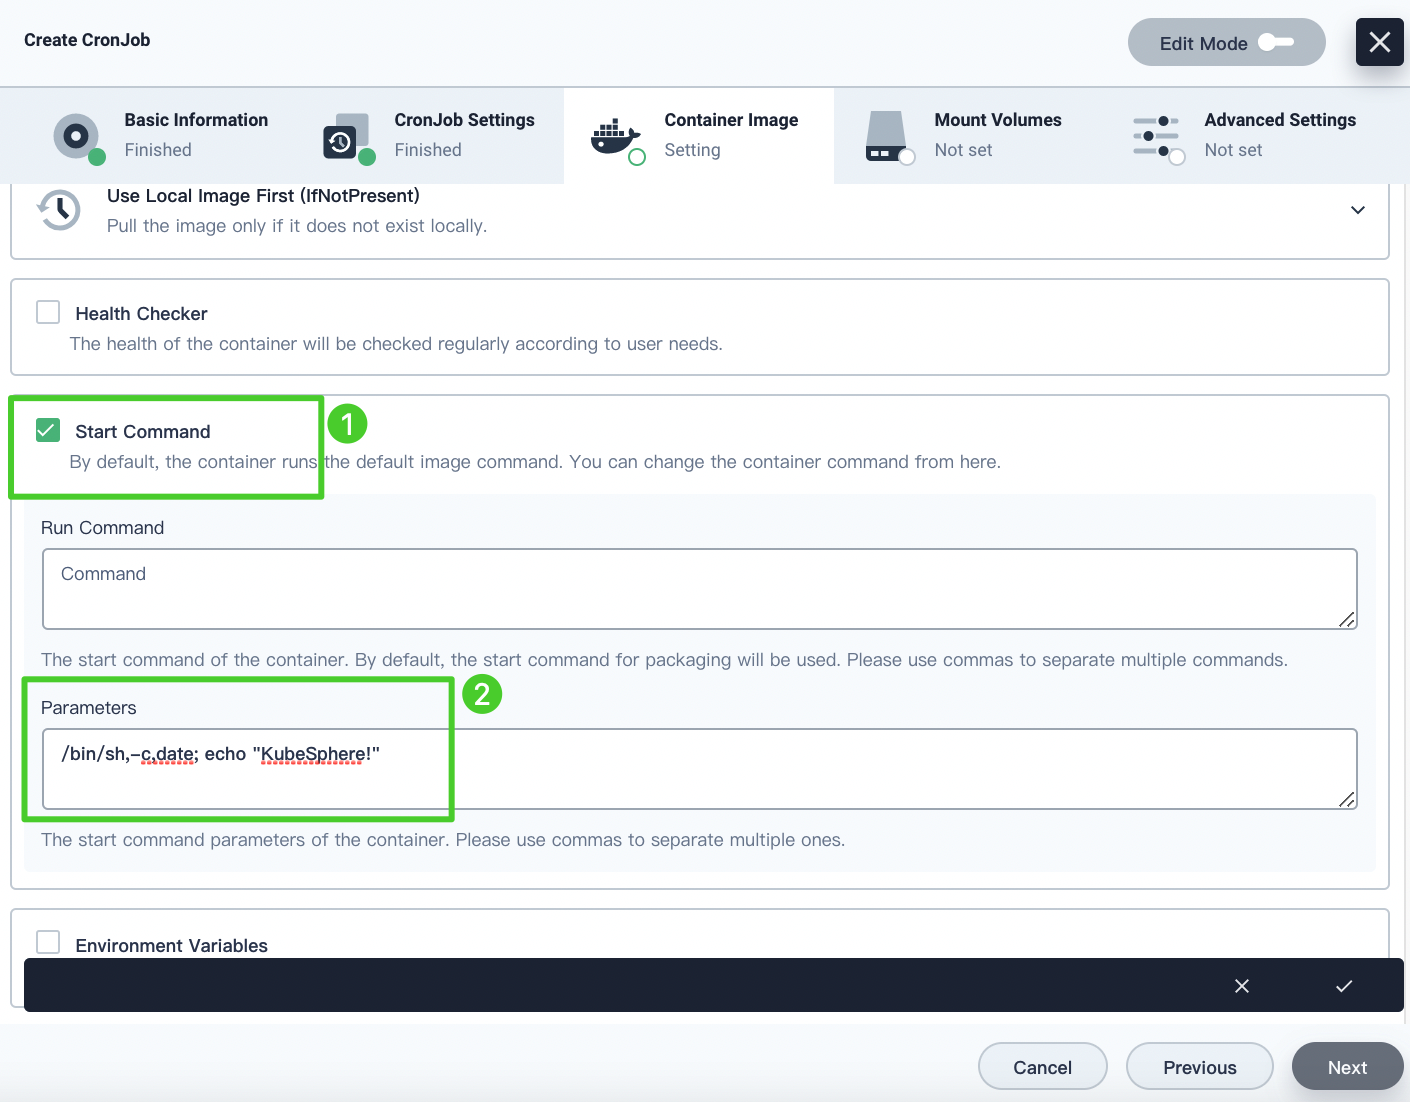
-
Click √ to finish setting the image and Next to continue.
Note
- This example CronJob prints
KubeSphere. For more information about setting images, see Container Image Settings. - For more information about Restart Policy, see Jobs.
- You can skip Mount Volumes and Advanced Settings for this tutorial. For more information, see Mount Volumes and Configure Advanced Settings in Deployments.
- This example CronJob prints
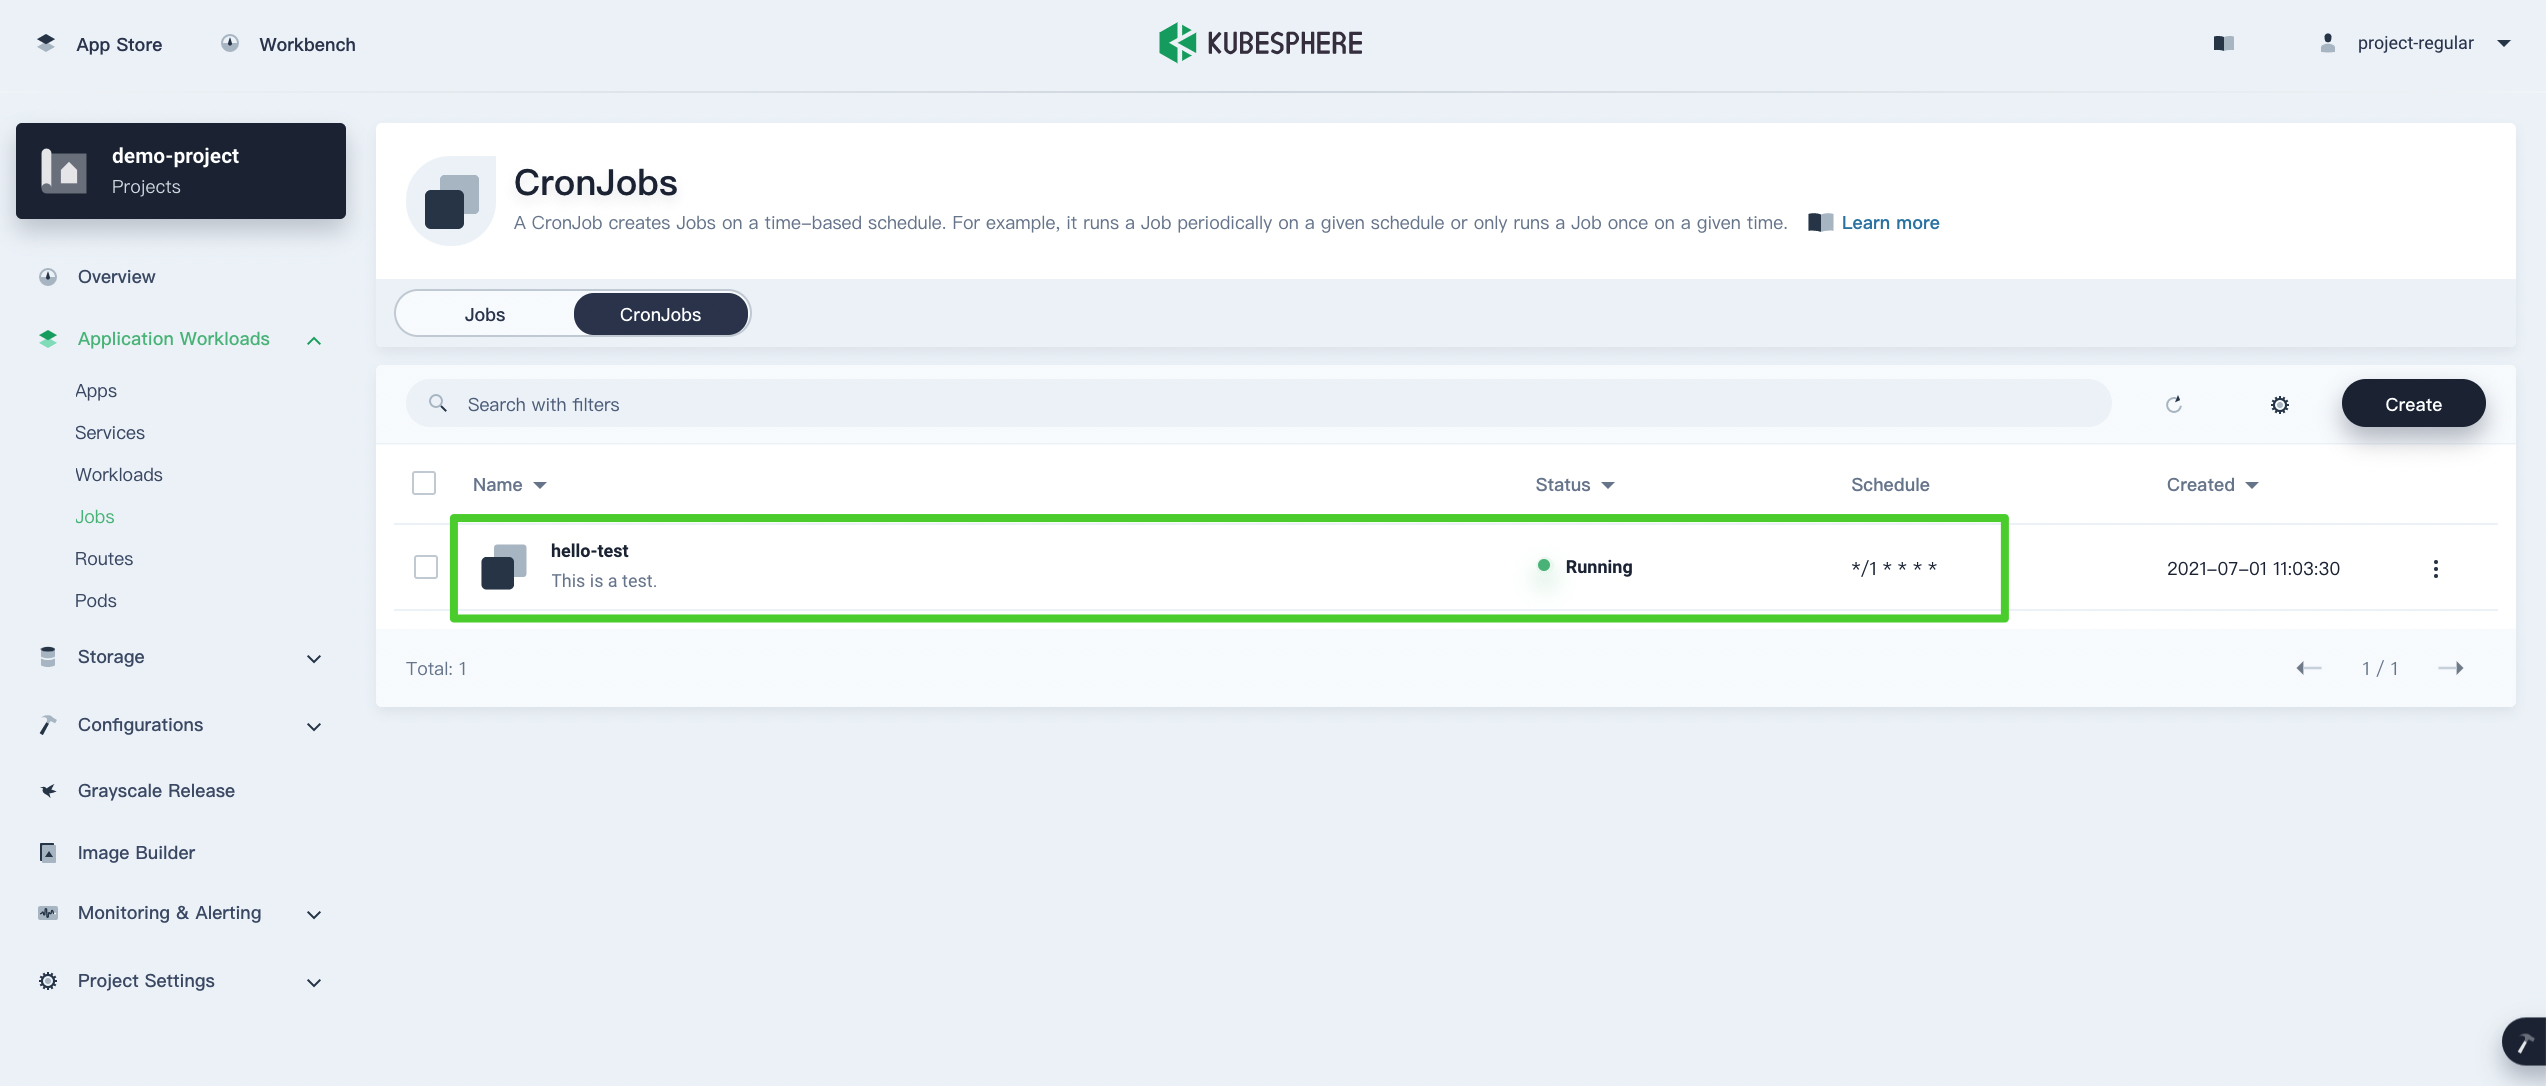
Step 5: Check results
-
In the final step of Advanced Settings, click Create to finish. A new item will be added to the CronJob list if the creation is successful. Besides, you can also find Jobs under Jobs tab.
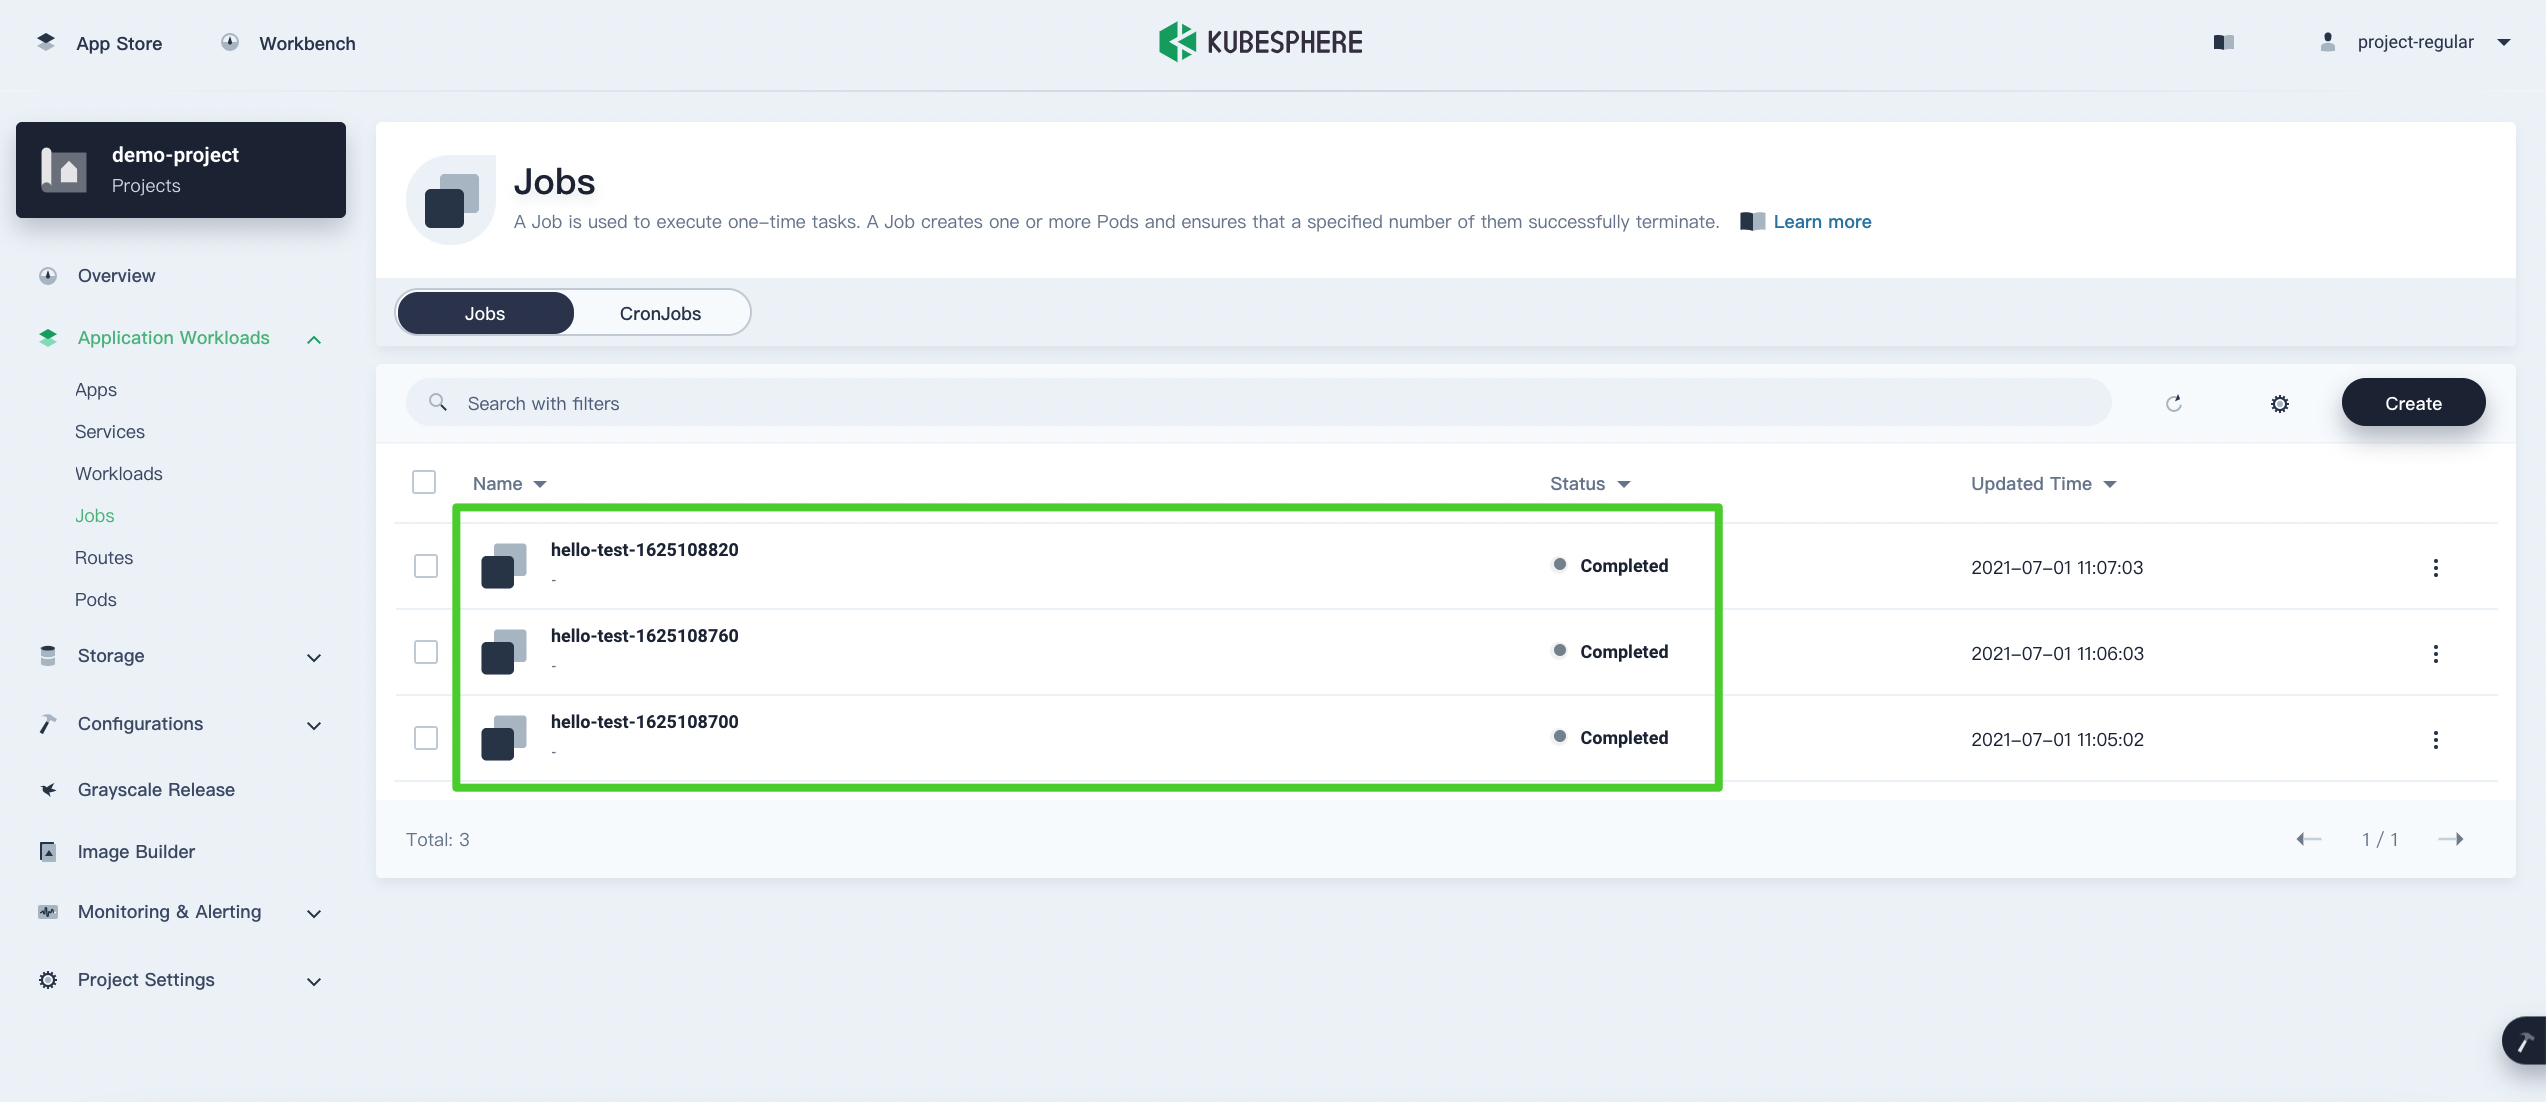
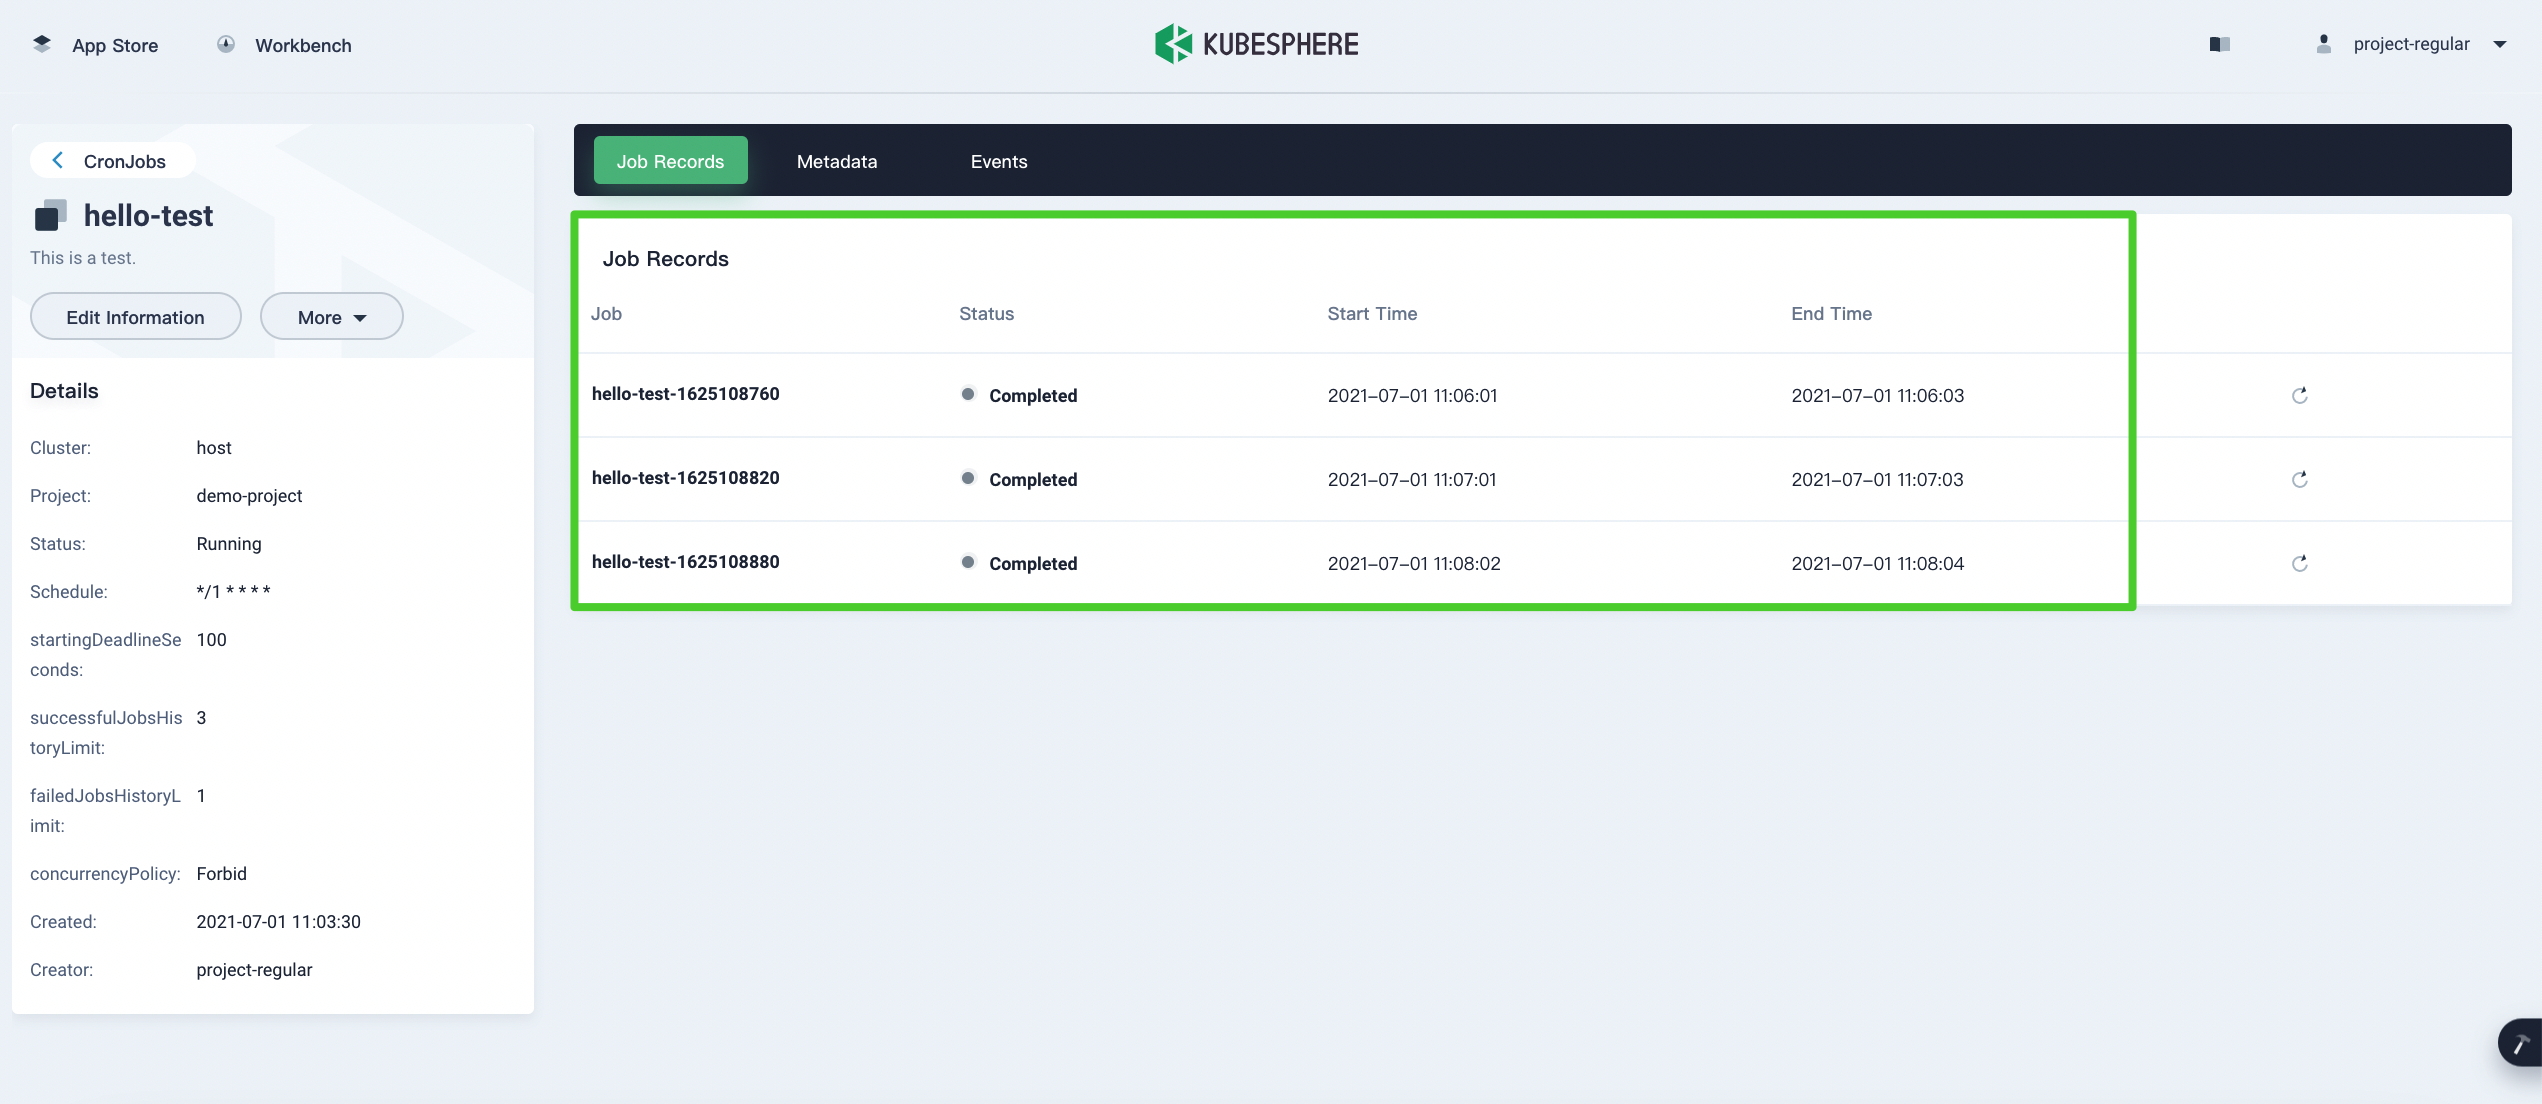
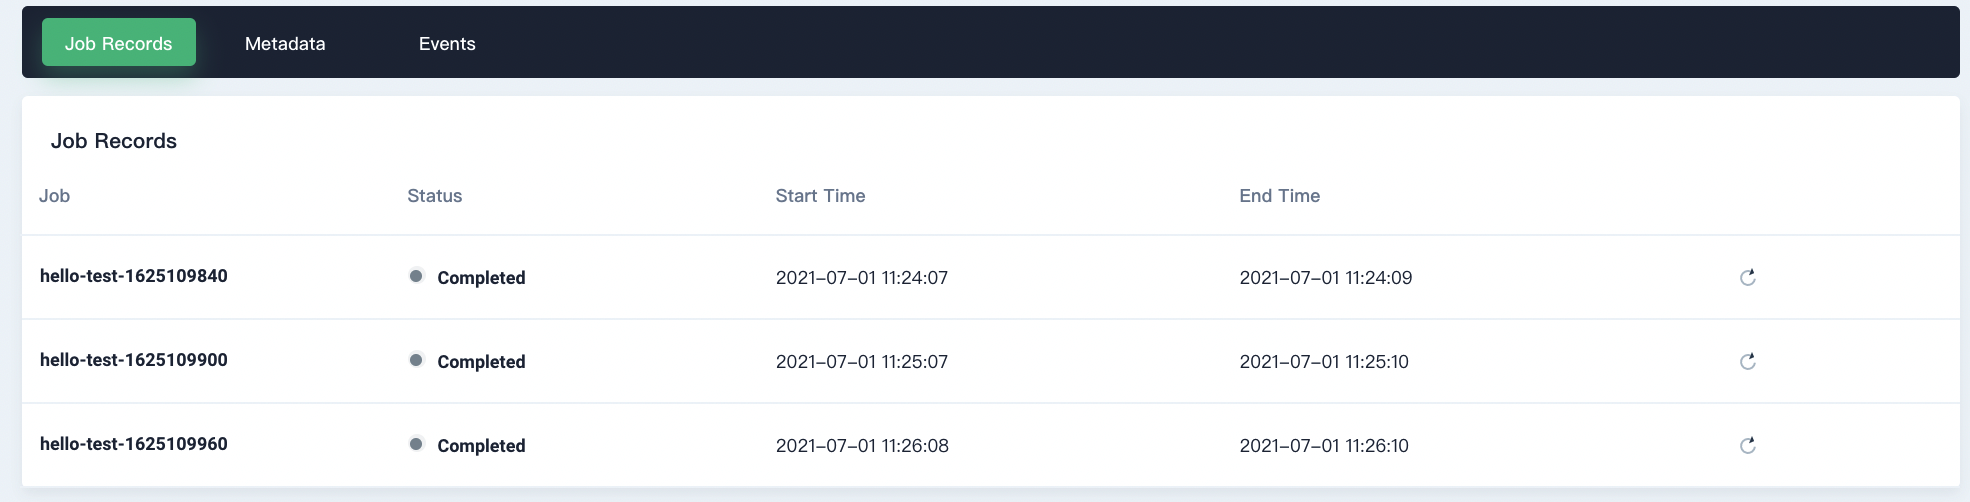
-
Under the ConJobs tab, click this CronJob and go to the Job Records tab where you can see the information of each execution record. There are 3 successful CronJob executions as the field successfulJobsHistoryLimit is set to 3.
-
Click any of them and you will be directed to the Job detail page.

-
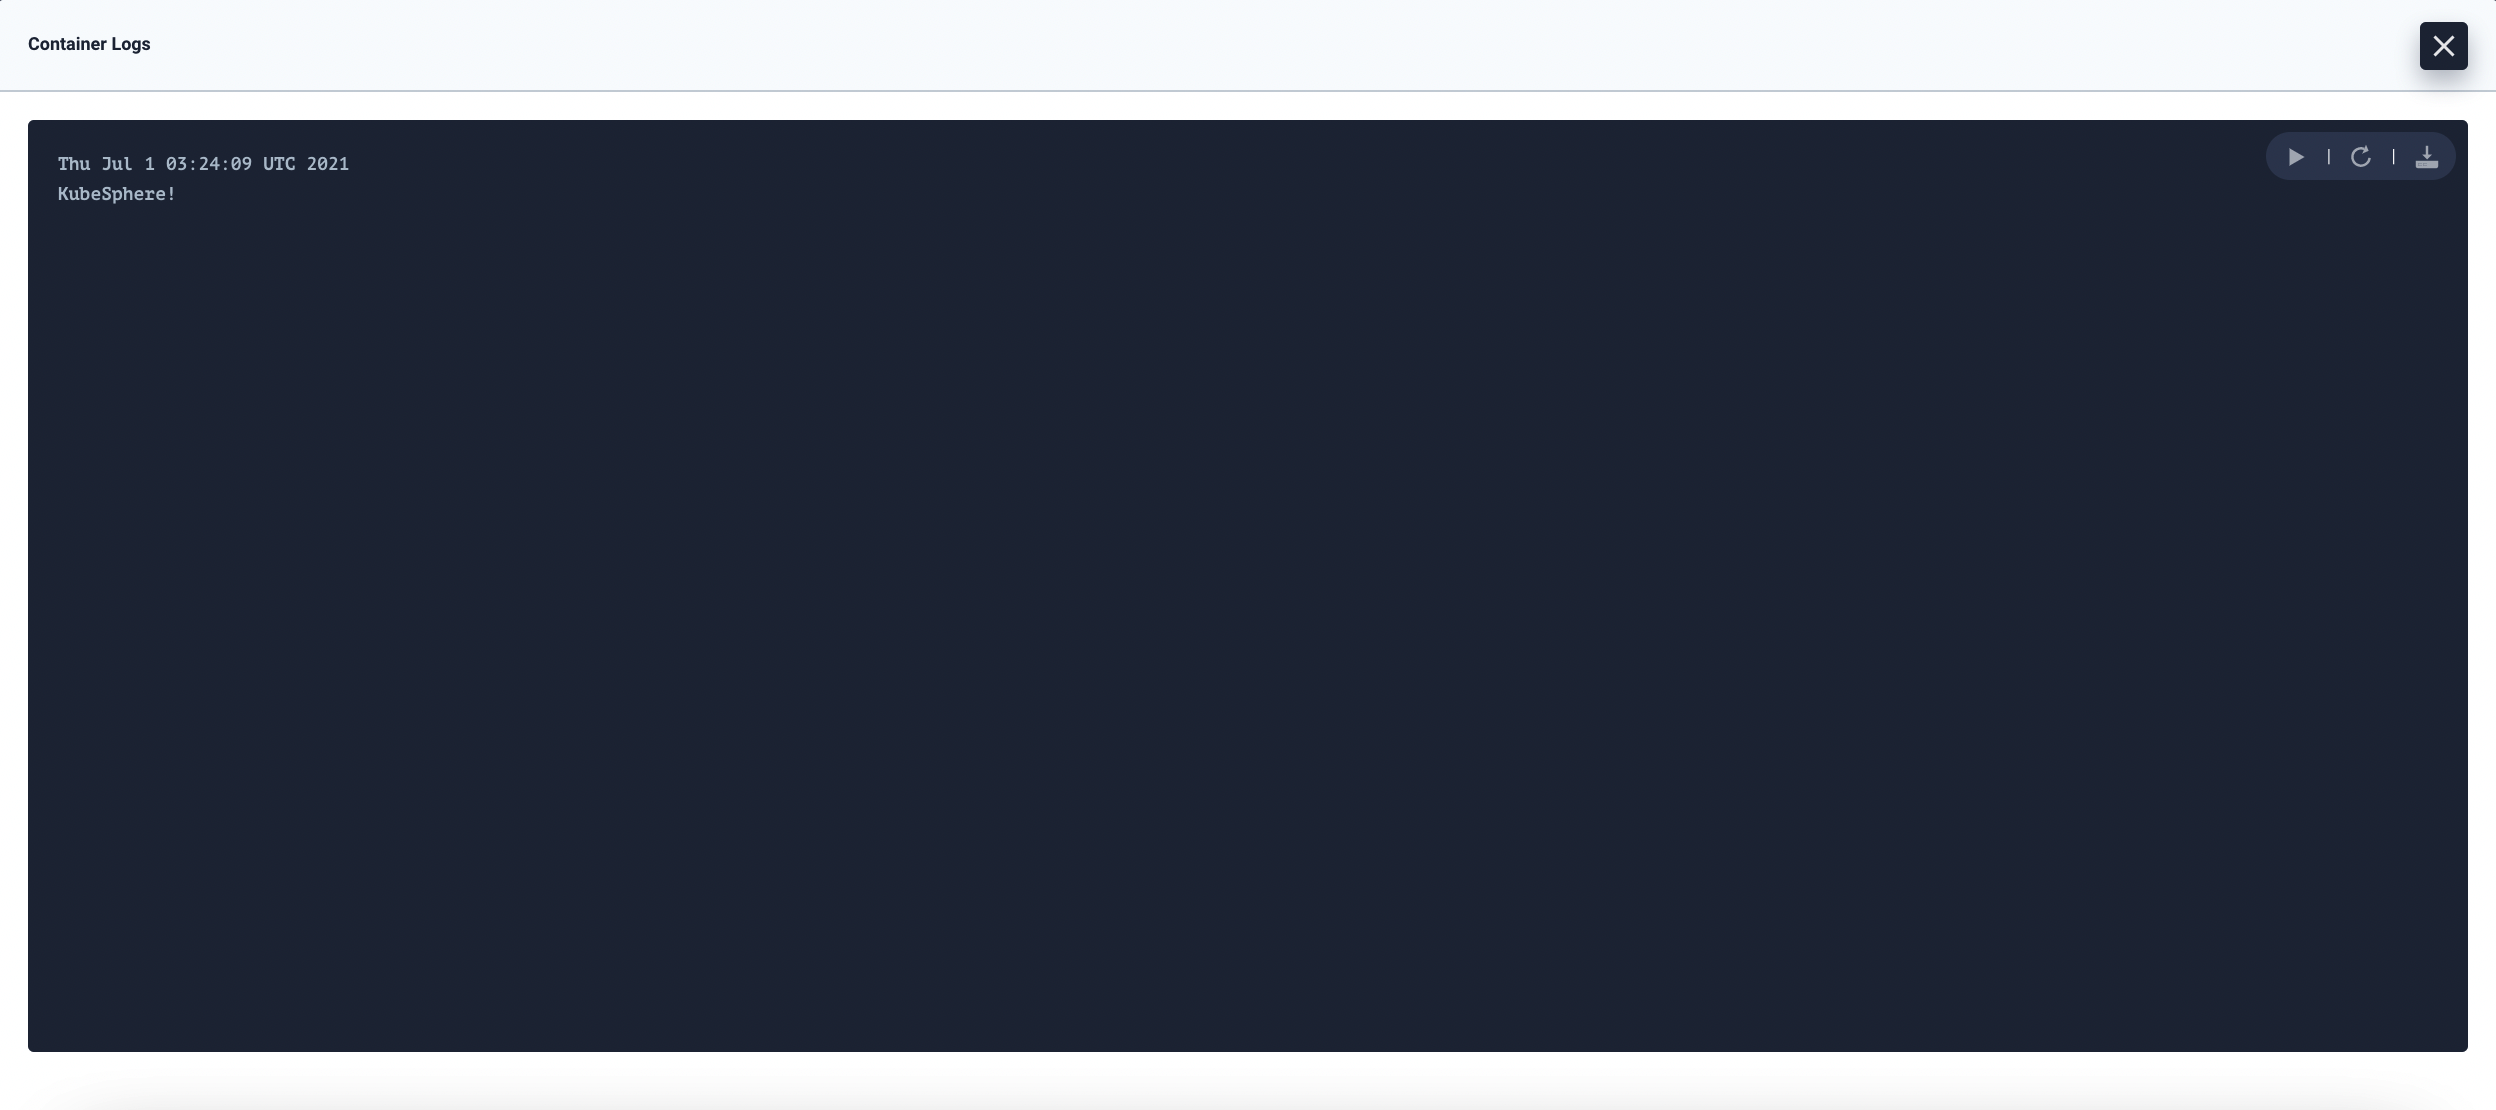
In Resource Status, you can inspect the Pod status. Click
 on the right and check the container log as shown below, which displays the expected output.
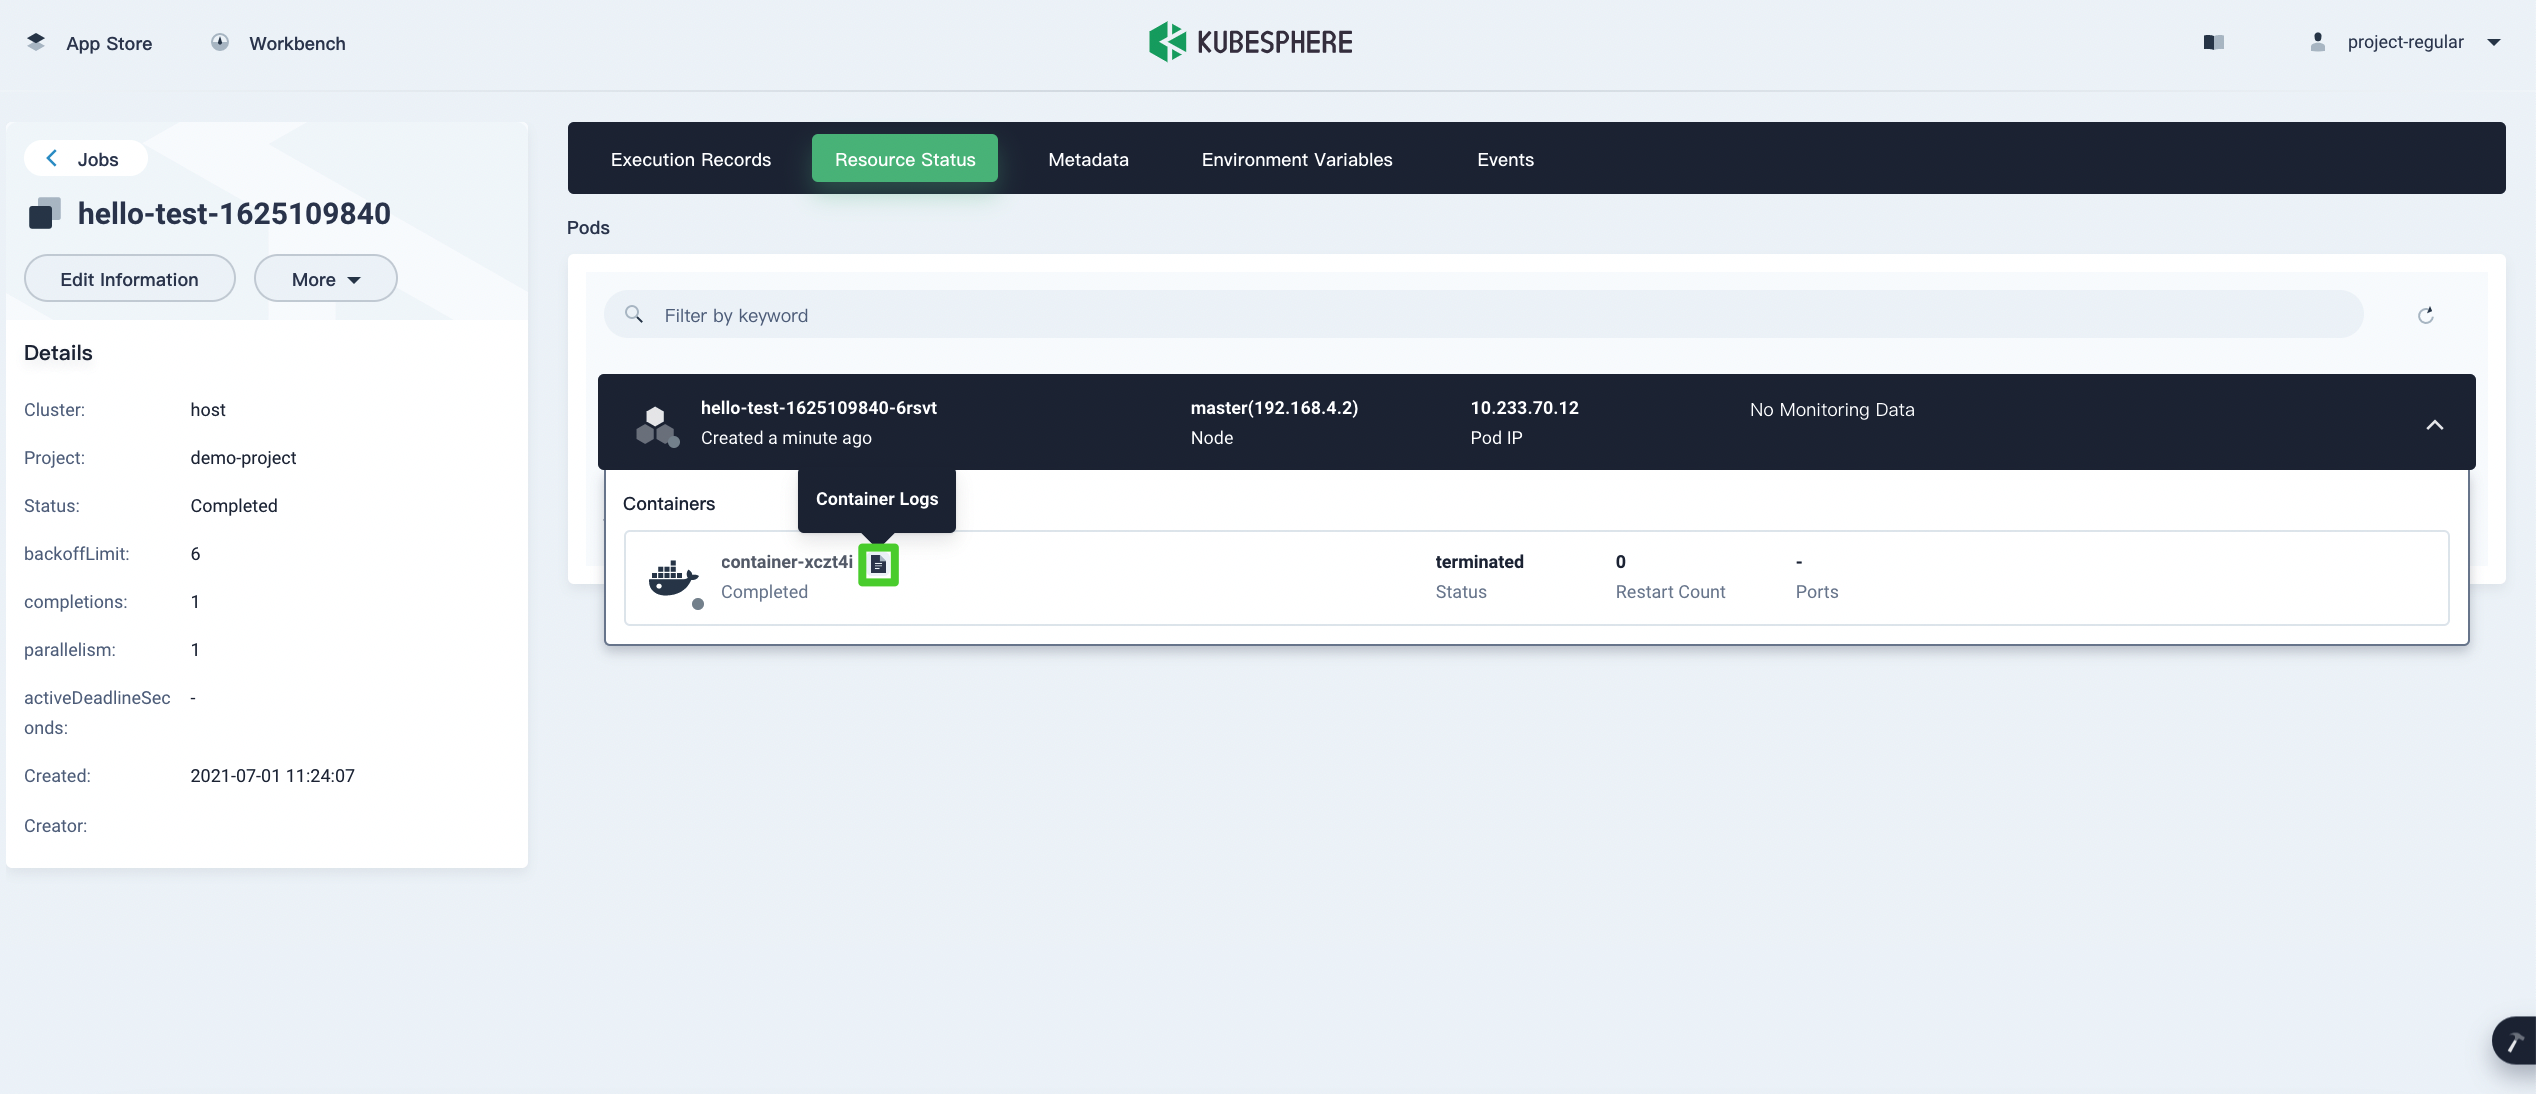
Check CronJob Details
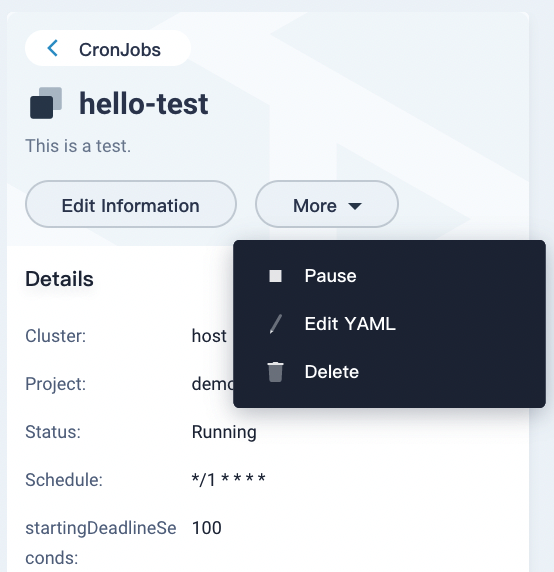
Operations
On the CronJob detail page, you can manage the CronJob after it is created.
- Edit Information: Edit the basic information except
Nameof the CronJob. - Pause/Start: Pause or start the Cronjob. Pausing a CronJob will tell the controller to suspend subsequent executions, which does not apply to executions that already start.
- Edit YAML: Edit the CronJob’s specification in YAML format.
- Delete: Delete the CronJob, and return to the CronJob list page.
Job records
Click the Job Records tab to view the records of the CronJob.
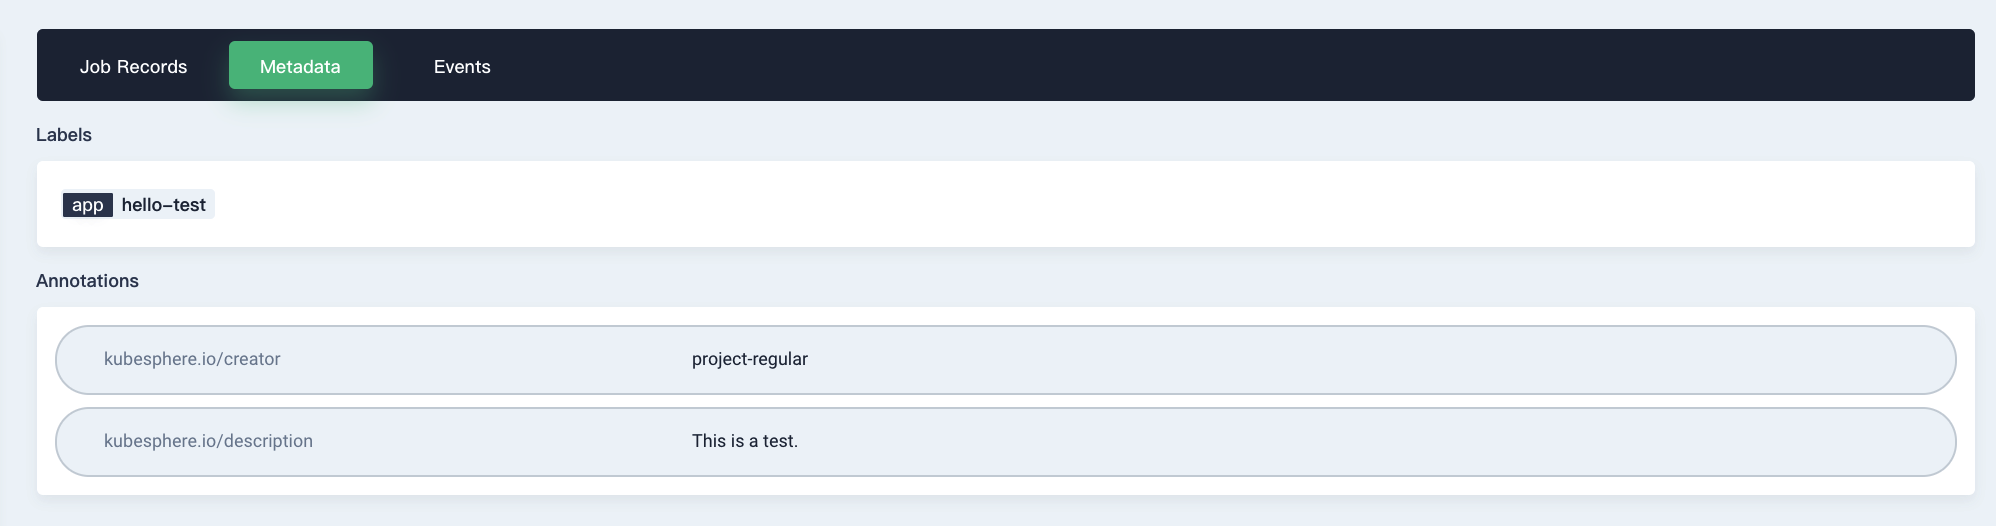
Metadata
Click the Metadata tab to view the labels and annotations of the CronJob.
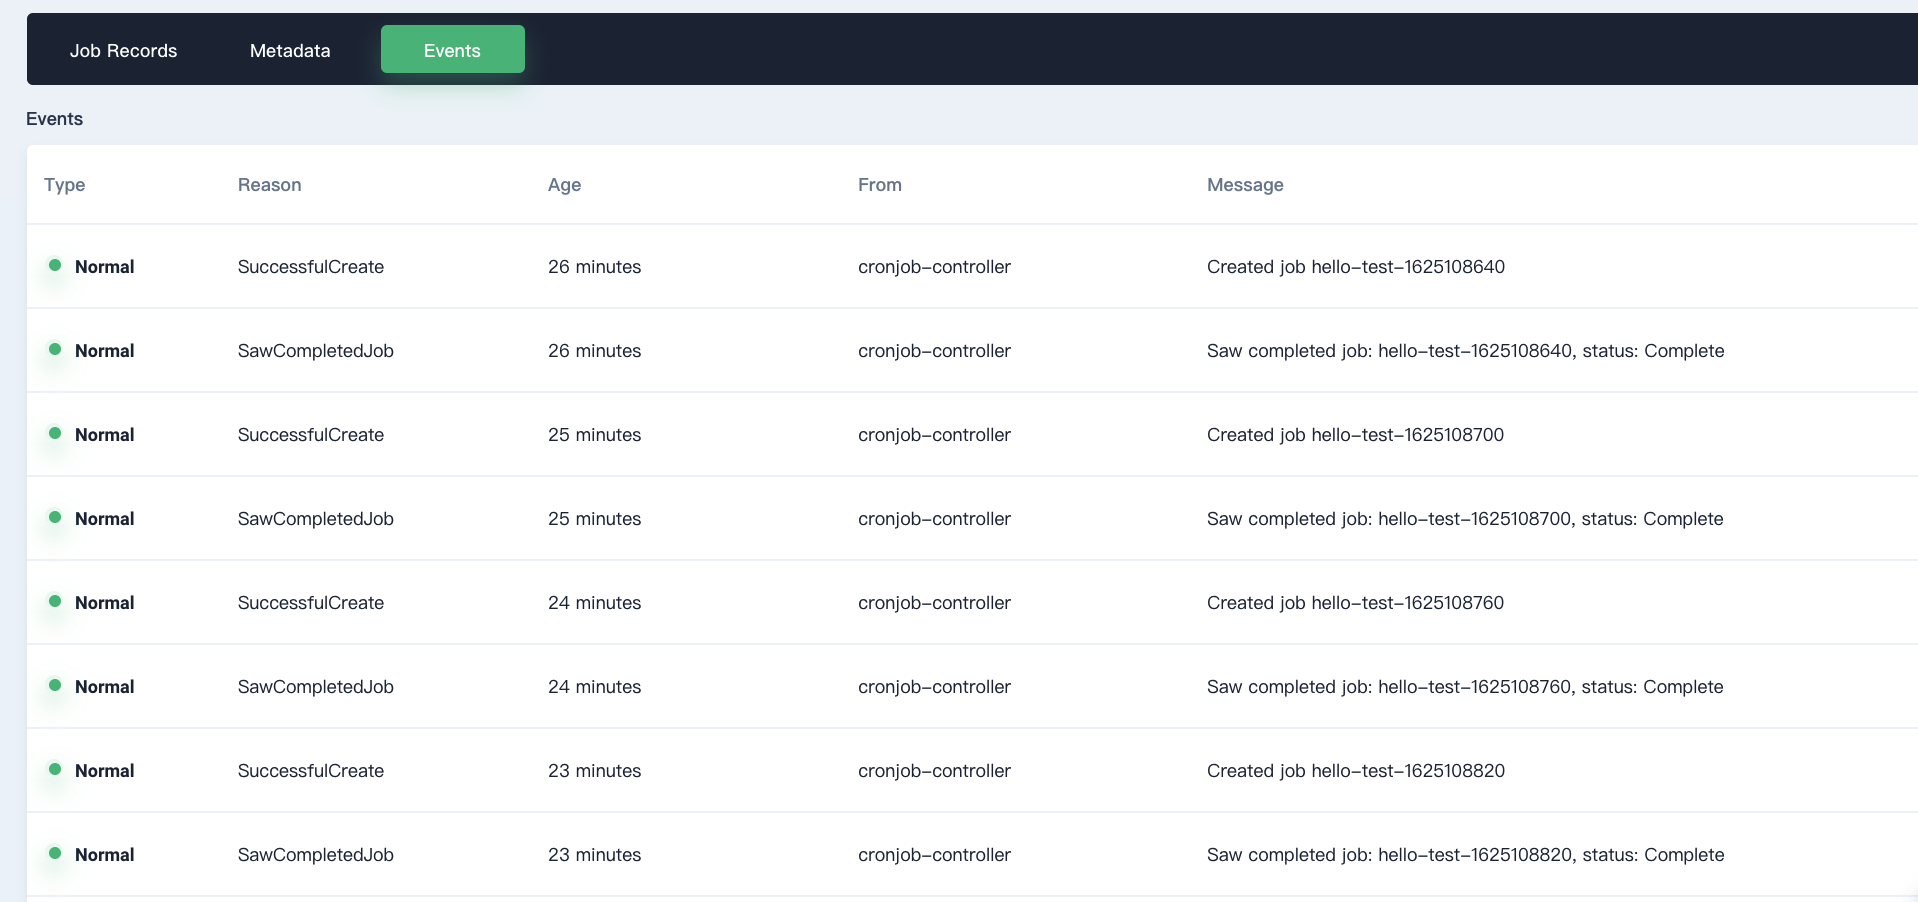
Events
Click the Events tab to view the events of the CronJob.
Feedback
Was this page Helpful?
Thanks for the feedback. If you have a specific question about how to use KubeSphere, ask it on Slack. Open an issue in the GitHub repo if you want to report a problem or suggest an improvement.
 Previous

What’s on this Page