


Configure S2I and B2I Webhooks
KubeSphere provides Source-to-Image (S2I) and Binary-to-Image (B2I) features to automate image building and pushing and application deployment. In KubeSphere v3.1, you can configure S2I and B2I webhooks so that your Image Builder can be automatically triggered when there is any relevant activity in your code repository.
This tutorial demonstrates how to configure S2I and B2I webhooks.
Prerequisites
- You need to enable the KubeSphere DevOps System.
- You need to create a workspace, a project (
demo-project) and an account (project-regular). The account must be invited to the project with the role ofoperator. For more information, see Create Workspaces, Projects, Accounts and Roles. - You need to create an S2I Image Builder and a B2I Image Builder. For more information, refer to Source to Image: Publish an App without a Dockerfile and Binary to Image: Publish an Artifact to Kubernetes.
Configure an S2I Webhook
Step 1: Expose the S2I trigger Service
-
Log in to the KubeSphere web console as
admin. Click Platform in the top-left corner and then select Cluster Management. -
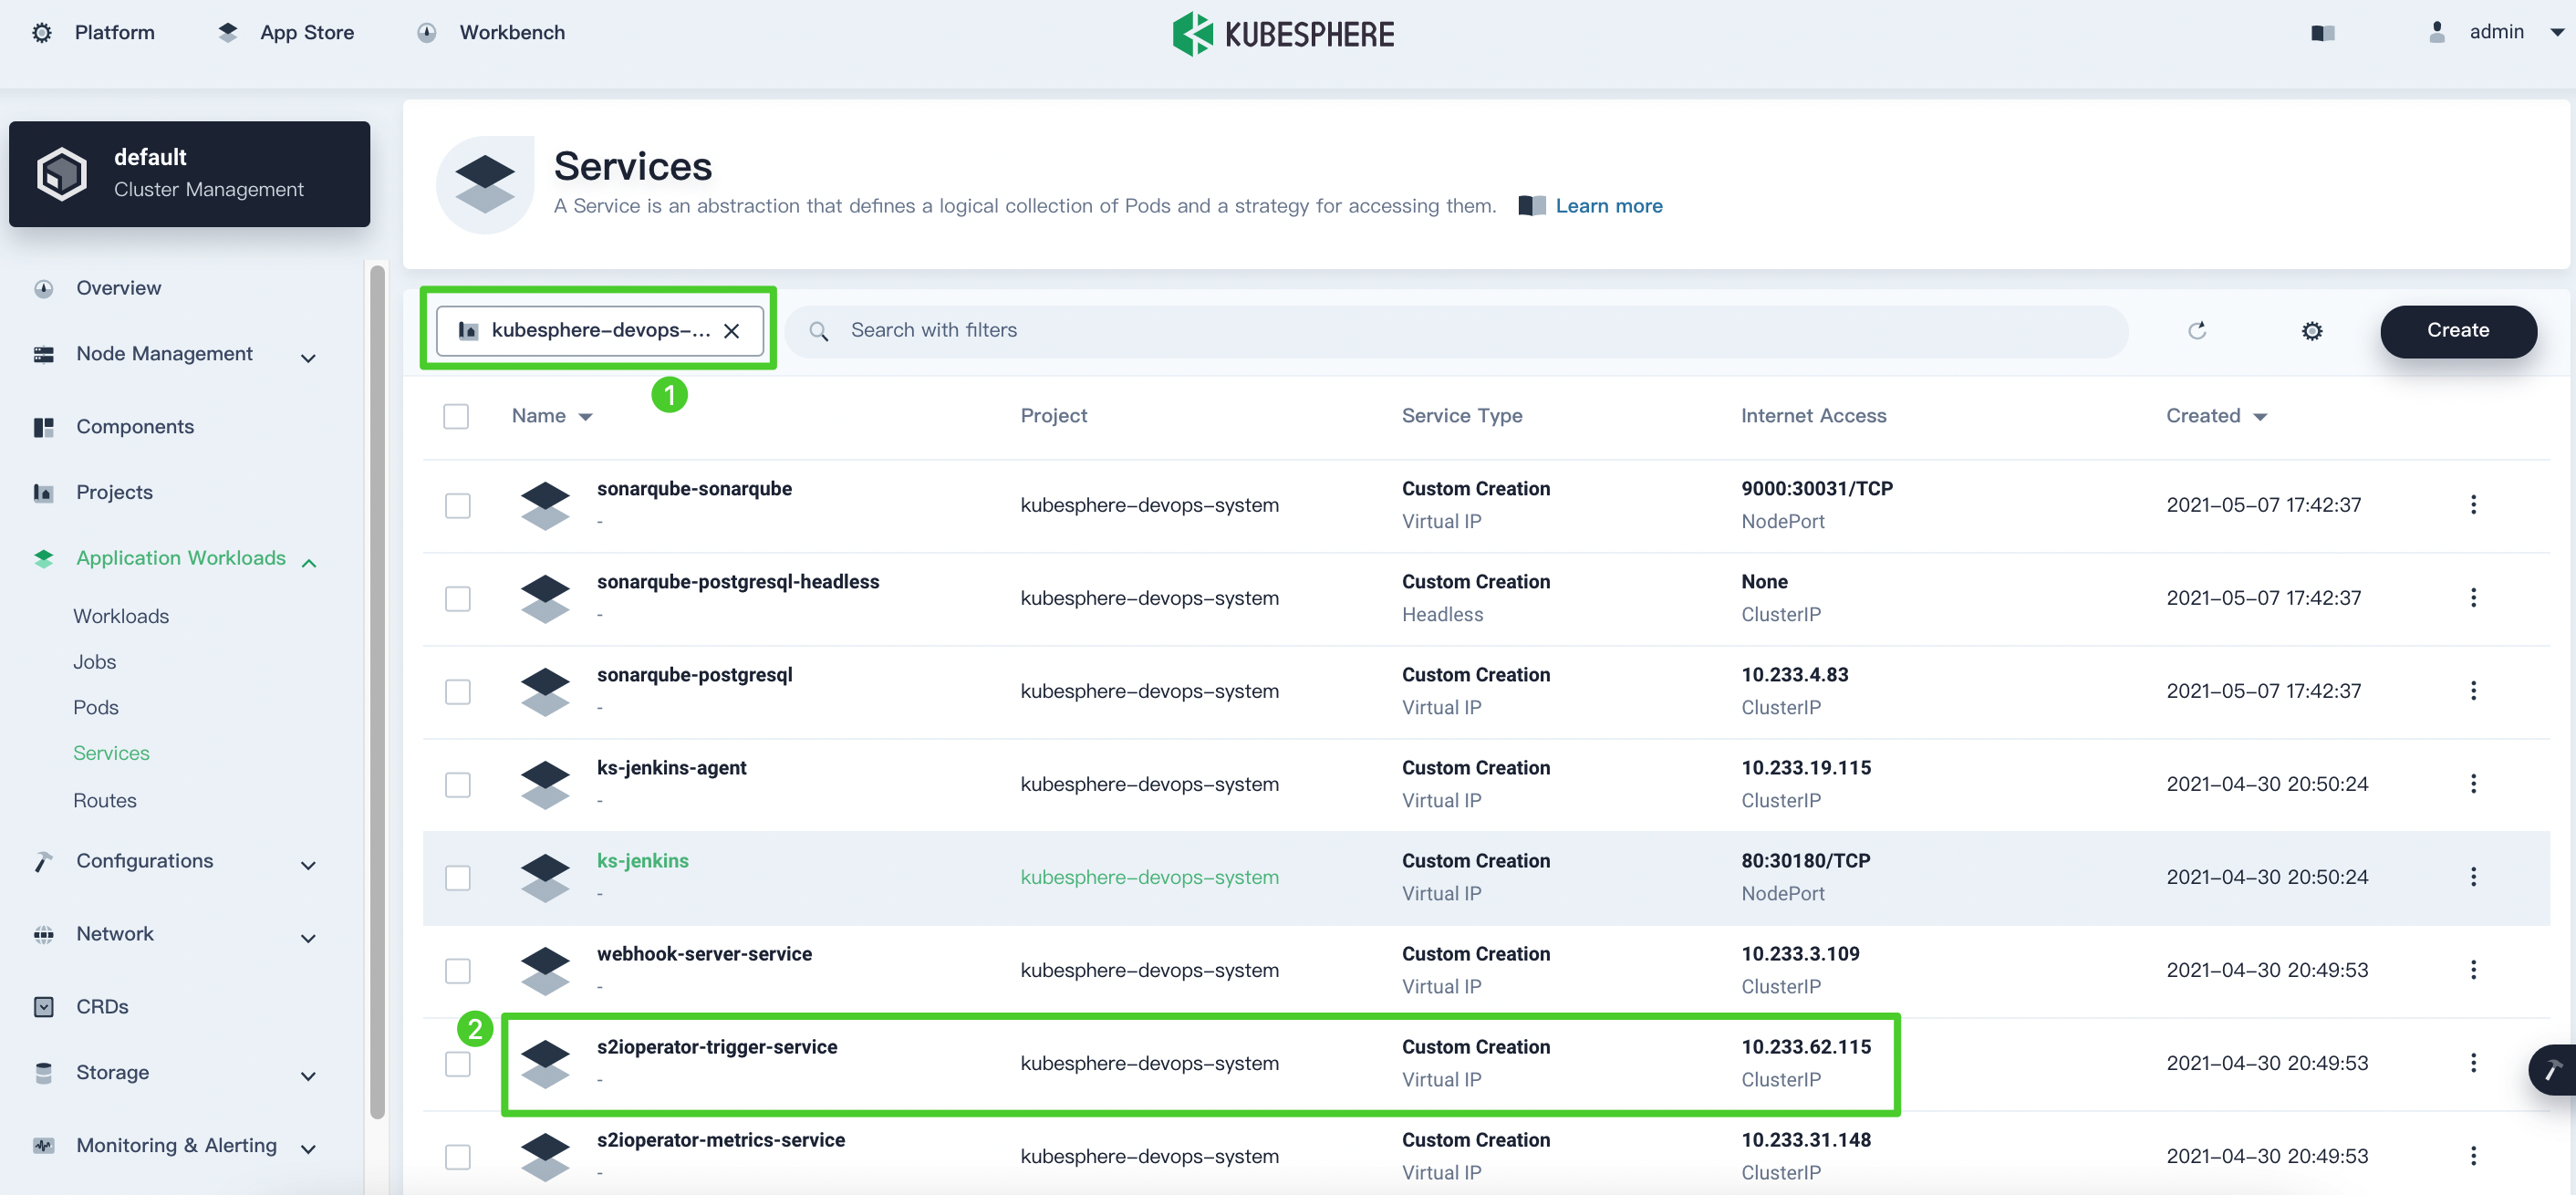
In Services under Application Workloads, select kubesphere-devops-system from the drop-down list and click s2ioperator-trigger-service to go to its detail page.
-
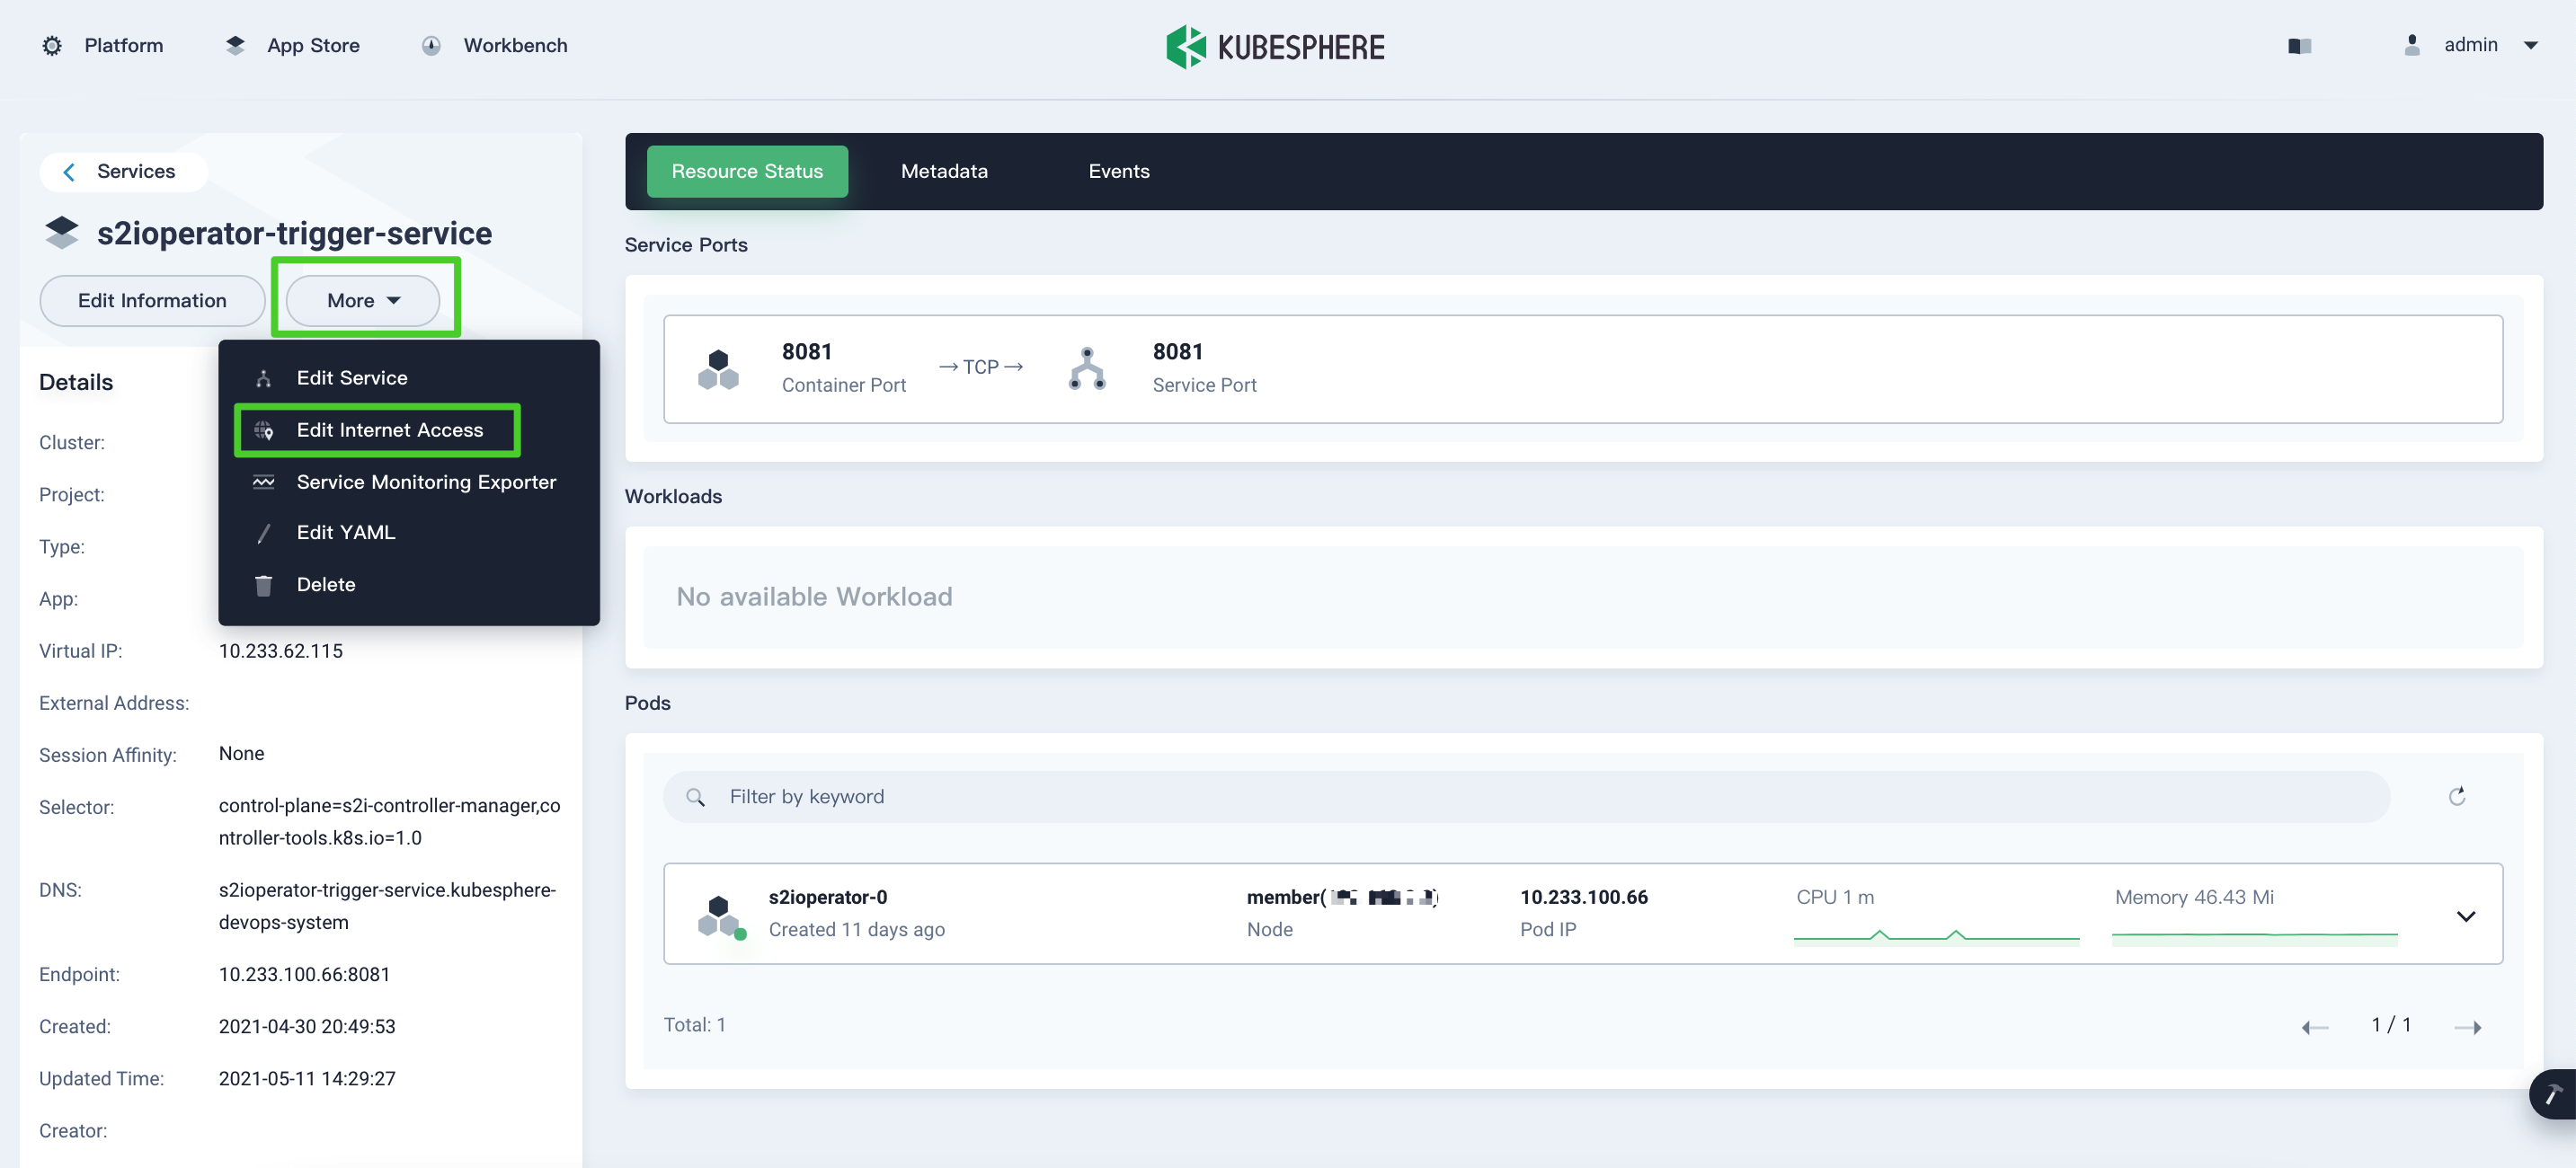
Click More and select Edit Internet Access.
-
In the window that appears, select NodePort from the drop-down list for Access Method and then click OK.
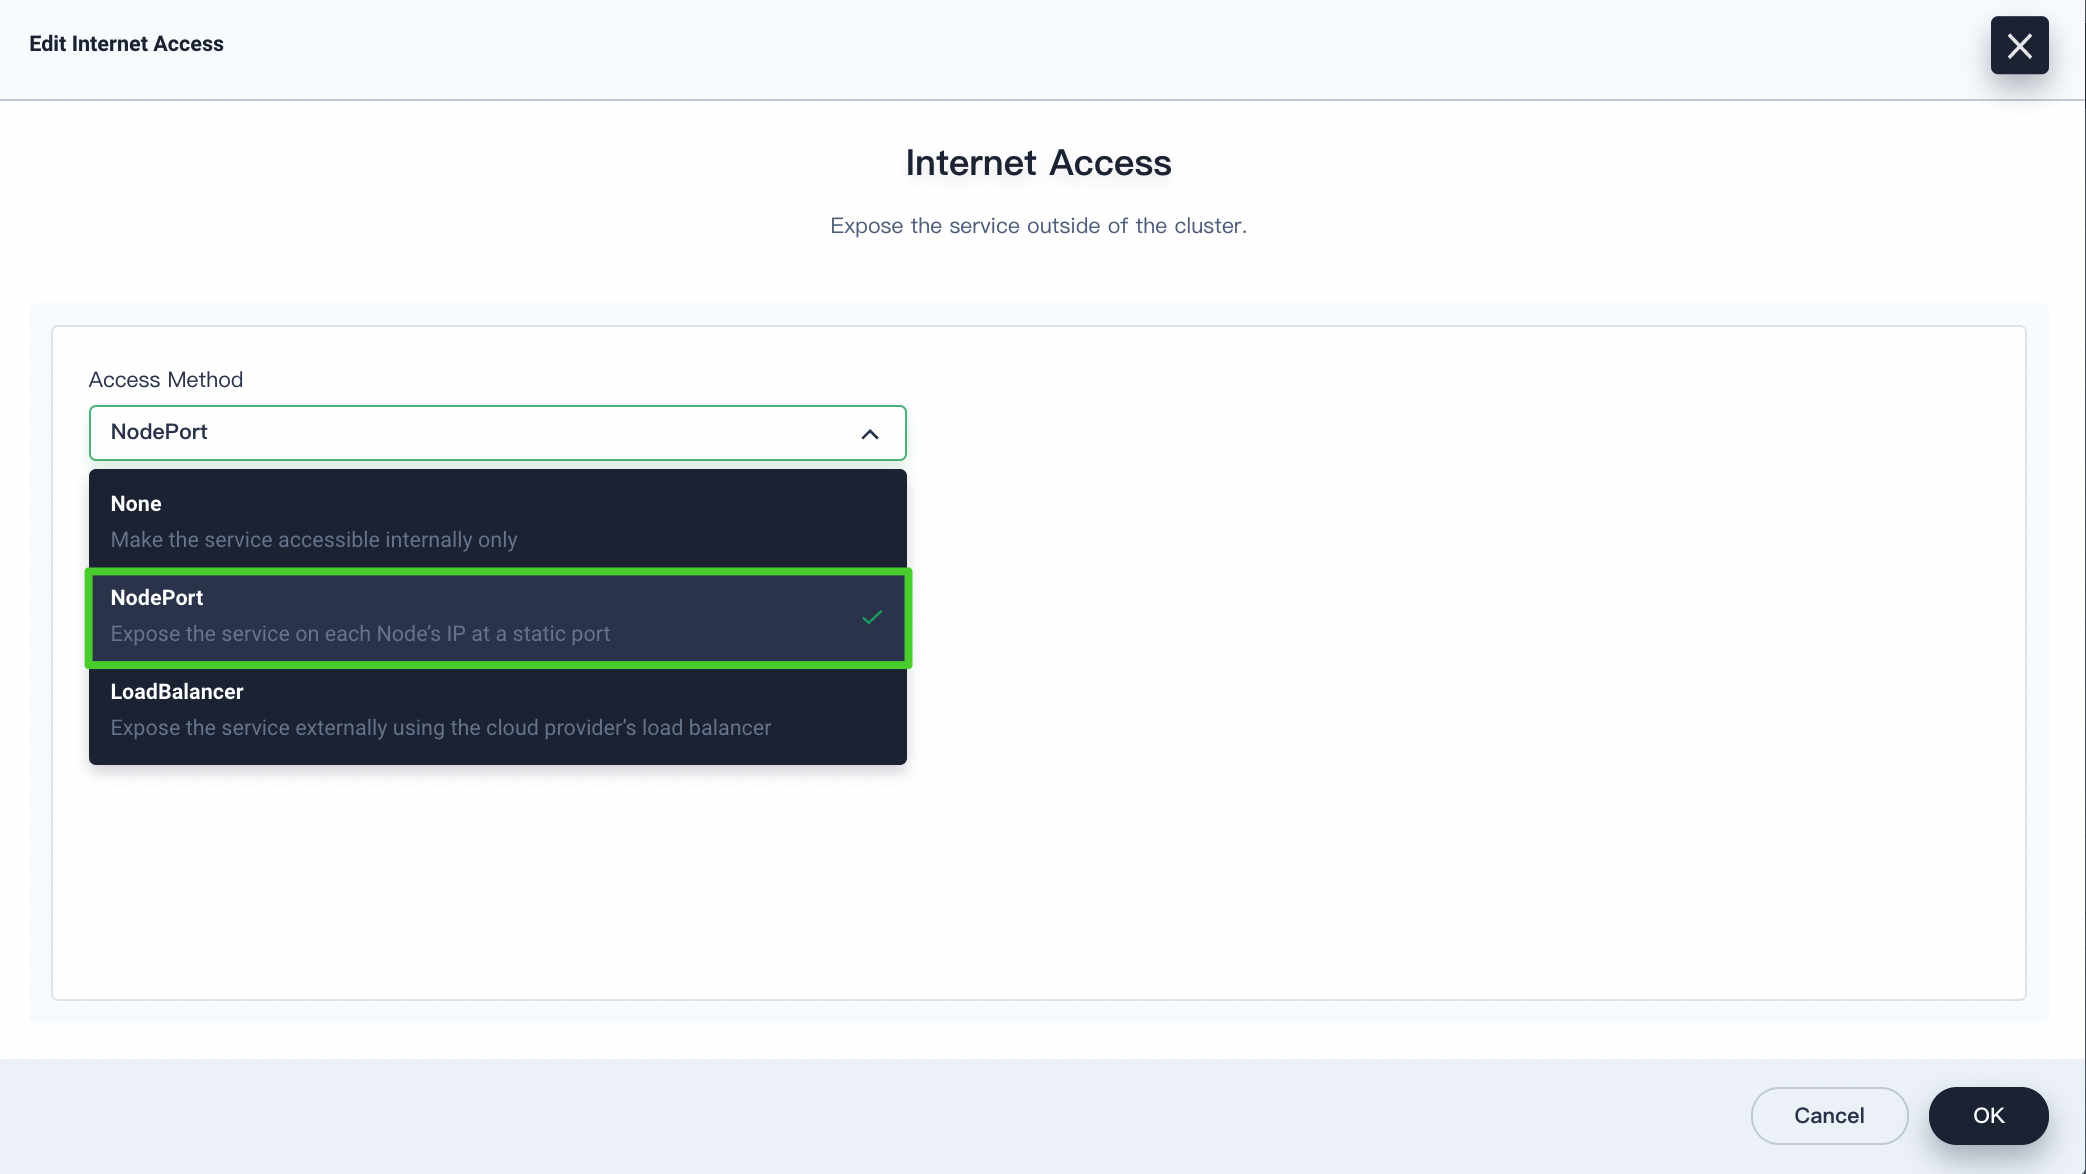
Note
This tutorial selects NodePort for demonstration purposes. You can also select LoadBalancer based on your needs. -
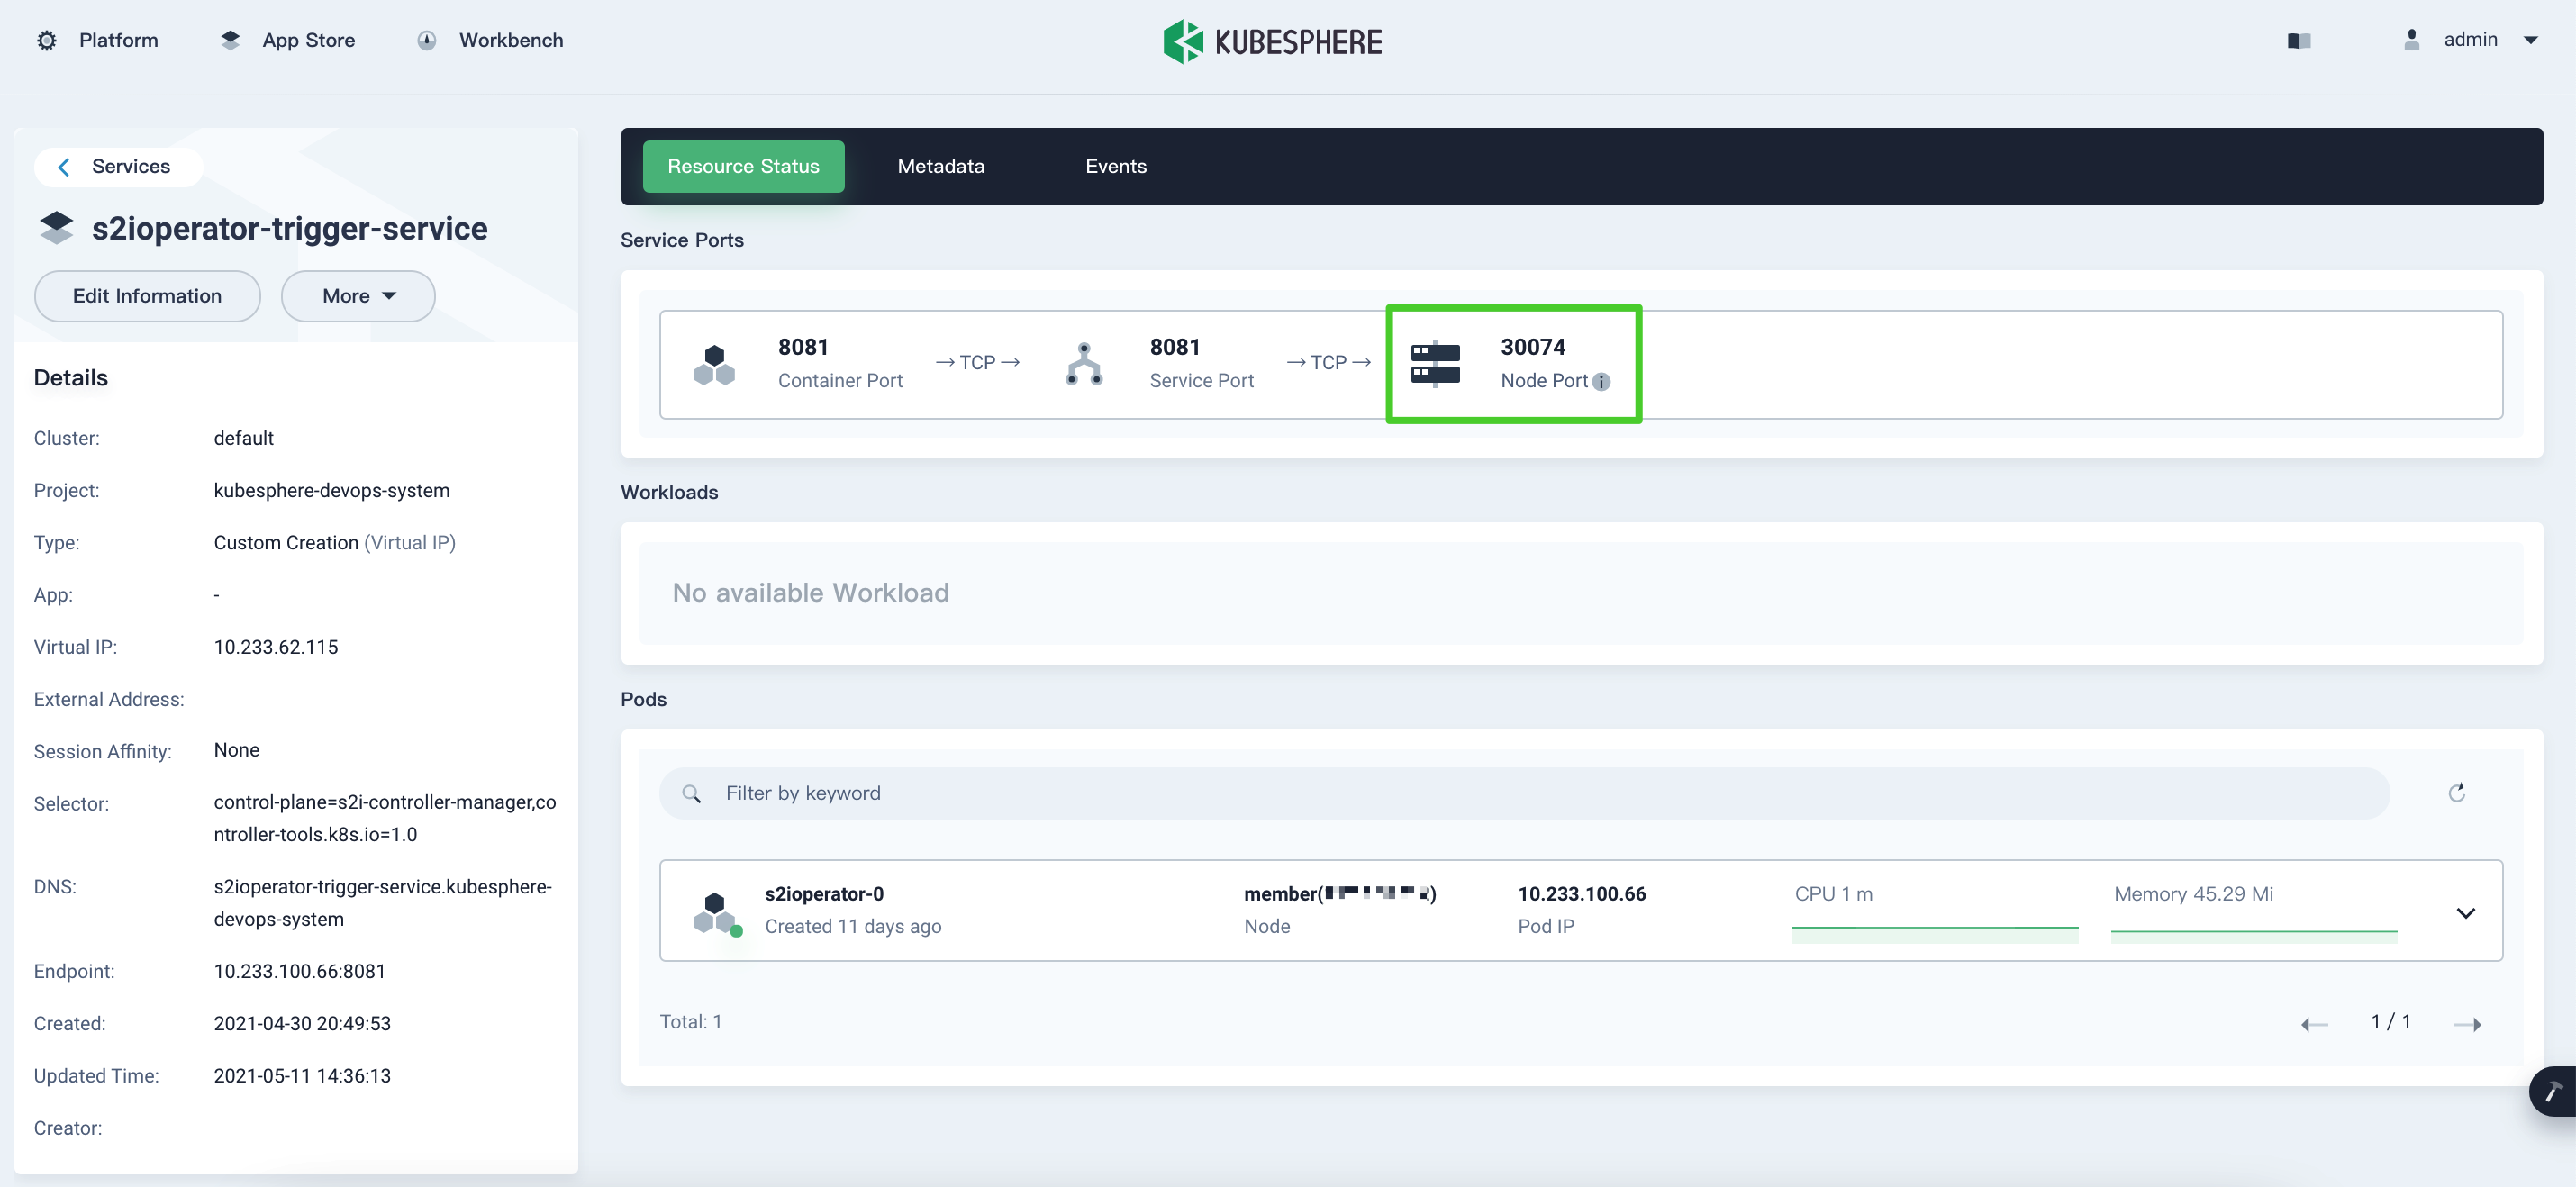
You can view the Node Port on the detail page. It will be included in the S2I webhook URL.
Step 2: Configure an S2I webhook
-
Log out of KubeSphere and log back in as
project-regular. Go todemo-project. -
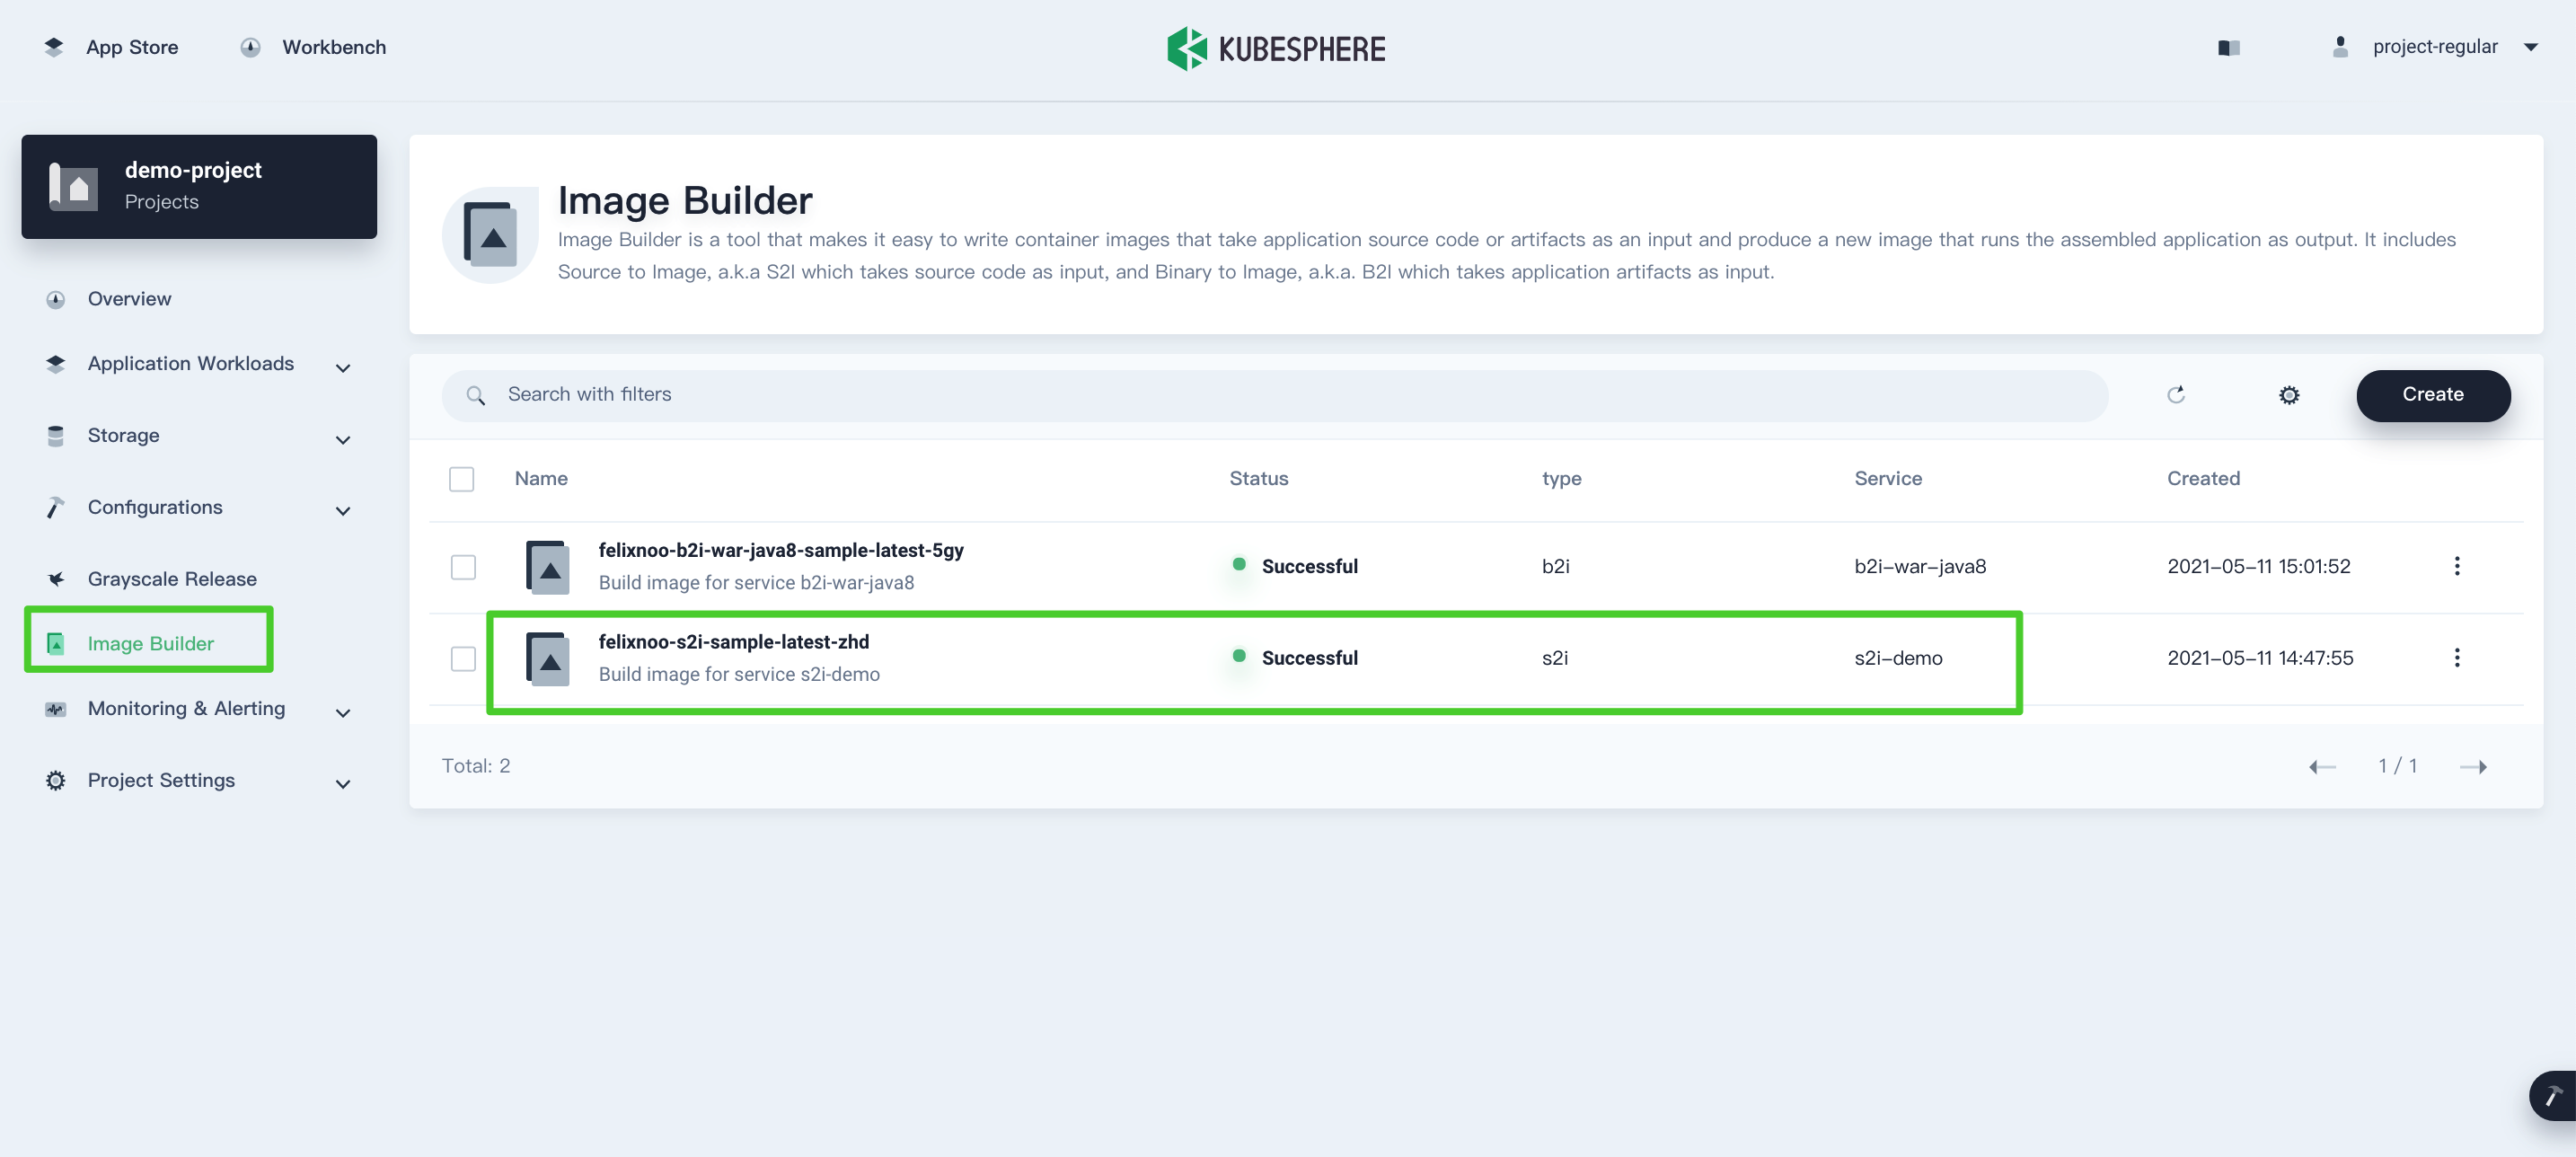
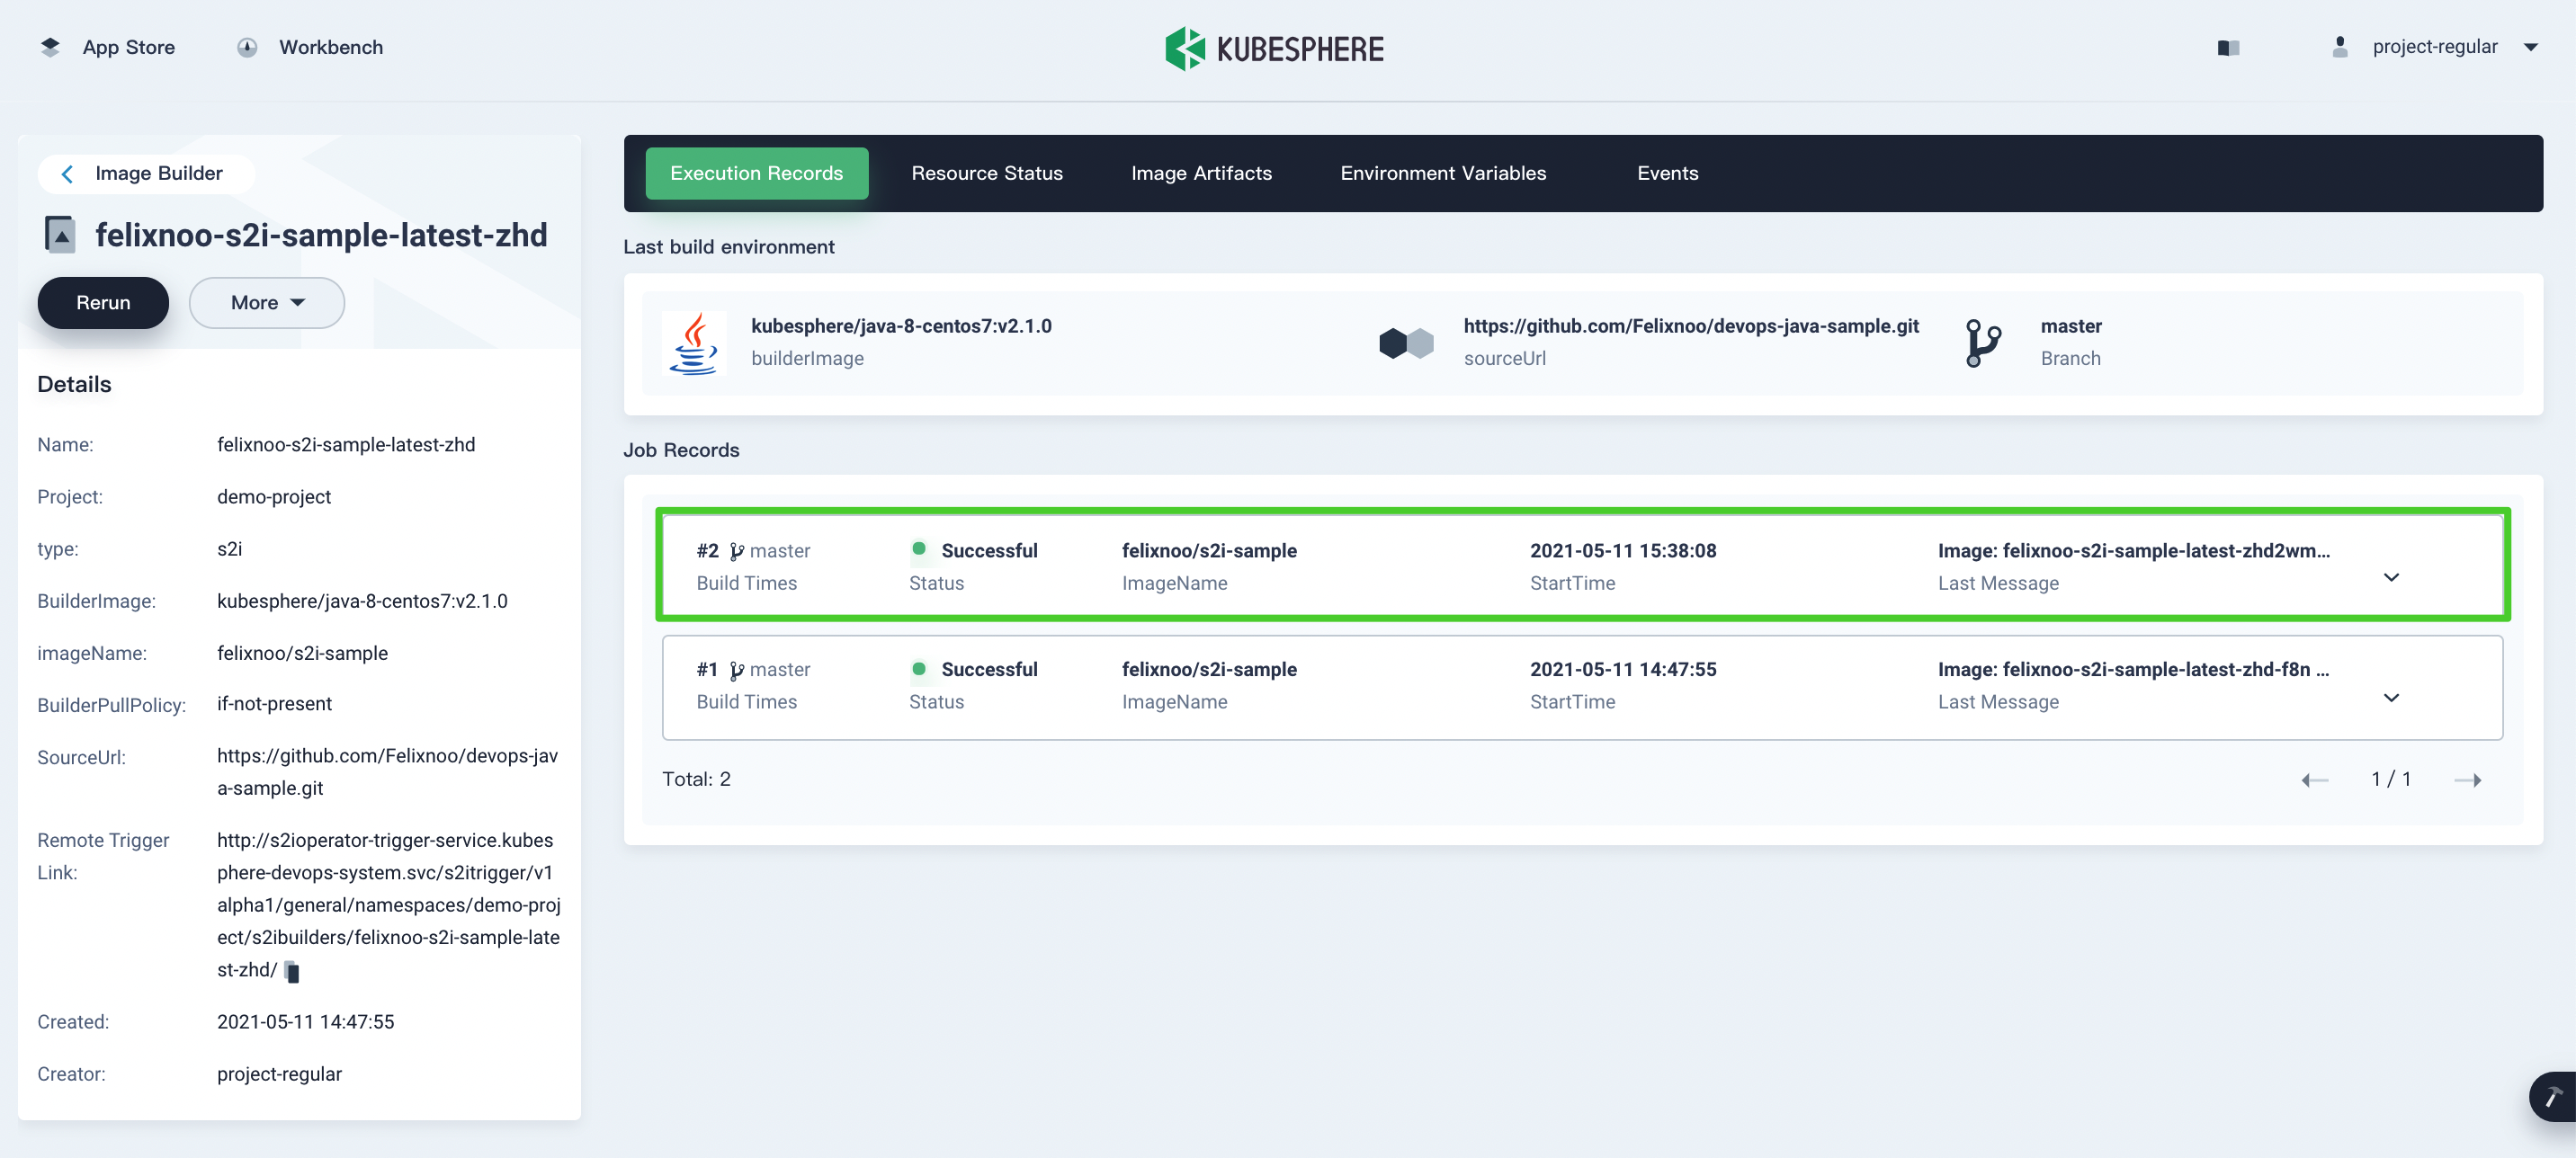
In Image Builder, click the S2I Image Builder to go to its detail page.
-
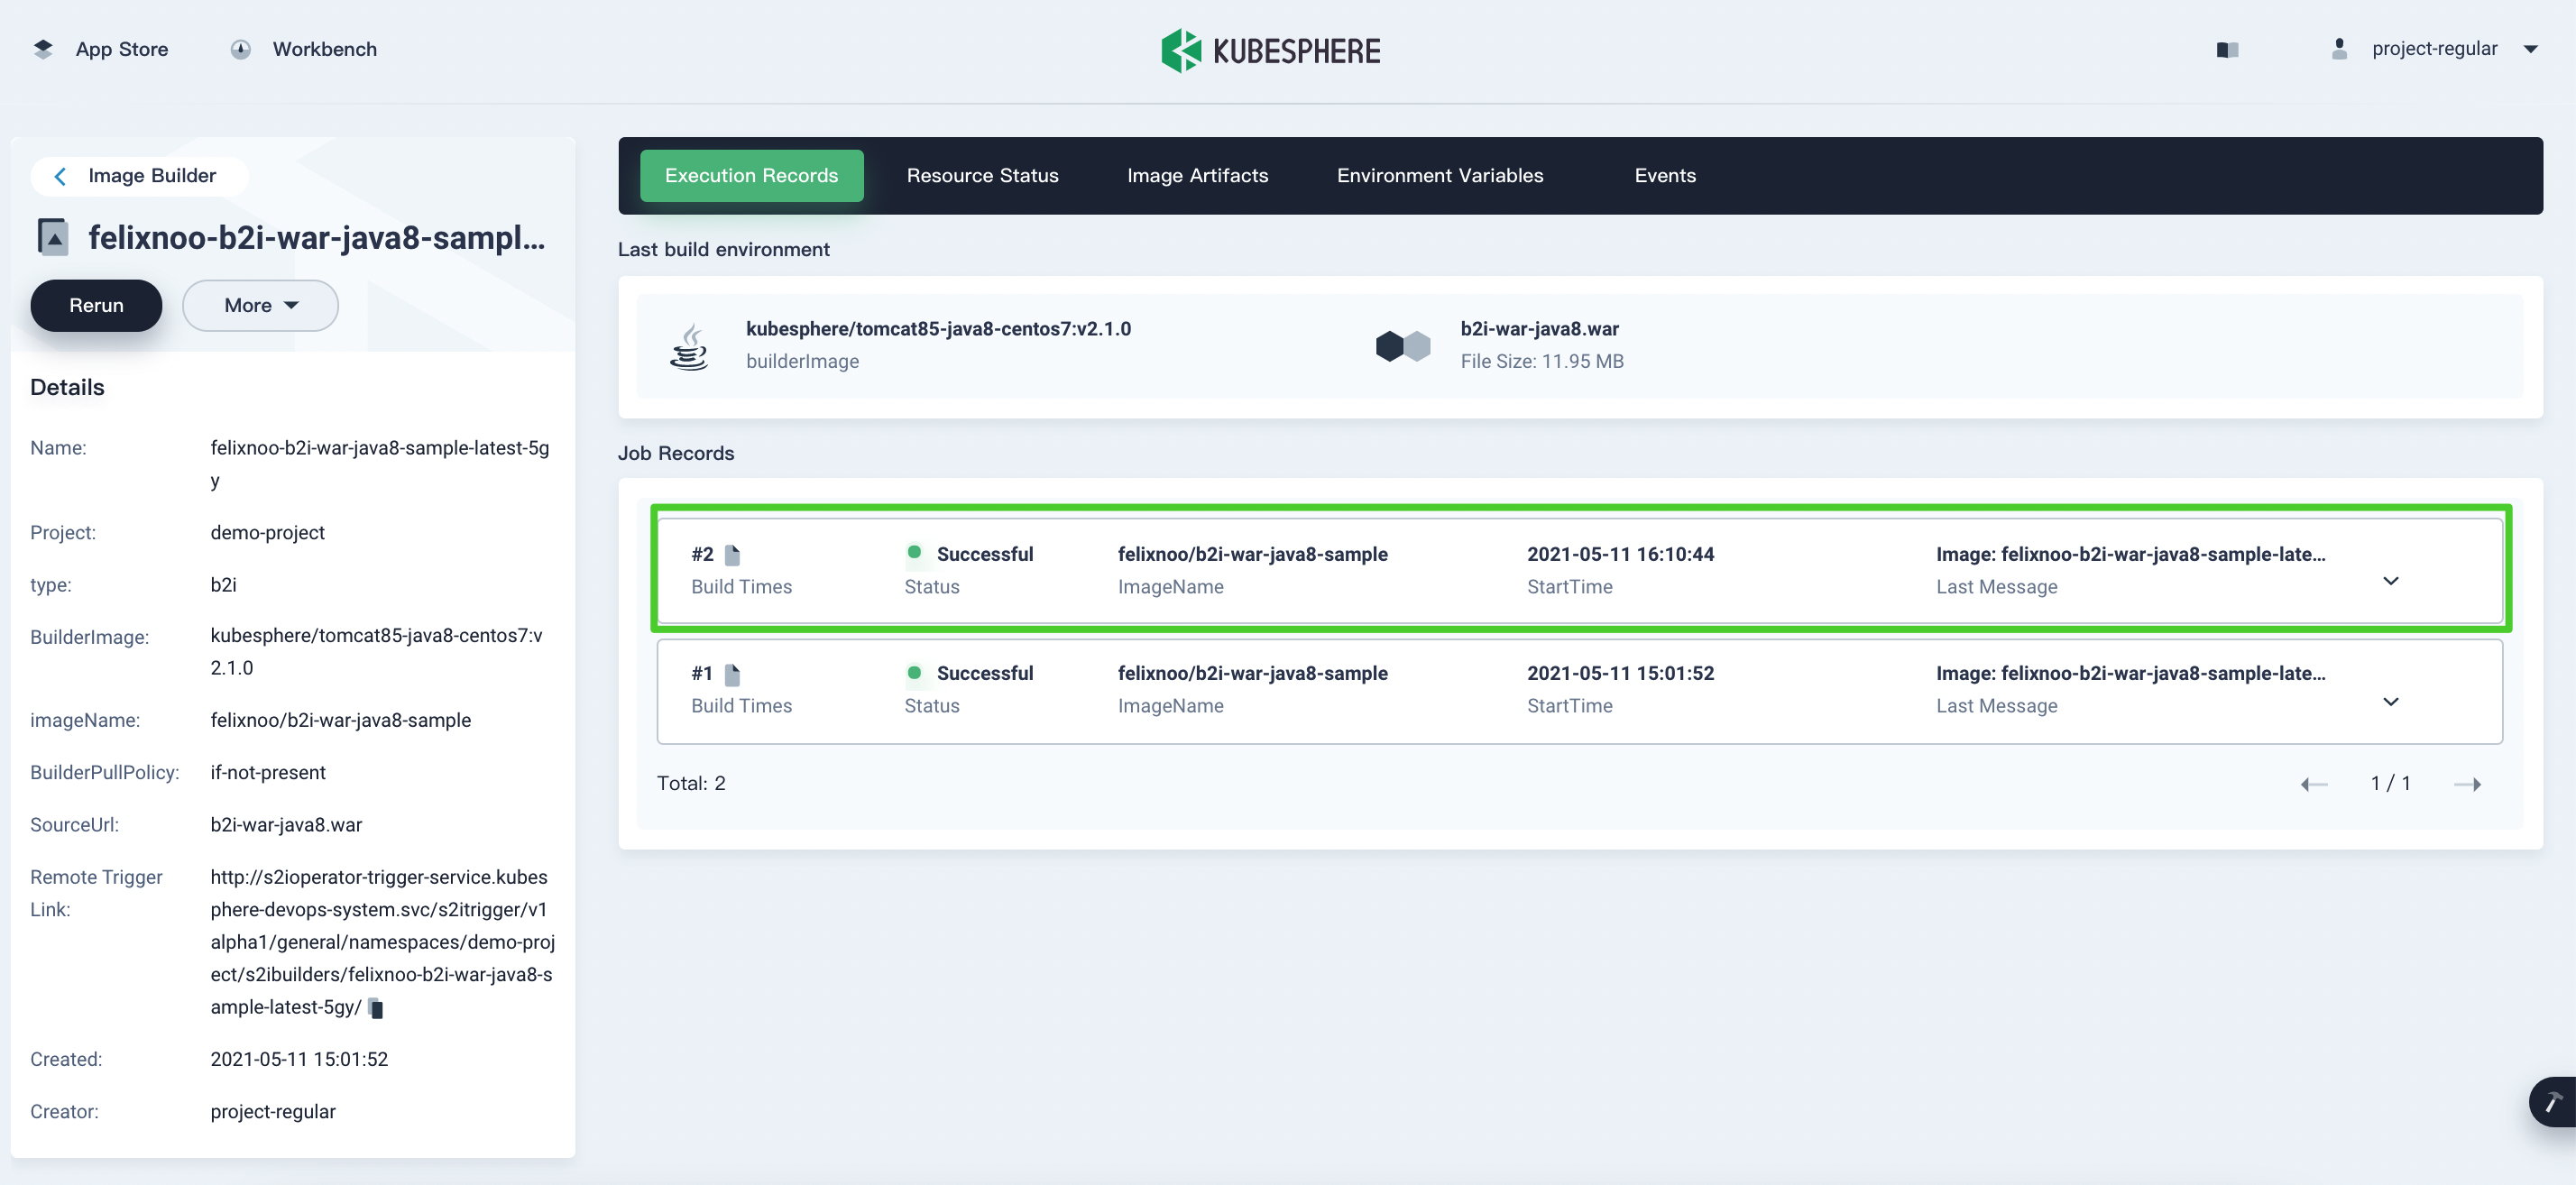
You can see an auto-generated link shown in Remote Trigger Link. Copy
/s2itrigger/v1alpha1/general/namespaces/demo-project/s2ibuilders/felixnoo-s2i-sample-latest-zhd/as it will be included in the S2I webhook URL.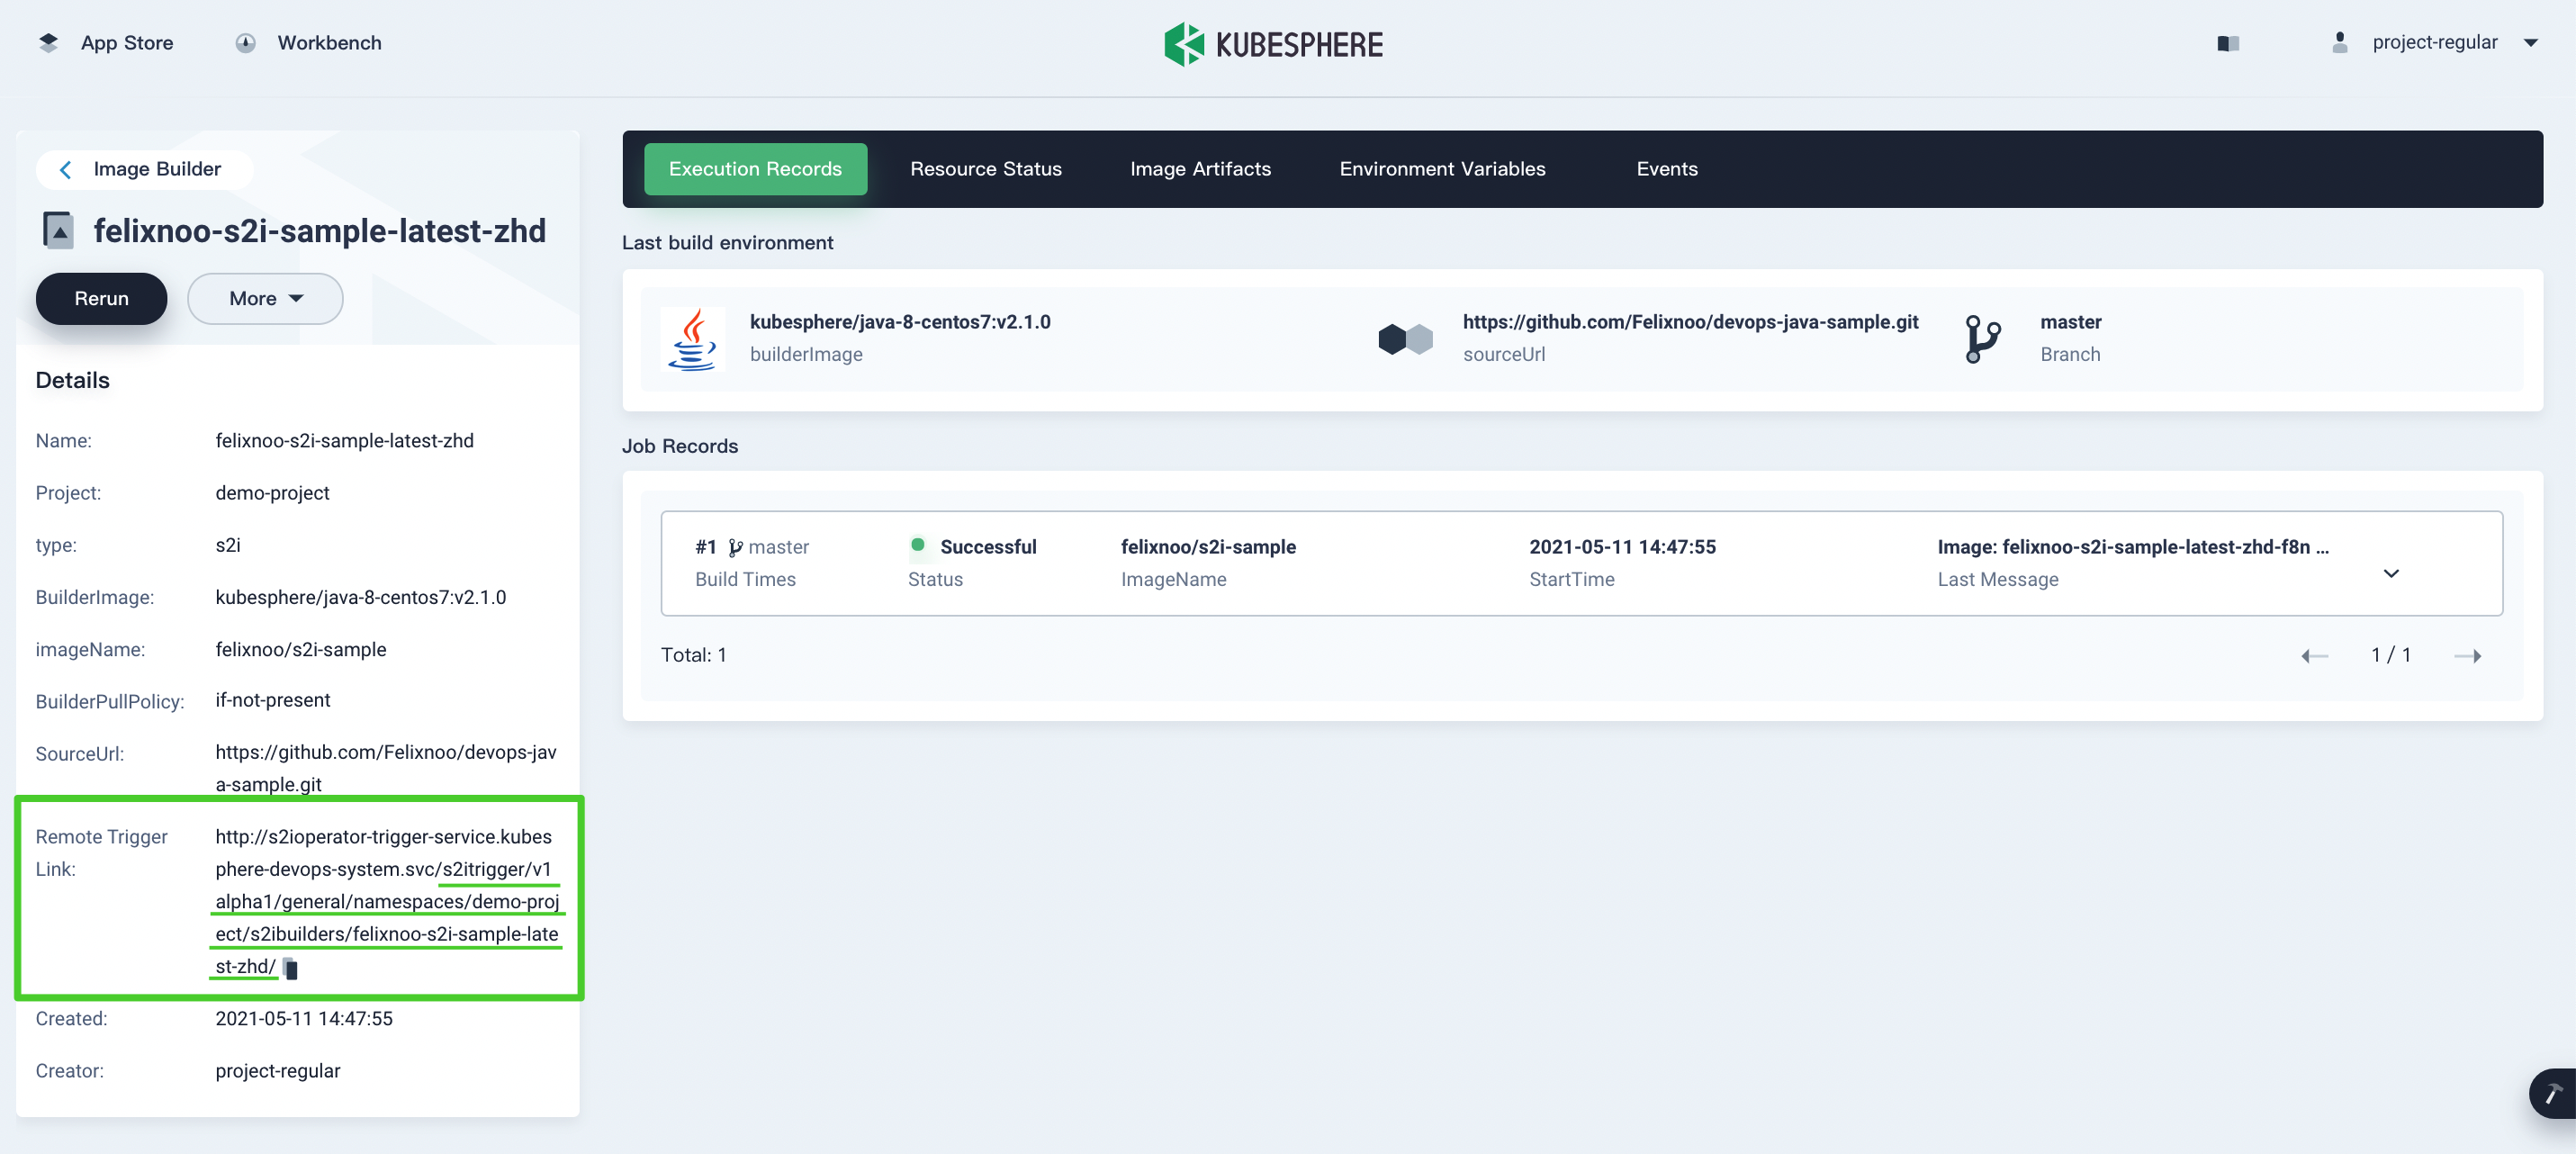
-
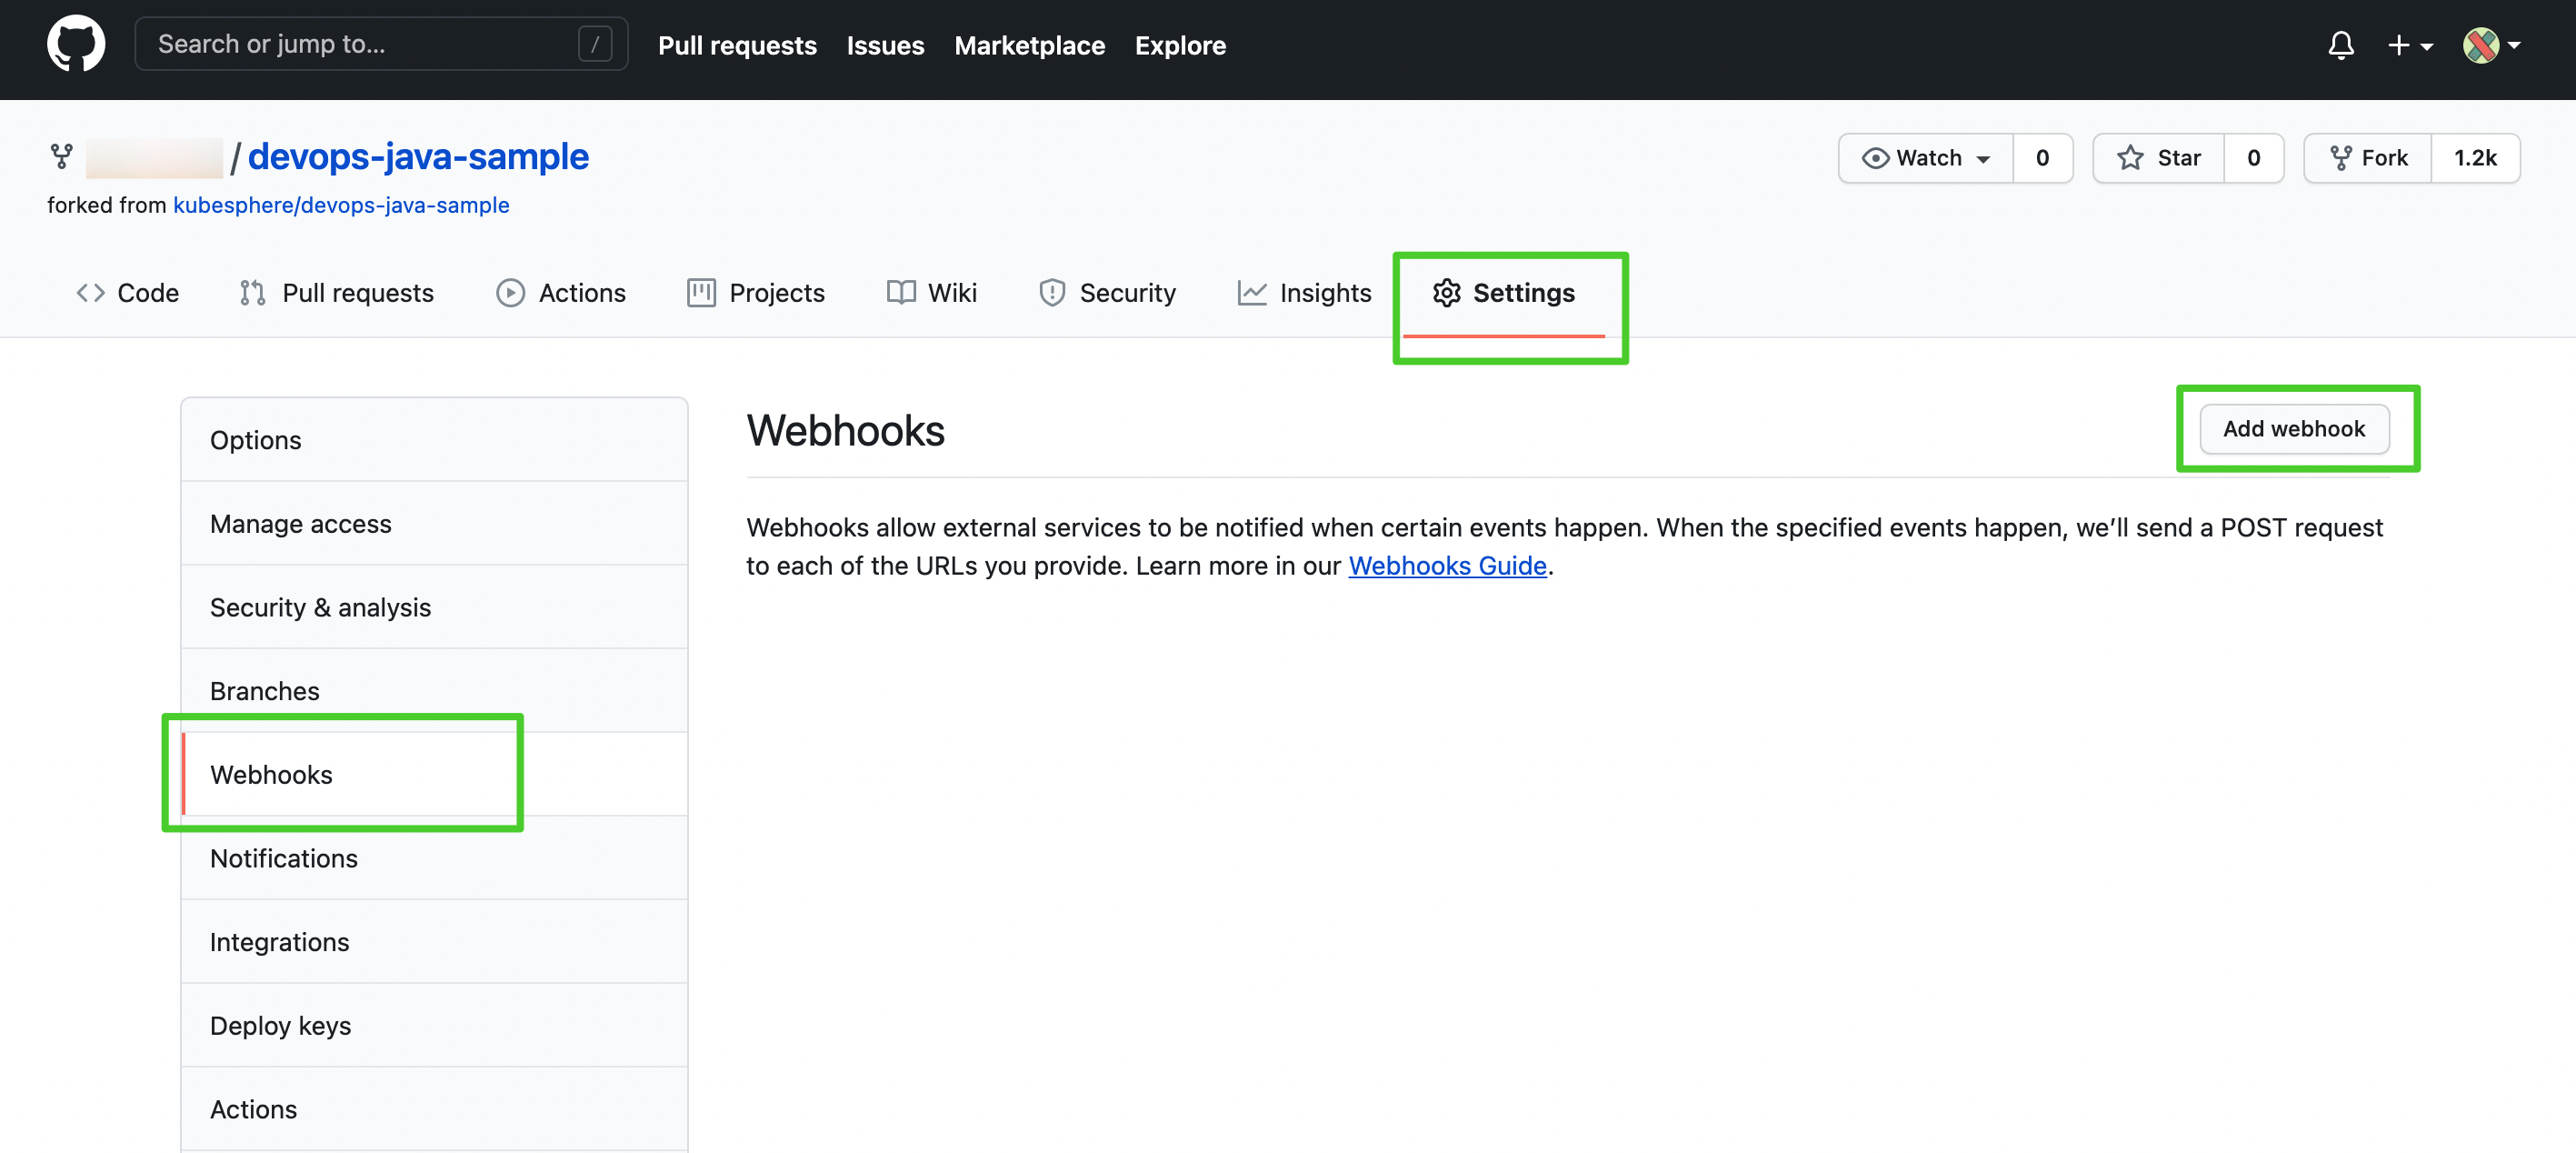
Log in to your GitHub account and go to the source code repository used for the S2I Image Builder. Go to Webhooks under Settings and then click Add webhook.
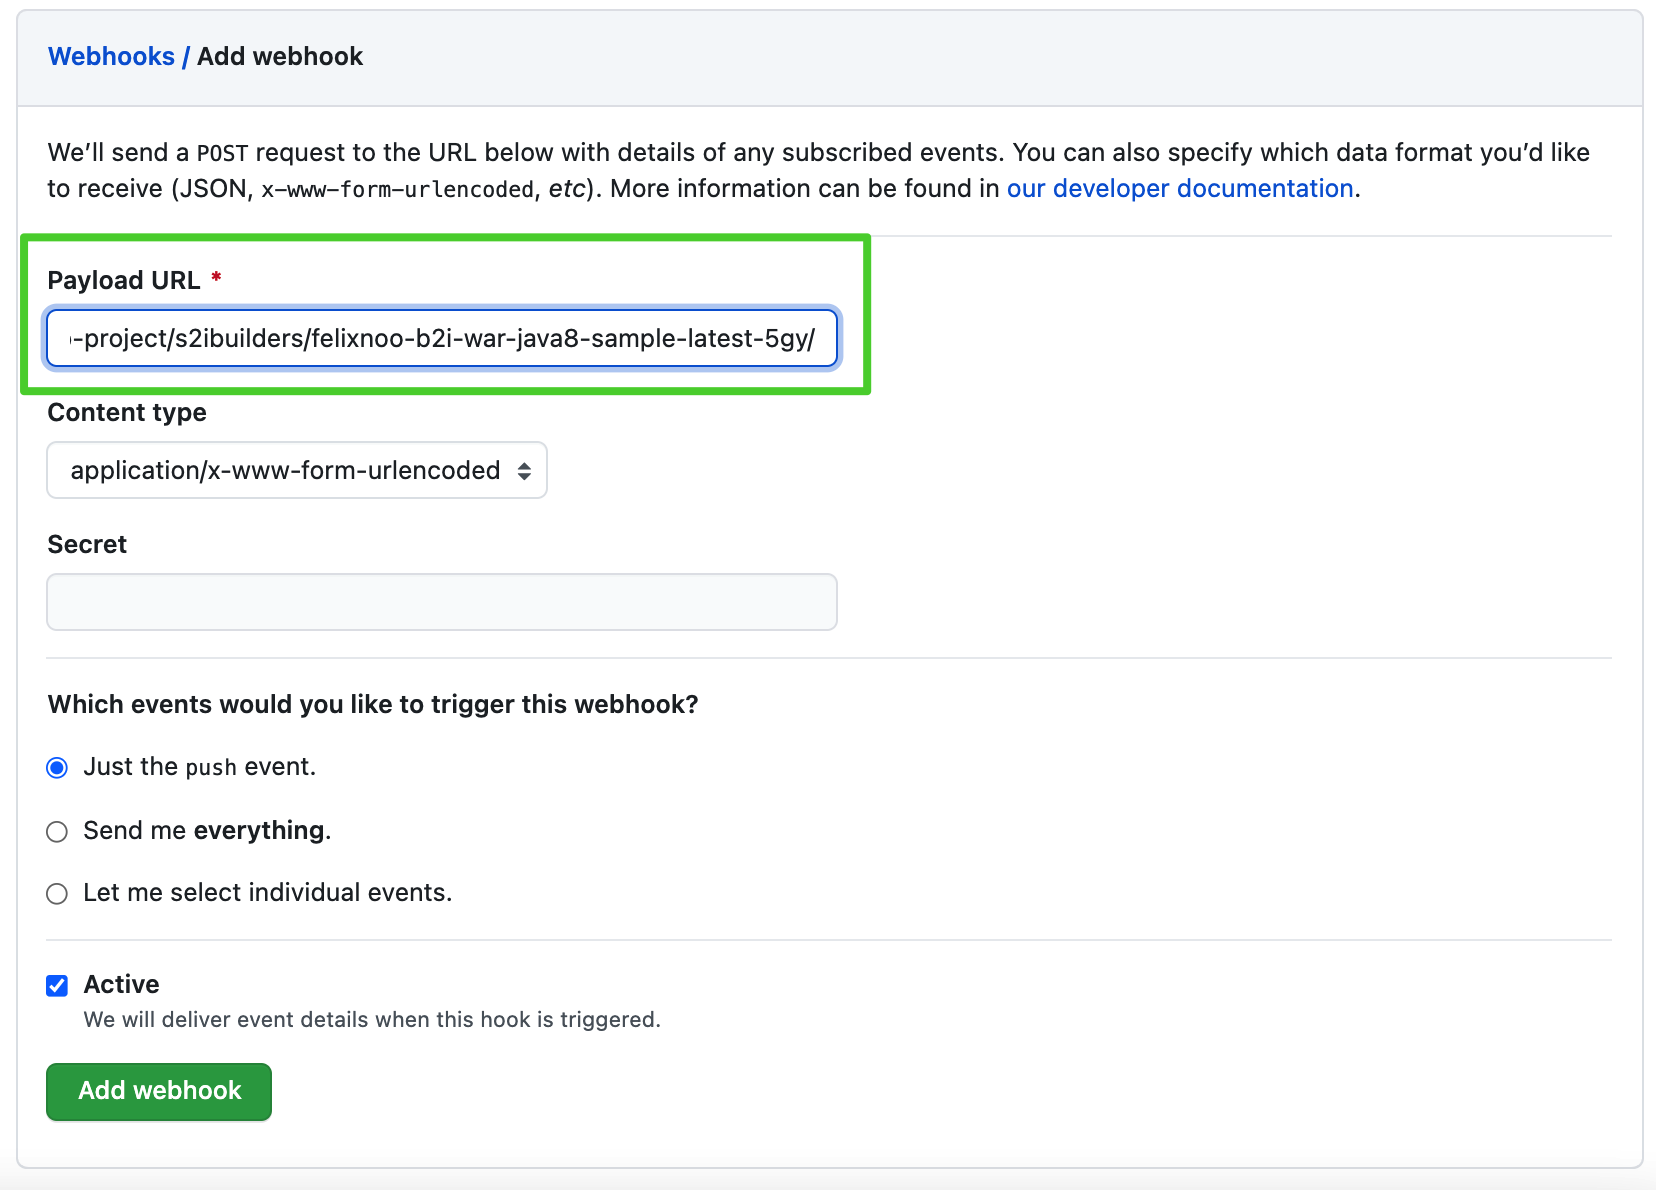
-
In Payload URL, enter
http://<IP>:<Service NodePort>/s2itrigger/v1alpha1/general/namespaces/demo-project/s2ibuilders/felixnoo-s2i-sample-latest-zhd/. You can select trigger events based on your needs and then click Add webhook. This tutorial chooses Just the push event for demonstration purposes.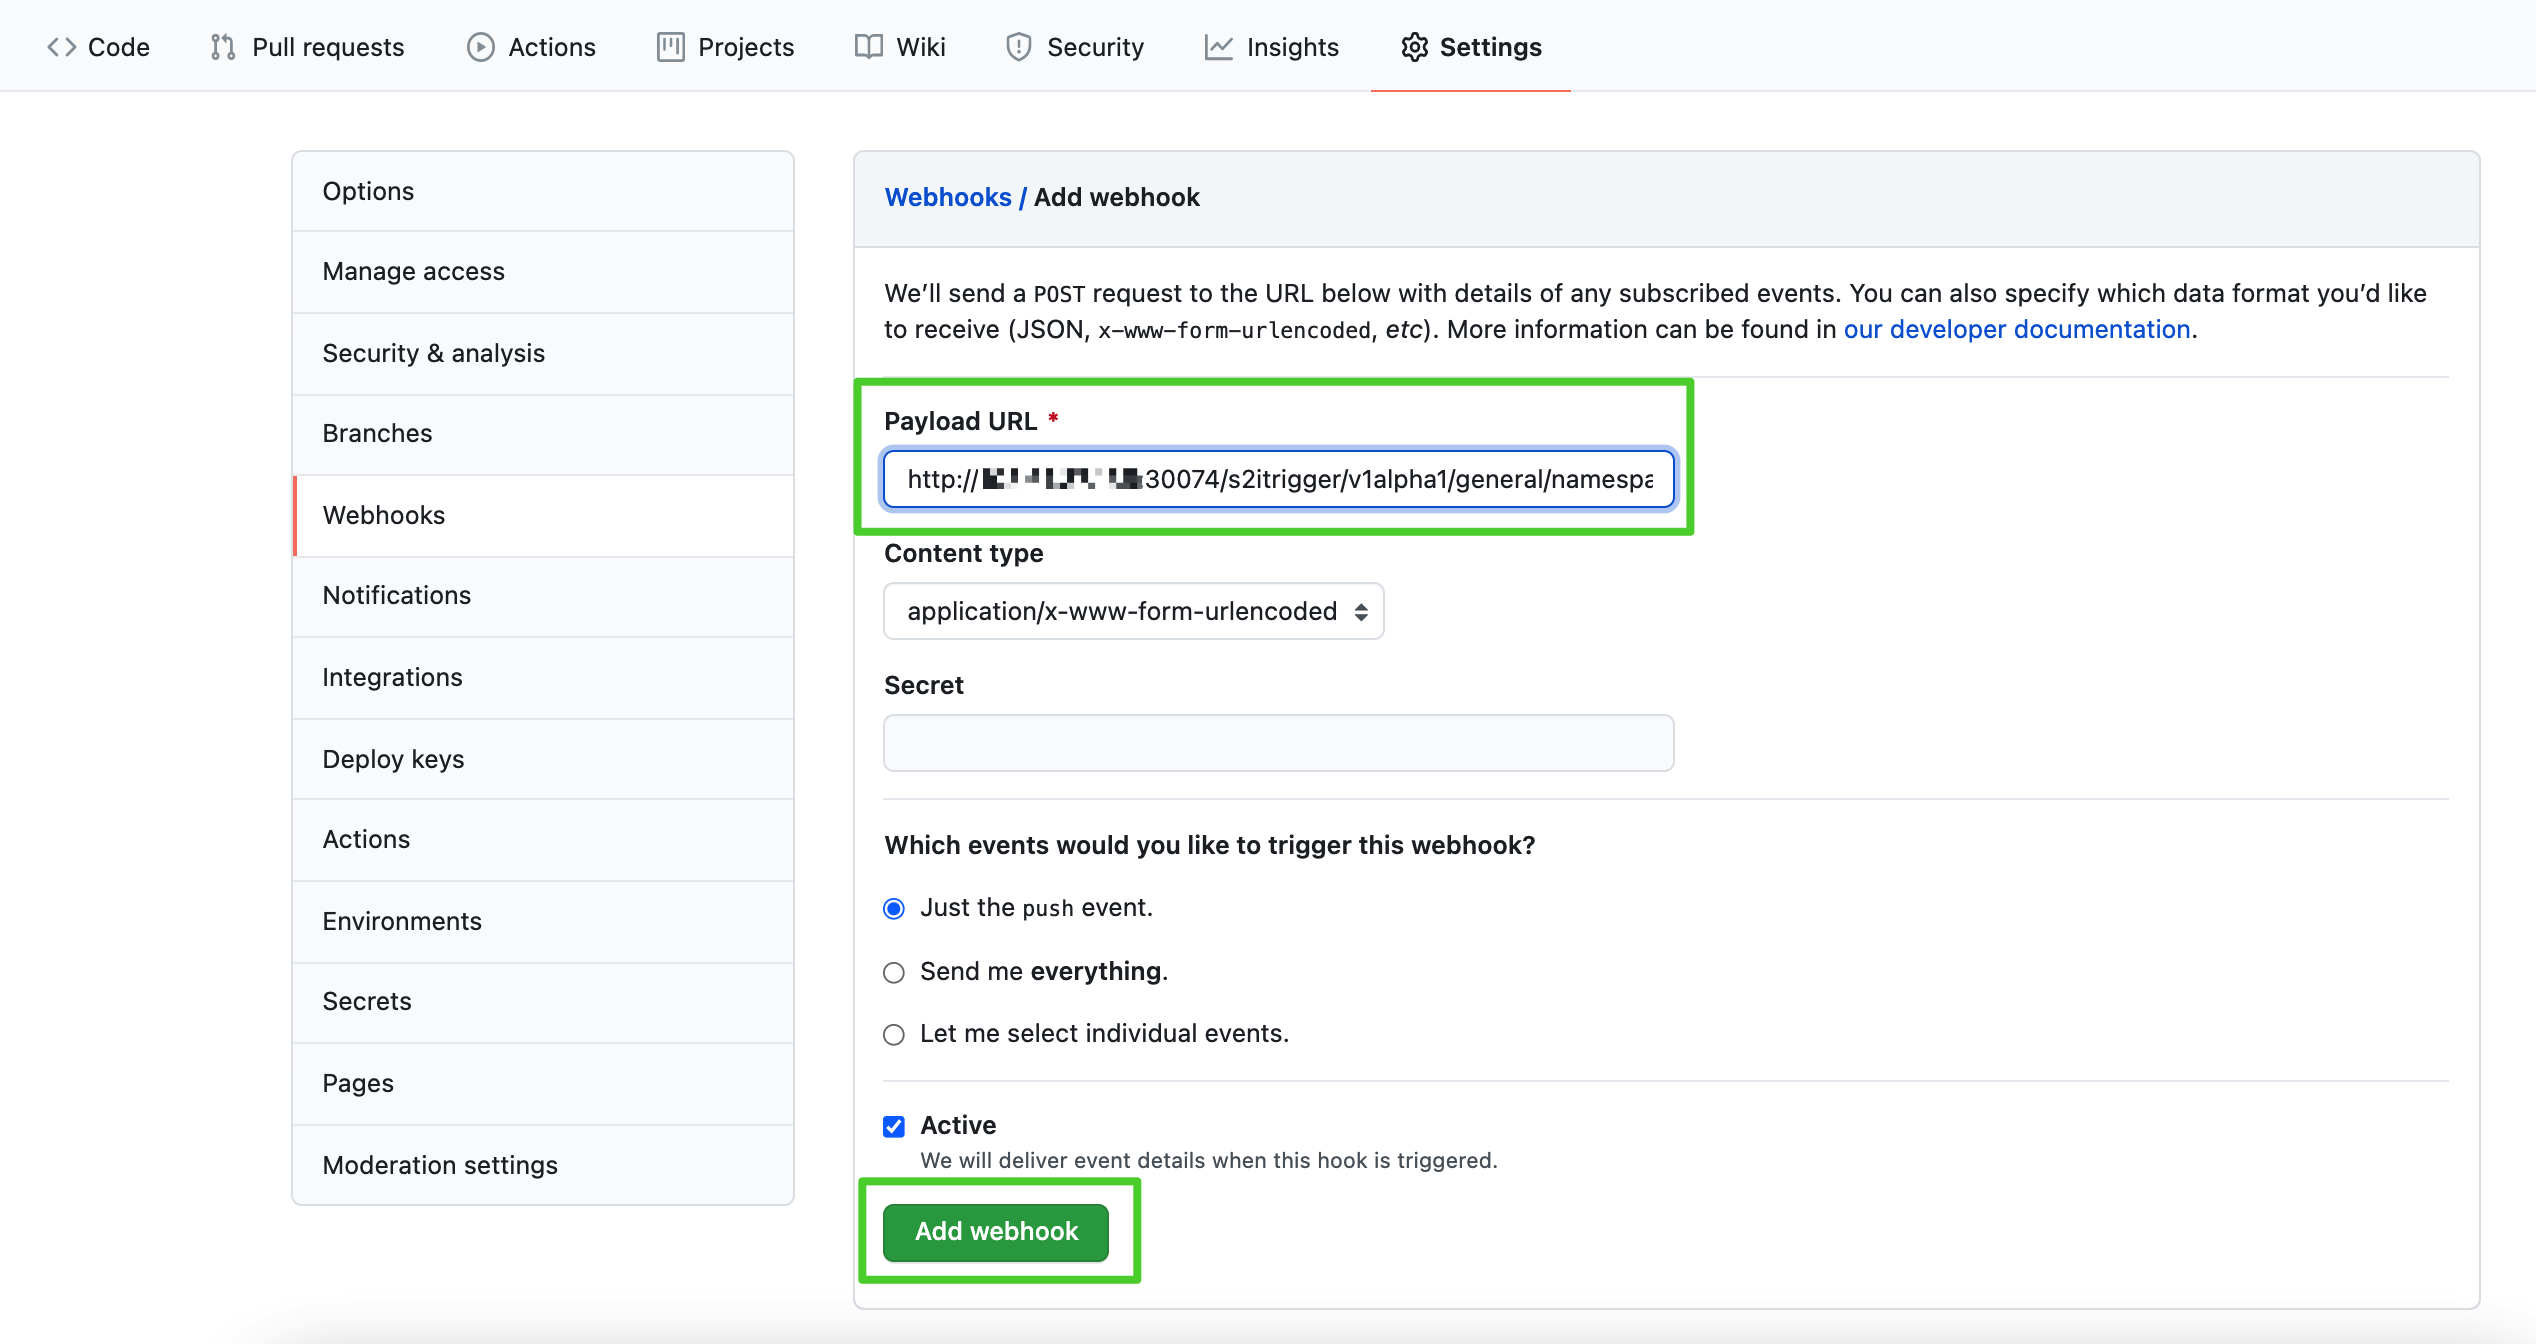
Note
<IP>is your own IP address,<Service NodePort>is the NodePort you get in step 1, and/s2itrigger/v1alpha1/general/namespaces/demo-project/s2ibuilders/felixnoo-s2i-sample-latest-zhd/is from the S2I remote trigger link. Make sure you use your own IP, Service NodePort and S2I remote trigger link. You may also need to configure necessary port forwarding rules and open the port in your security groups depending on where your Kubernetes cluster is deployed. -
Once the webhook is added, you can click the webhook to view delivery details in Recent Deliveries. You can see a green tick if the Payload URL is valid.
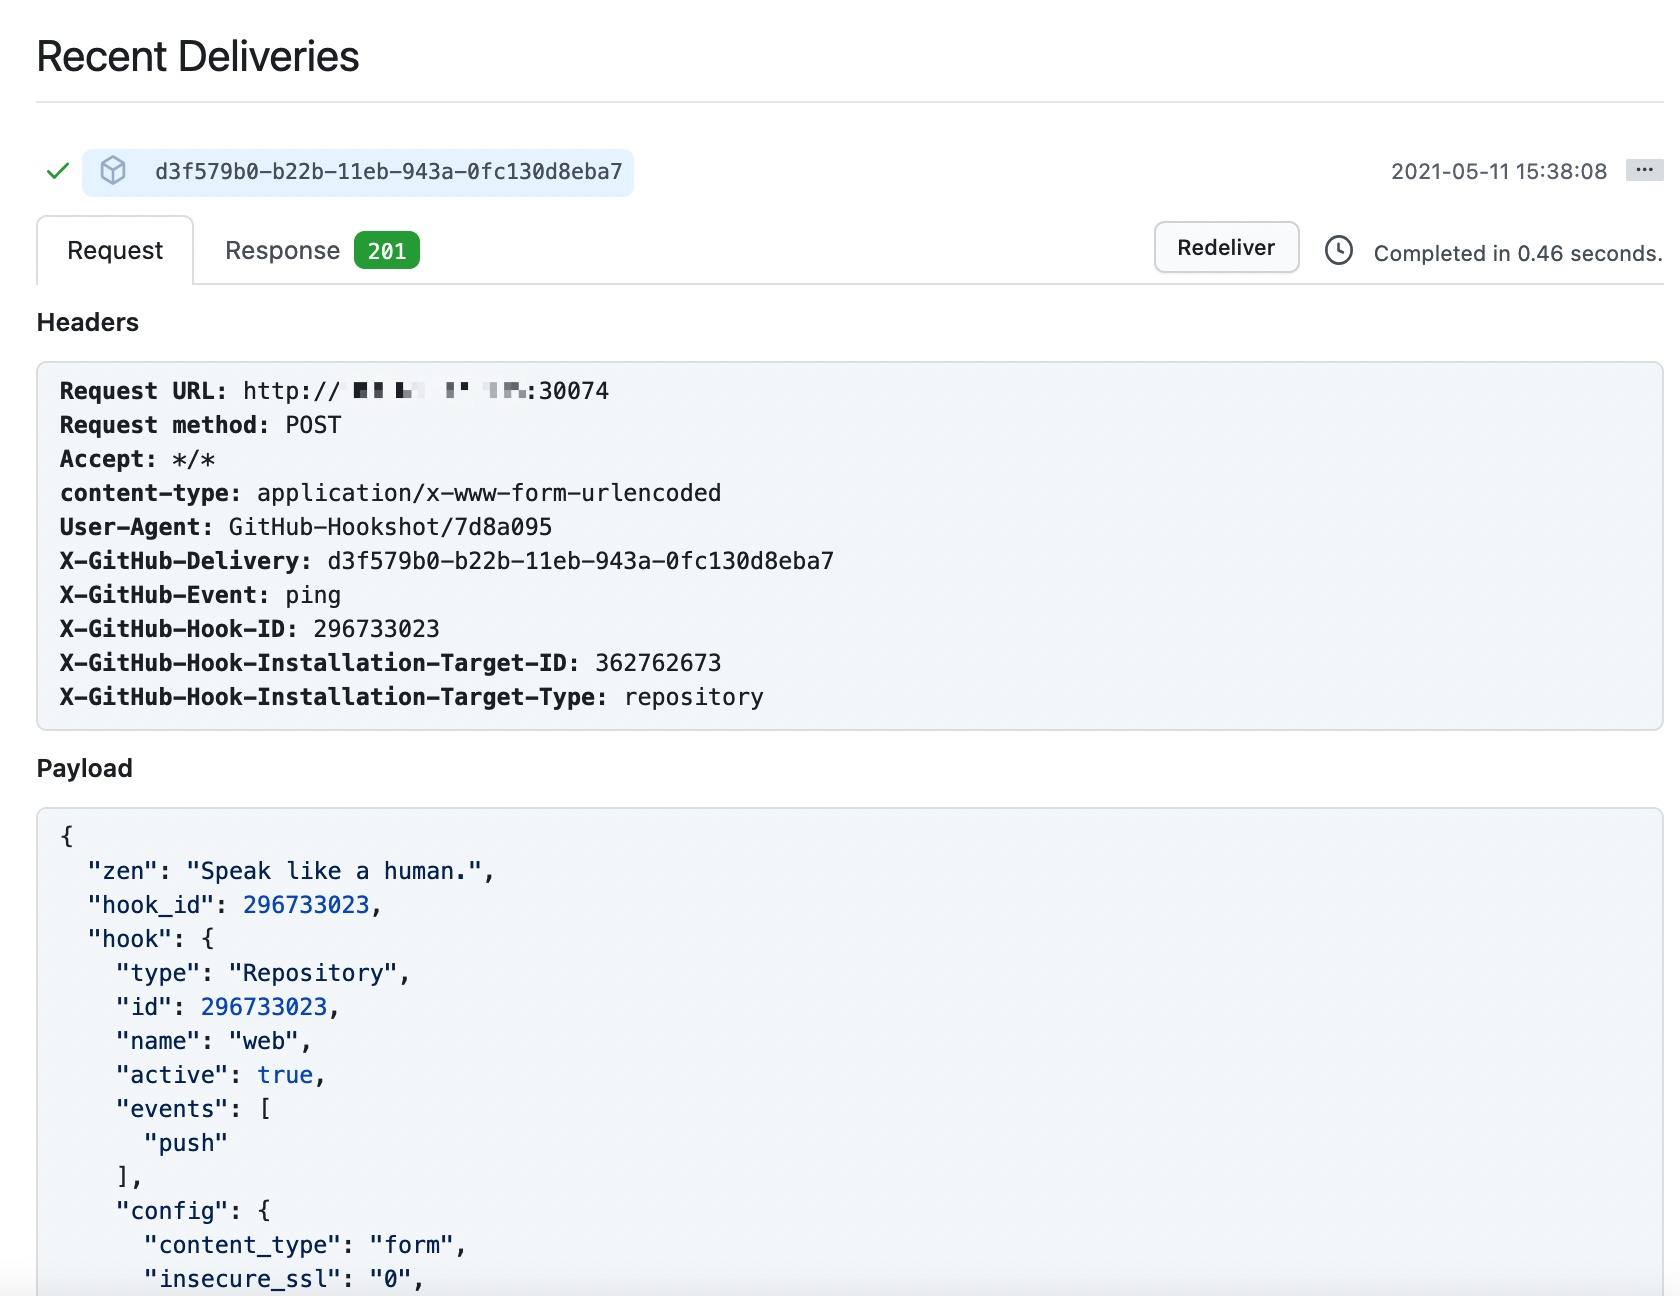
-
After you finish all the above operations, the S2I Image Builder will be automatically triggered if there is a push event to the source code repository.
Configure a B2I Webhook
You can follow the same steps to configure a B2I webhook.
-
Expose the S2I trigger Service.
-
View the Remote Trigger Link in the detail page of your B2I Image Builder.
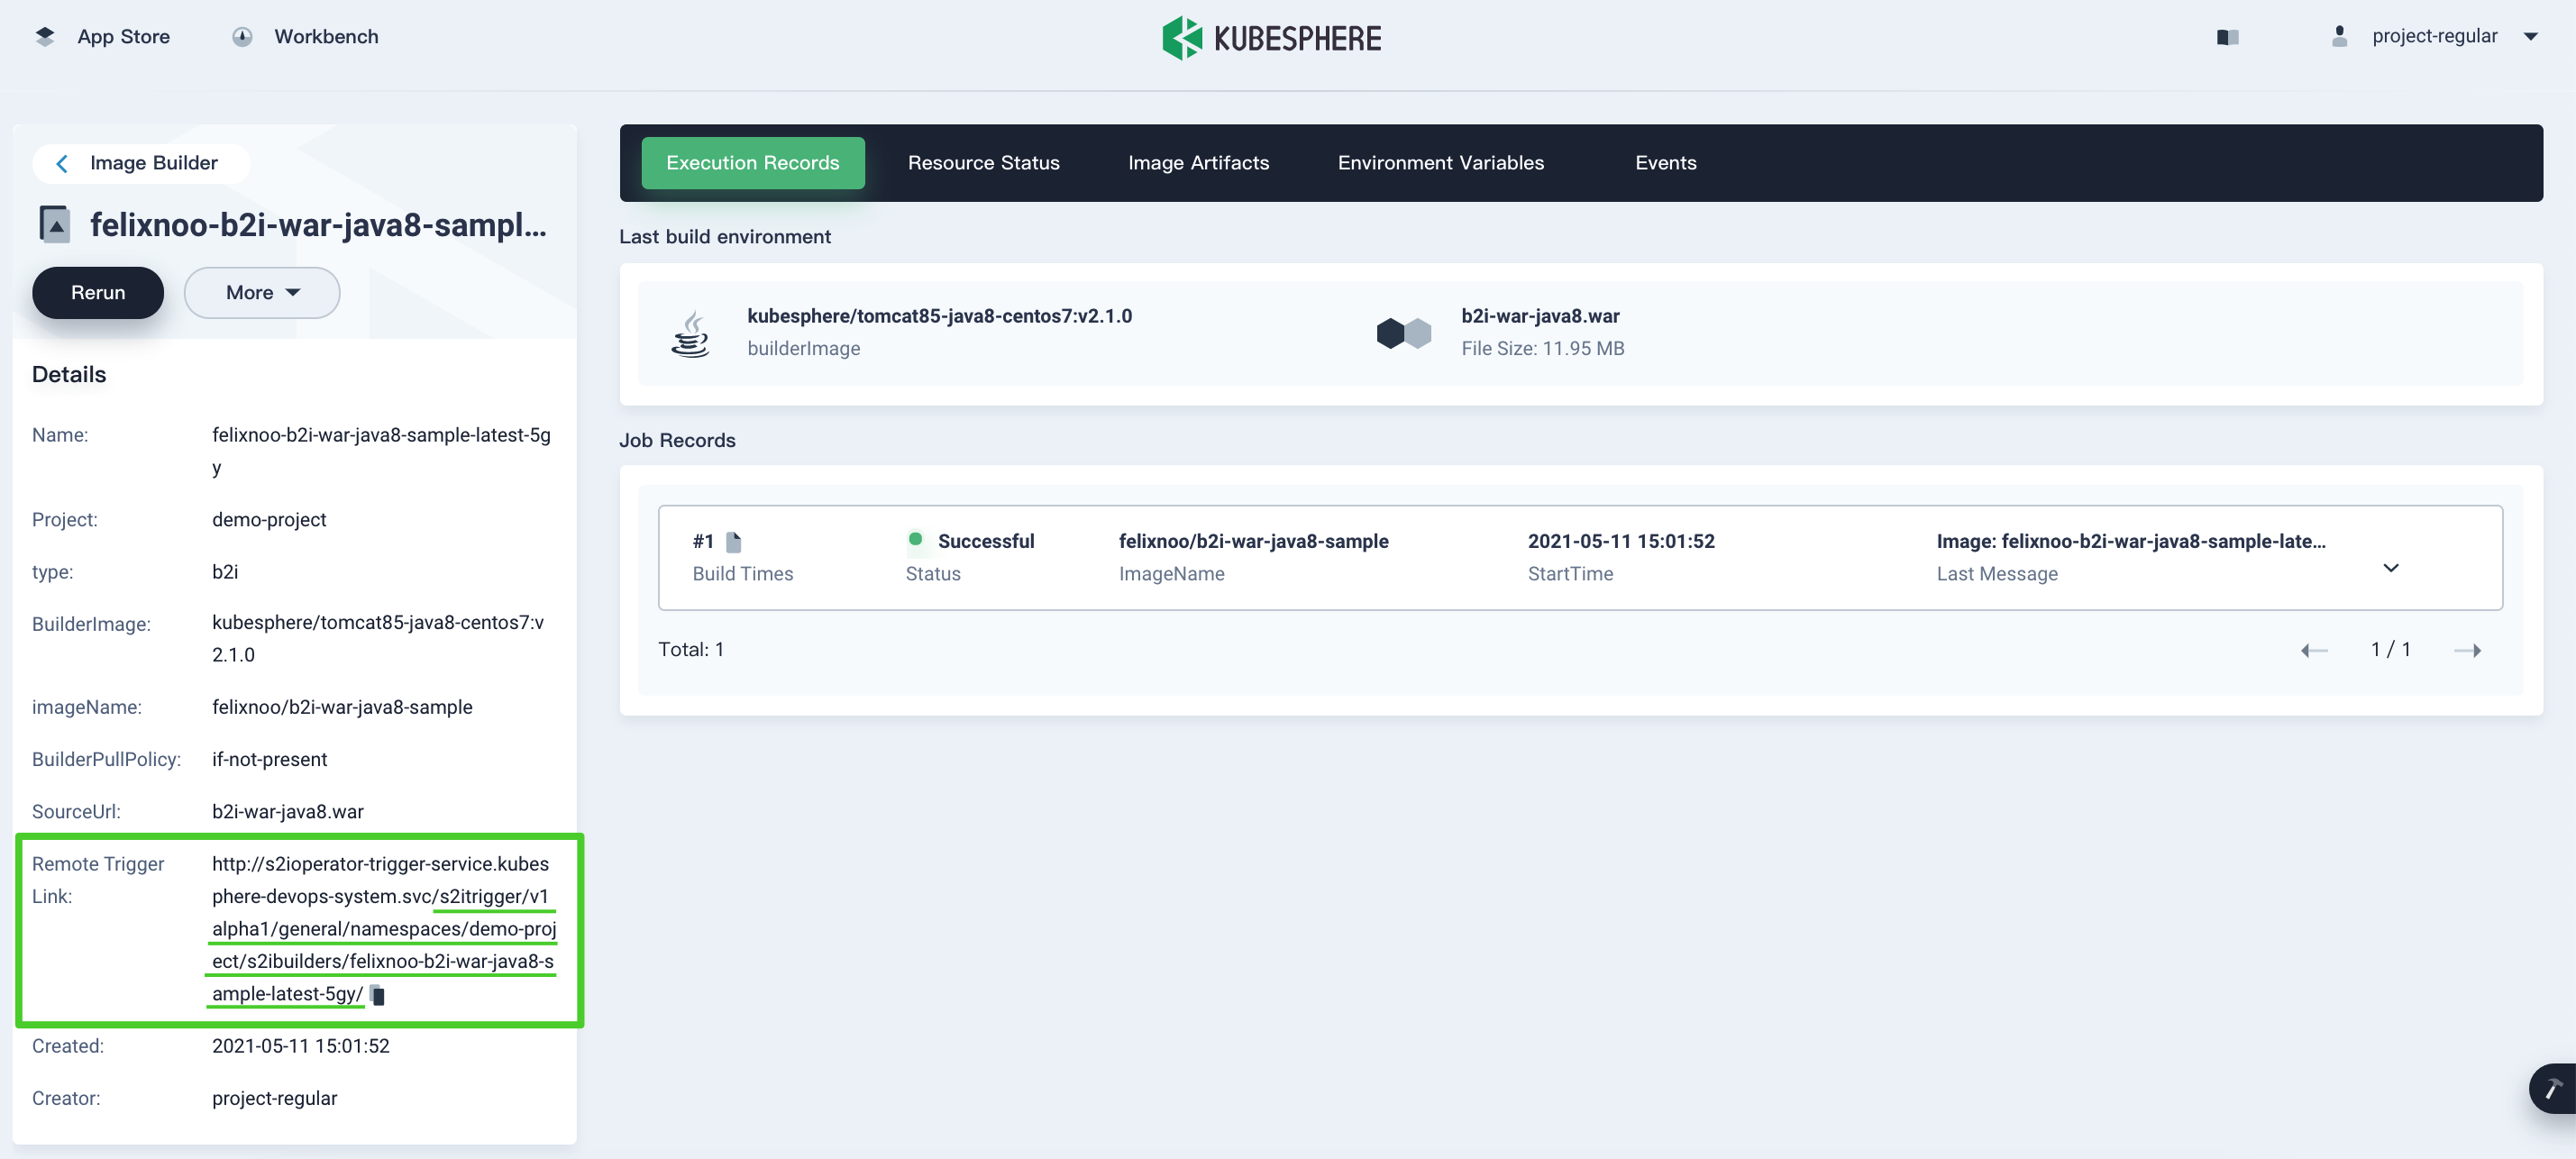
-
Add the payload URL in the source code repository. The B2I payload URL format is the same as that of S2I payload URL.
Note
You may need to configure necessary port forwarding rules and open the port in your security groups depending on where your Kubernetes cluster is deployed. -
The B2I Image Builder will be automatically triggered if there is a relevant event to the source code repository.
Feedback
Was this page Helpful?
 Previous

What’s on this Page