Volume Snapshots
Many storage systems provide the ability to create a snapshot of a persistent volume. A snapshot represents a point-in-time copy of a volume. It can be used either to provision a new volume (pre-populated with the snapshot data) or to restore the existing volume to a previous state (represented by the snapshot). For more information, see the Kubernetes documentation.
This tutorial demonstrates how to create and use a volume snapshot.
Prerequisites
-
You need to create a workspace, a project and an account (
project-regular). The account must be invited to the project with the role ofoperator. For more information, see Create Workspaces, Projects, Accounts and Roles. -
Kubernetes version 1.17+.
-
Your underlying storage plugin supports snapshots.
-
You have an available volume so that you can create a snapshot for it. For more information, see Volumes.
Create a Volume Snapshot
-
Log in to the web console of KubeSphere as
project-regular. On the Volumes page of your project, select a volume that you want to create a snapshot for. -
On the detail page, select Create Snapshot from the More drop-down list.
-
In the dialog that appears, set a name for the snapshot which serves as a unique identifier. Click OK to finish.
-
Newly-created snapshots will appear on the Volume Snapshots list.
Use a Snapshot to Create a Volume
There are two ways for you to use a snapshot to create a volume.
Create a volume from the snapshot detail page
-
Log in to the web console of KubeSphere as
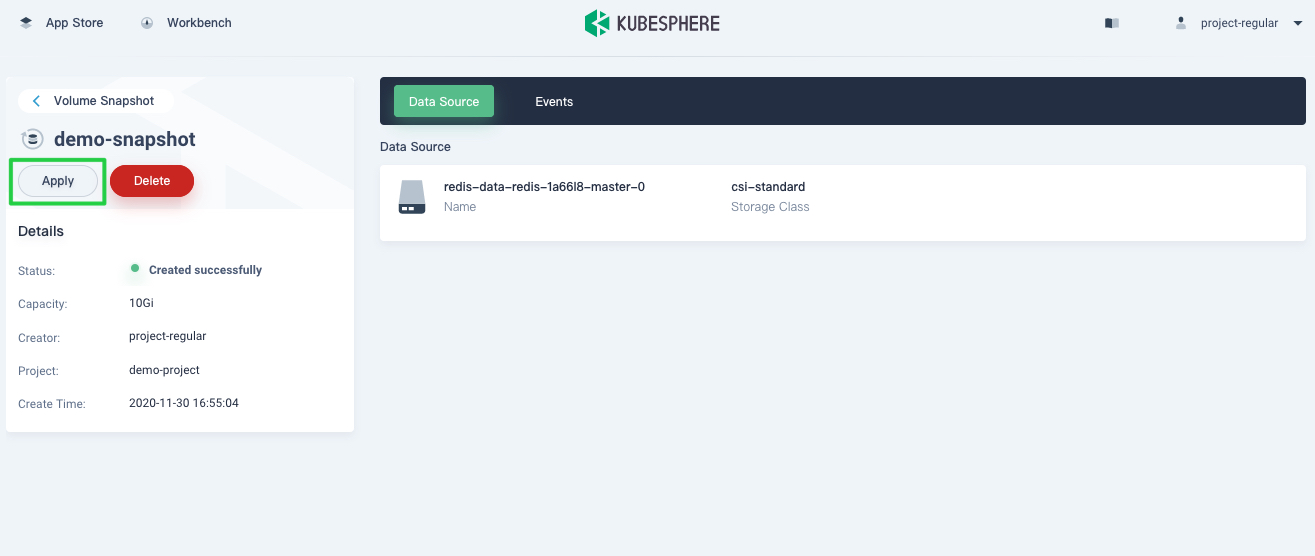
project-regular. On a snapshot’s detail page, click Apply to use the snapshot. Generally, the steps are the same as creating a volume directly.
-
In the dialog that appears, set a name for the volume. Click Next to continue.
Note
The resource you create is a PersistentVolumeClaim (PVC). -
On the Volume Settings tab, select an access mode and click Next.
-
On the Advanced Settings tab, add metadata for the volume such as labels and annotations. Click Create to finish.
-
You can see the volume created appear on the Volumes page.
Create a volume from the Volumes page
-
Log in to the web console of KubeSphere as
project-regular. On the Volumes page of a project, click Create. -
In the dialog that appears, set a name for the volume. Click Next to continue.
-
On the Volume Settings tab, select Create a volume by VolumeSnapshot under the Method section. Select a snapshot and an access mode, and click Next to continue.
-
On the Advanced Settings tab, add metadata for the volume such as labels and annotations. Click Create to finish creating the volume.
-
You can see the volume created appear on the Volumes page.
Feedback
Was this page Helpful?


 Previous
